CabMasterPro User Guide
This tutorial is aimed at those who wish to create their own custom textures for CabMasterPro, although it also contains some useful general knowledge on images. It assumes you have a graphics editing package installed, such as Paint Shop Pro.
To get the best quality textures, its necessary to know a little about how computers deal with images.
Loss-less: Some Image Formats are compressed, which means they take less space to store (note that space means disk space, not the physical dimensions of the picture). One type of compression is called "loss-less" because the compressed image looks exactly the same as the uncompressed original. Even better compression can be obtained by discarding some of the information in the image, which is called "lossy" compression, as some of the data is lost. Although the image is not exactly the same as the original, high-quality lossy compression can be indistinguishable to the human eye. The most popular lossy format is JPEG, which is great for compressing photographic images to a fraction of their original size.
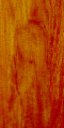

Shown here are two versions of the same texture. The one on the left is the uncompressed original, and the one on the right has been highly compressed with the JPEG algorithm. You may think the smudging artefacts are very noticeable, but the compression factor was set very high in this example to show the effects of lossy compression. The second image is over 25 times smaller than the original, taking up less than 1 Kb. Usually the quality would be set higher, resulting in a slightly bigger file but being almost identical to the original.
The first step in creating a texture is to decide where the initial image is going to come from. Several options are available:
Also known as "bit depth", this simply means the maximum number of colours that can be used in an image. Because the image is stored as a bitmap, the number of available colours is related to the number of bits used per pixel. Typical colour depths are:
| Bits | Colours | Description |
|---|---|---|
| 1 | 2 | Monochrome: the two colours are black and white. Only really useful for simple line drawings. |
| 4 | 16 | These use a palette (lookup table for colours), so any 16 colours can be used. Good for flat colour textures. |
| 8 | 256 | A lot of textures can be reduced to 8-bit colour without degrading the image quality. |
| 16 | 65,536 | This is not actually used with images, but your desktop may be set to this depth. It uses less memory than 24/32-bit yet the difference visually is usually not too noticeable. |
| 24 or 32 | 16.8 million | Also known as "true colour". The best bit depth to store photographs and other high colour images in. With 32-bit colour the extra 8 bits are used as an alpha channel (transparency) so has the same number of colours as 24-bit. |
When dealing with colour depth, the best rule is usually to reduce it as much as possible while leaving the image quality as good as it needs to be. For example, a wood grain texture will look great in true colour, but will probably look exactly the same in 256 colours (which takes up one-third of the room). However, reducing it to 16 colours is not usually worth it and the result probably won't look too good.
Paint Shop Pro has a handy feature called "Count Colors Used". It is available from the Colors menu, and reports on how many different colours are actually being used in an image. This can be a handy guide for reducing the colour depth - if 14 unique colours are found, you can safely reduce the depth to 4-bit (16 colours) with no loss of quality.
Most textures will usually use several hundred colours, if not a few thousand. In these cases however, it is still worthwhile to try a reduction to 256 colours, as most good graphics packages (Paint Shop Pro included) will have a good palette selection algorithm. What this means is that although the image may use over a thousand colours, many will be very similar and can be converted to the same colour. After reducing a true colour image to 256 colours, there is a good chance you will not notice any difference at all. Although this will not work on all textures, you can always leave the exceptions in 24-bit true colour.
The size of images determines how detailed the textures will be in a 3D view. Larger sizes will usually result in clearer line-work and features of a texture, but this also increases the file size and the time it takes for CabMasterPro to load it. Obviously this doesn't mean you can enlarge a texture to create more detail - there can't be more than in the original copy. This is why you should scan images at high resolution and then shrink them.
Here are a few guidelines for deciding how big to make your texture:
When resizing a texture, you should always convert it to true colour first. This is because during the resize process, extra colours are created by a technique called anti-aliasing. What this does is reduce the jagged lines that appear as a result of resizing by softening the edges with intermediate colours. Here is an example of an image that has been reduced to 30% of its original size; the one on the left was converted to 24-bit colour first, and the one on the right wasn't:
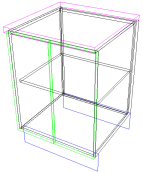
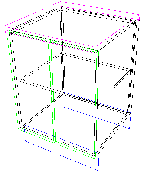
The difference is quite obvious; the image on the right has large gaps in its lines because the graphics program (Paint Shop Pro in this case) did not have enough available colours. In fact, a lot of extra colours were created for the image on the left - the original large image contained five colours, yet the reduced anti-aliased one used over 1000. Once you have resized an image in true colour, you should be able to convert it back to a lower colour depth without any loss of detail. The one thousand colours in the image above were reduced to an 8-bit palette with no visible difference.
In summary, to reduce or enlarge an image containing any number of colours - even two - you should follow these steps
CabMasterPro supports many different image file formats, because each format has slightly different characteristics such as image quality, compression and colour depth. Listed here are the available formats as well as some of the advantages of each.