CabMasterPro User Guide
In this tutorial we will discuss how to create sloped walls using the Standard Edit Options Wall Tool.

 Watch the Video on Angled Height Walls. [2:00 mins]
You can also utilise the features discussed here to create custom cabinets.
One of the first things that you will want to do with a new drawing is place the walls, as shown in the following example, and Format...
Example: Walls placed on a new drawing
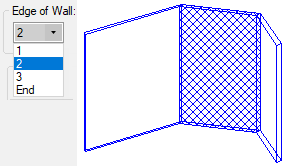
This shows a Wall placed in Plan View with three edges.
Use the right click menu and select the Format option to open the Property Sheet.
We will now discuss how to slope the walls using the Standard > Heights page.
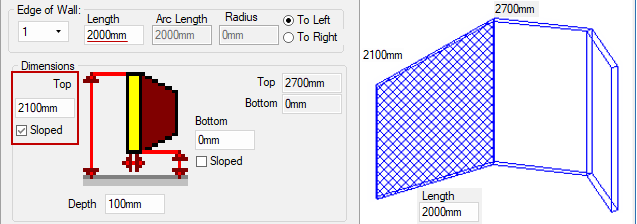
Be aware that in this example, all walls initially start with a height of 2700mm.
The Edge of Wall drop list allows you to select and control each section of the wall individually.
Working with sloped walls, you have to specify the start position and work from left to right.
The Length of each section of the wall can also be controlled on this page.
In this example we will select Edge of Wall 1 and slope it by reducing the LHS height.
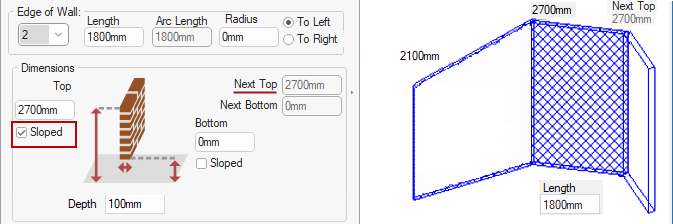
In this example we will select Edge of Wall 2 and only enable/tick the Sloped checkbox.
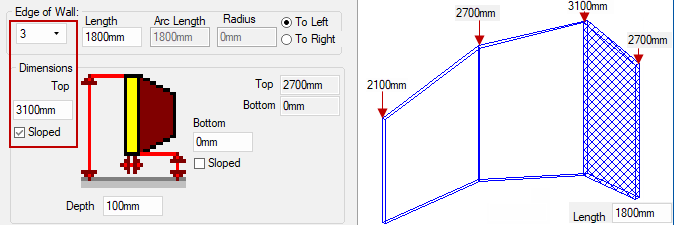
Now we will select Edge of Wall 3 and increase its height.
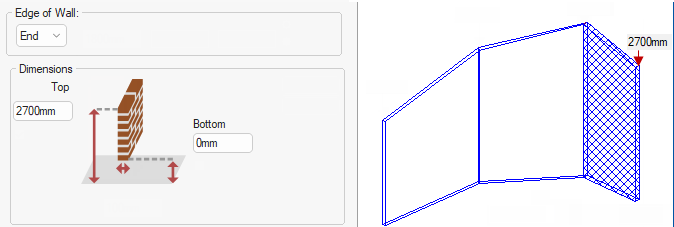
This shows that the Top of the End (i.e. Wall 3) is 2700mm.
This video discusses angled height walls in CabMaster [2:00 mins]