CabMasterPro User Guide
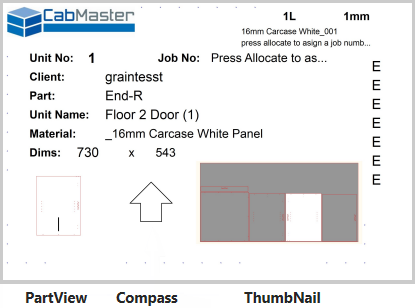
There are three special pictures available to the label, they are...
The compass and thumbnail are useful when labels are adhered onto the parts by hand.
A compass icon can be put on labels designed in the Label Designer. This generates an arrow which is rotated in such a way that you can reliably place the labels on their parts and expect the orientation of the label on the part to always be correct. That is, even if the part has been rotated during the nesting, EzyNest tracks the angle of rotation and sets the compass arrow so that, if you follow this simple rule, everything will work:
Using the thumbnail, you can see which part the label belongs on. Then once you stick all the labels on all the parts, you can eyeball the machine table before unloading, and confirm that all compass arrows are pointing upwards.
It is important to have the label exactly the right way around on each part, because this can affect decisions about edging when not all four sides are edged, for example. And sometimes parts may be close to square and it would be easy to make mistakes if you do not notice that they have been rotated for efficient nesting.
Example
In this little test job, we nested parts which mostly have text on them, so it is clear which way up they really are. We created a label design with the name of each part, a thumbnail and a compass. Let's go through the motions of putting the labels on the parts and confirm that this all works.
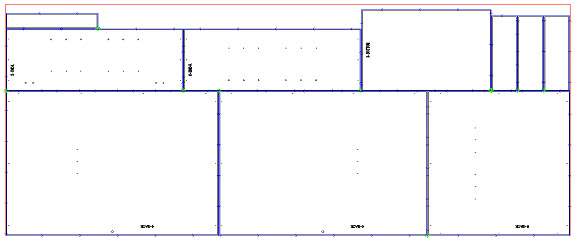
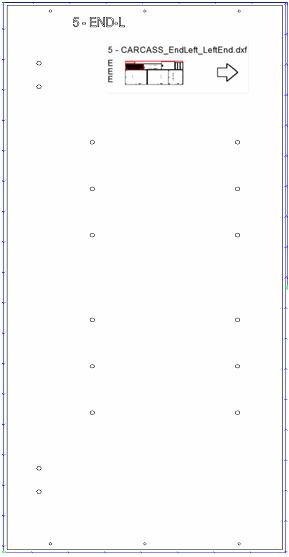
The first sheet looked like this...
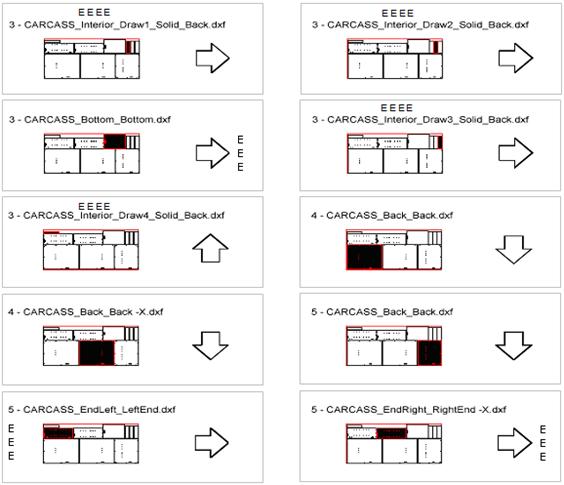
And here is the sheet of 10 labels that EzyNest created for it...
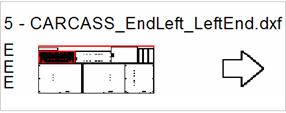
The six bigger parts have writing on them, making it clear which way up they really are. (Note that the 'E's relate to Edging)
The bottom three parts on the board are upside down. Find their labels using the thumbnails, and you can see they all have downward pointing arrows. So you must rotate them 180° before sticking them on to make the arrows point upwards. Like the image below.
This gives the correct result once the part is lifted off the table and rotated so that the label text is upwards again and readable.
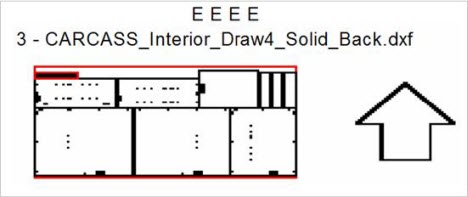
The label for the little part at the top left is OK too. It has no text on it, but one can confirm from the data that this part is not rotated, and since its arrow points up, the label will remain up the right way, like the following image...
Finally, let us look at the three bigger parts with writing on the left...
Take the left one of these three, which is near the top left of the sheet. Its label is at the bottom left of the sheet of labels and looks like this (confirm the thumbnail showing where the part is):
Before sticking this label onto the part, you must rotate it so that the arrow points upwards.
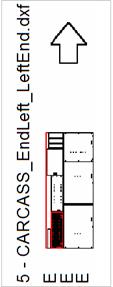
Now stick this label onto the part on the cut up board while it is still on the machine table as illustrated below...
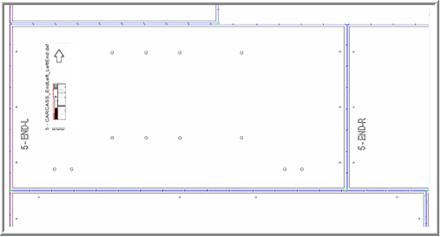
Lift the part off the machine and rotate it so the label is readable and you now have this:
You can see that the label is the right way up on the part once it is removed from the machine table.