In This Topic
To edit a cell of the lookup table, click on them with the mouse.
- Grey row and column headers can be edited by double clicking.

- Select all of the cells in that row or column with a single click.
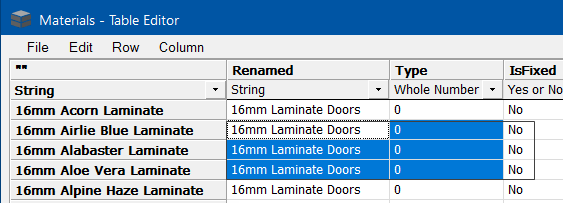
- Highlighting a range of cells is the same as in Excel, just click and drag the mouse across the cells.

Any operation on the current selection refers to the currently highlighted block of cells.
To finish editing hit the Enter key or click on another cell or press the Escape key.
While the table is not in edit mode, you can move around between cells using the arrow keys on the keyboard.
File
- New:
Keyboard Shortcut: Ctrl+N.You can create an empty lookup table, which starts with 2 rows and 2 columns.
- Print:
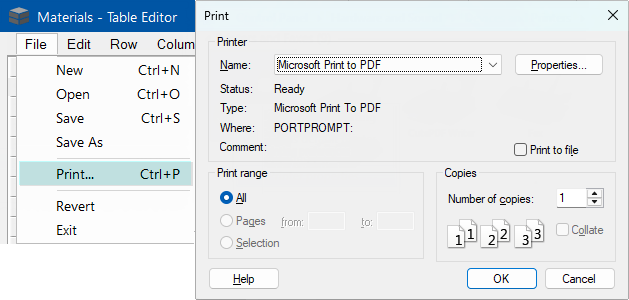
Keyboard Shortcut: Ctrl+P. See Printing Tables.
- Revert:
Re-opens the current table as it was when you last saved it.
Edit
- Table Comment:
The table description is a data field which is not used by and is for the benefit of the person editing the table. The current description for a table is shown in the status bar. Use the Table Comment command to change the comment, which will be saved with the table.
- Copy:
Keyboard Shortcut: Ctrl+C
- Paste:
Keyboard Shortcut: Ctrl+V
Data can be passed between the Lookup Table Editor and other spreadsheet programs such as Excel using the copy and paste commands. These commands can also be accessed using standard Windows shortcuts.
- Selection > Clear:
Keyboard Shortcut: Delete - deletes the values of all the selected cells.
- Find:
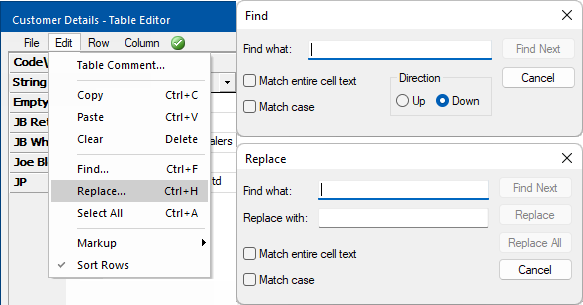
Keyboard Shortcut: Ctrl+F - launches the find dialog.
- Find and Replace:
Keyboard Shortcut: Ctrl+H - launches the find and replace dialog. See Find and Replace
- Select All:
Keyboard Shortcut: Ctrl+A This selects the entire table data, including row and column headers to the clipboard.
- Mark up:
Increases the value of all cells in the current row, column or selection according to the value entered.
The styles of increase are:
- By Fixed Amount: Adds the selected amount to the row/column's cells.
- By Multiplier: Multiplies the row/column's cell by this value. For example, 0.5 would halve all values.
- By Percentage: Multiplies the row/column's cell by this percentage. For example 200 would double all values.
- Sort Rows:
Sort rows down the table by their row header.
Row
- Add:
Keyboard Shortcut: Shift+Insert - insert a new empty row at the bottom / end of the table.
- Remove:
Keyboard Shortcut: Shift+Delete - completely remove the row that the cursor is currently in.
- Duplicate:
Keyboard Shortcut: Shift+D - make a copy of the current row that the cursor is in and place it on the bottom / end of the table.
- Move Up:
Keyboard Shortcut: Shift+Page up - move row up.
- Move Down:
Keyboard Shortcut: Shift+Page down - move row down.
Column
The Find and Replace dialog allows you to search for instances of a particular text fragment within the table, and then to replace them if desired with another piece of text.

To use, first type in the text that you would like to find in the Find what:text box. Then, clicking the Find Next button will locate the next instance of that text within the table, and it will become highlighted.
Replace replaces the selection that has been found with the contents of the "Replace with:" field.
Replace All searches through the entire table (or the selected cells, if Selection only is enabled) and replaces each instance of the searched for text with the given replacement text.
Note that the checkboxes modify the behaviour of the find function:
- Match case: When enabled, makes the search case-sensitive. By default, search is case-insensitive.
- Selection only: When enabled, searches only in the currently highlighted cells.
- Include row/heading titles: When enabled searches in the titles as well as through the main body of the table.
- The top left cell in a table is not used by ™ and can be used to hold any information you like. In the image below it is blank (i.e. <none > ""). It is typically used to show what the column and row headers of the table are listing.

- Those familiar with editing lookup tables manually will know that requires you to include how many rows and columns are in the table. This is unnecessary when using the QLT Editor, as it determines the row and column counts when you save the table. These row and column counts are also checked when you open a lookup table, and you will be warned if they are incorrect. The counts will be automatically fixed next time you save the table.

Lookup tables can be printed by selecting File > Print or using shortcut Ctrl+P.

Some things to note about printing:
- The table will be sent to the default Windows printer. If you have multiple printers installed ensure that you select the correct printer from the list. If the printer doesn't exist in the list, go to your Windows Control Panel and add the required device.
- If you have selected a range of cells in the table, you will be asked whether you wish to print only the selected cells. Choosing "No" will print the whole table instead.


