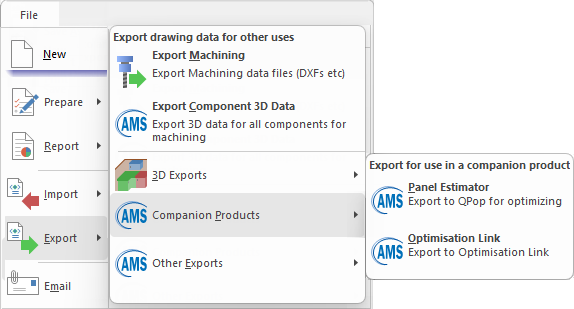
CabMasterPro User Guide
To export the drawing via Optimisation link, ready for processing on the saw...
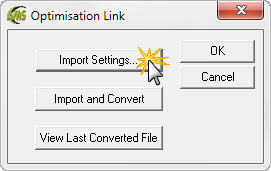
To access the settings, select Import Settings by clicking on the button, as shown.
This enables you to configure Optimisation Link as desired for your library setup and Optimiser format.
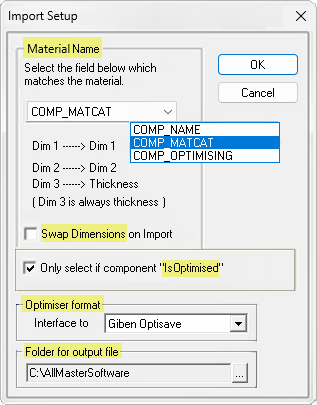
This will open an Import Setup dialog, as shown, and the following will discuss the available options.
Select the field from the drop list which matches the material.
Depending on the setup of your library, different fields might be used to indicate the material for each panel. Select one of the fields for this interfacing.
COMP_NAME
These are hard coded values in CM-Cabinets such as ‘Board’, ‘Door’, ‘Benchtop’ etc.
COMP_MATCAT
When exported to Optimisation Link, the required information is taken from the materials ‘Raw Material’ field in Materials Manager.
MAT_OPTIMISING
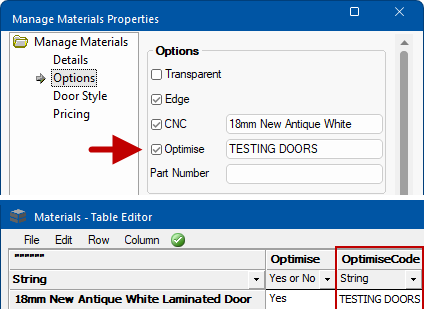
This is taken from the ‘Optimiser Code’ field in the Materials Manager - see IsOptimised below.
Example of Optimiser Code
Click to Expand
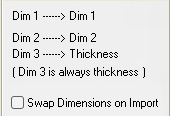
Dimension 1 (Dim1) can be swapped with Dimension 2 (Dim 2) on import. Note: Dimension 3 is always the thickness.

OFF - If this option is not ticked then EVERYTHING is available for output (including edge tape etc).
ON - If this option is ticked, the user can control which components go through based on two settings i.e. (1) ‘OptiLink’ flag in the Materials Manager and (2) the ‘Manufacture’ is set to Saw (see note below). If both are true then the part is output, otherwise not.
For Optimisation, make sure any relevant materials that will be processed by Optimisation Link have the 'Optimise' check box ticked in the Materials manager, to tell CabMaster that this material is to be sent to the Optimisation Link for cutting on a beam saw. Typically this would be the Panel and Door materials.
Materials Manager and Optimise settings
In the Catalog/Drawing Properties for the examples used in this topic we have ..
- selected the Door and Panel materials in the Job Setup > Materials page and;
- then opened the Materials Manager
to enable to Optimise as shown...
Click to view Job Setup > Materials
Door and Panel set to Optimise in Materials Manager
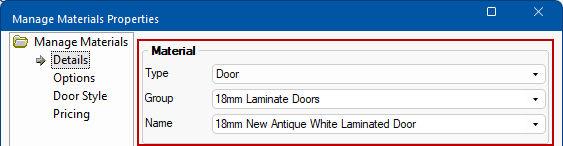
1. On the Details page, select the relevant material using the Type/Group/Name using the drop lists.
Click to Expand
2. On the Options page, enable to Optimise by ticking the checkbox and Save.
- Optional: If you are using the Optimise Code then type in a name for use in the corresponding edit box.
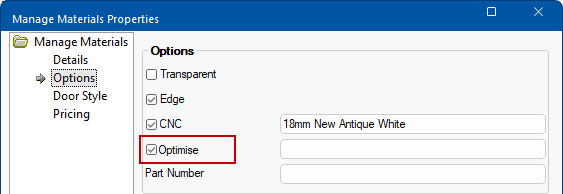
Click to view Save details
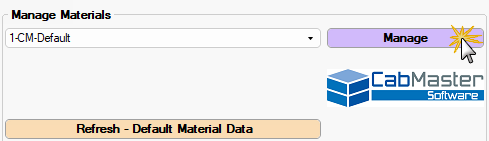
Remember to Refresh
Changes made to materials using the Materials Manager will not automatically update the default or same materials in the current drawing (or catalog editing session) if it was already selected prior to the change. As a new drawing is started default materials will refresh to the latest.
Bulk Changes to Materials Table
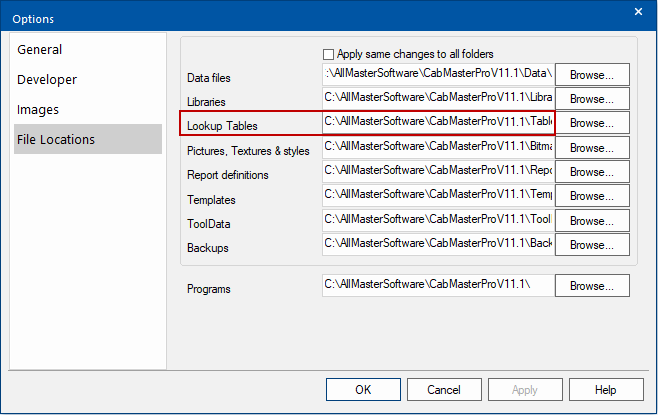
If you need to make a bulk change to the materials you can do this directly in the tables using eight TableEdit or Excel.
With both methods you will need to locate your tables i.e. File Options [F10] and copy the location to your clipboard...
File Locations
Copy this location...
Then open File Explorer [
+E] and paste the location into the search field...
File Explorer
Table Editor
1) Open the Material table you wish to edit by double clicking on the file name - typically 'Materials.qlt' which is your CM-Default table.
2) Change the 'Optimise' column to 'Yes' on each applicable material.
Example : Materials.qlt table
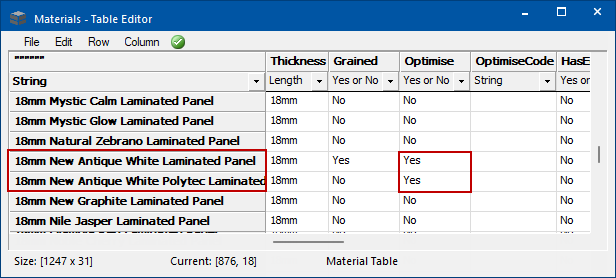
3) Save the table i.e. File > Save
4) In the Catalog/Drawing Properties you must refresh;
- on the Materials-Advanced > Manager page press Refresh - Default Material Data
Excel
Repeat Steps 1 and 2 above and then click the Save icon and exit the application.
- This may prompt you to save in excel format on exit which in not required.
CabMasterPro Design software packages, by default, always output to Optimisation Link, i.e. Saw, on the Mach.General > Const page
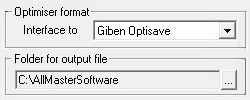
Select your Optimiser format from the Interface to drop list.
Troubleshooting
The Giben Optisave .AD format is variable and can be altered by having a OPTIBTCH.BR file in the Optisave directory.
If your Giben .AD files are not reading in, try removing this file temporarily to ensure that the standard default .AD format is being expected by Optisave.
OPTIBTCH.BR is used to alter various other operational parameters, so you may need to restore your settings for the .AD format but you can still alter other settings which are stored in this file.
This allows you to select the folder to be used when you create optimiser files. Normally, this is the folder where you have installed your Optimiser software. To select a folder, click on the […] button and you will be presented with a browse dialog.
If you do NOT select a folder, files will be written to the folder containing the AllMasterSoftware Optimisation Link application (i.e. “.exe” file). Typically in the .../AllMasterSoftware/Optimisation Link folder.
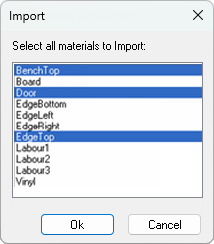
To access the settings, select Import and Convert by clicking on the button, as shown.
This will display the ‘Material Selection’ dialog, similar to image below. (This may take a few moments as CabMaster also prepares the data for output at the same time).
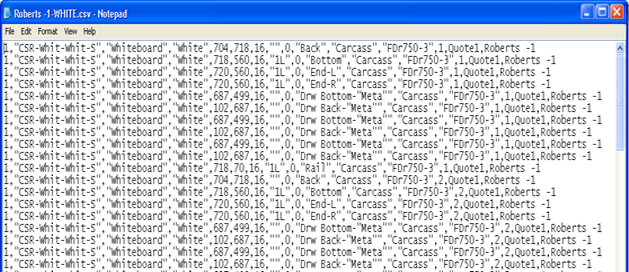
An output CSV (comma delimited) will be created in the chosen output directory.
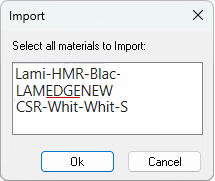
A sample of the output created using these settings...
The material used here is a 15 character code made up from the Brand, Material, Colour and Finish selected for the CabMaster job.
- CSR-Whit-Whit-S is the white board
- Lami-HMR-Blac- is coloured board.
- Edging material is also given a code - identified by having the word “EDGE” somewhere in them. LAMEDGENEW
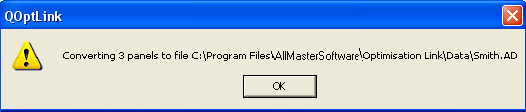
Once the output is complete a message similar to this.
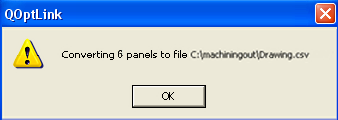
An output CSV (comma delimited) will be created in the chosen output directory - See example of opened using Notepad below.
- The name of this file is the same as the name of the CabMaster drawing file except it has a file extension of .CSV
- One CSV file is created regardless of the number of material types are output for the job, containing data for all the different materials.
- If optimisation link is run several times for the same job (even if different materials are selected each time) the filename will remain the same and be overwritten.
- It is important that if different files are required for each material, the output file is renamed before Optimisation Link is run again.
Filenames for some programs, such as Cutrite, spaces in the filename is not allowed. For example, 'test 1' will give an error ('test_1" is a better filename i.e. no spaces).
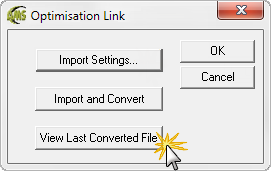
To view the CSV file created, select View Last Converted File by clicking on the button, as shown.
This will display the file using ‘Notepad’, similar to the sample below.
Make sure you close the file (without making any changes to it – unless you need to) once you have finished viewing it.