CabMasterPro User Guide
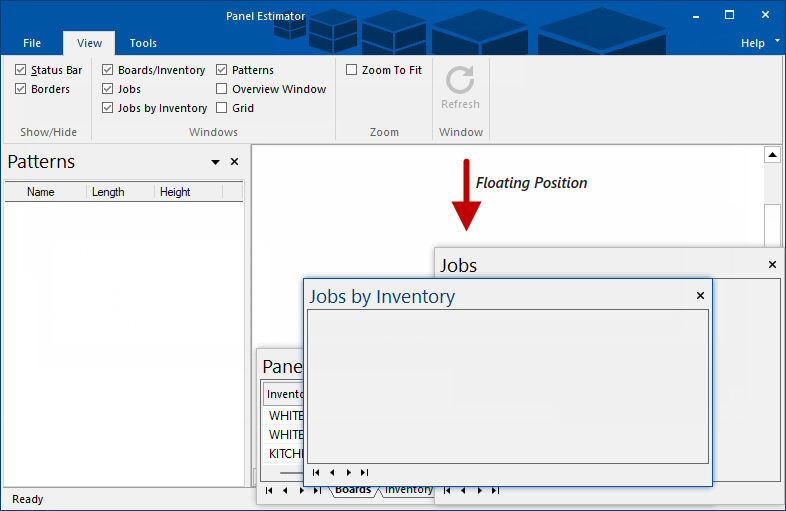
Windows can be undocked so that they float within or outside the application window, which can be very useful for those working on multiple screens.
The window visibility state can be toggled (either visible or hidden) from the Windows group on the View tab.
You can reposition a docking window by dragging its title bar to the desired location. If the window is already docked, starting to drag will cause it to float. If you then drag it close to the side of the application window, or over another docked window, a blue highlight will show the location at which the window would be docked - see discussion below.
In this example, three windows are floating. Click on image to view the same windows docked.
Click to view docked windows
In general, a dockable window will reappear at the size and position at which it was last visible, but this may change if other dockable windows have been made visible or repositioned in the meantime. When Panel Estimator starts, the dockable windows will be in the same location as when the application was previously closed.
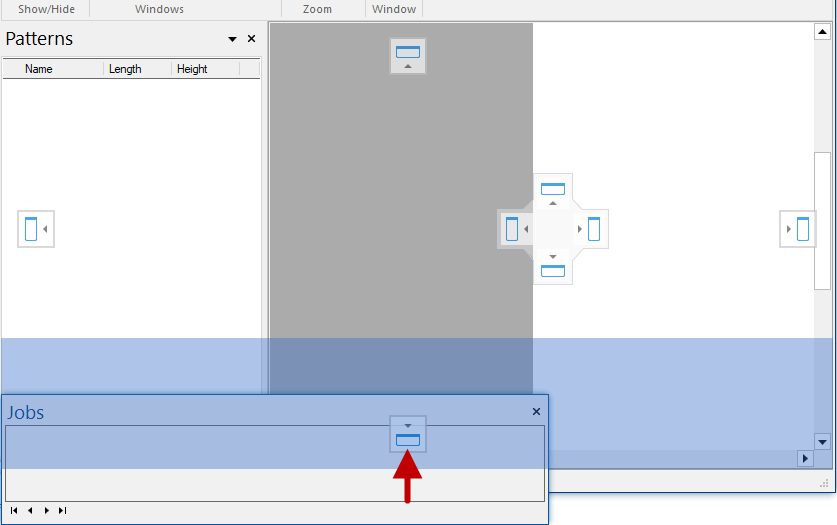
To change the size of a floating window, drag any corner or edge of the window. When docked the window will have a single free edge. You will only be able to resize in one direction by dragging the free edge.
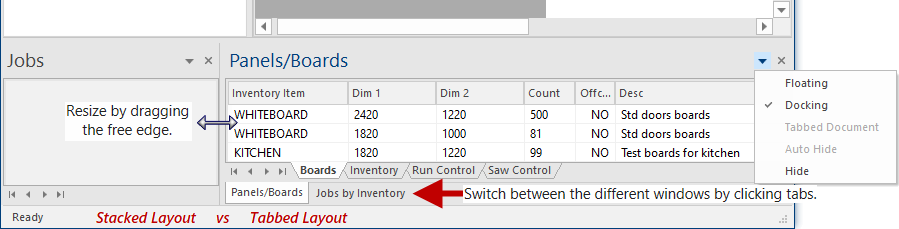
When there is more than one window docked to the same side, those windows can be laid out in one of two ways:
Example of Stacked vs Tabbed
It is possible to have some windows stacked and other windows tabbed, as shown. The switch from a stacked to a tabbed layout is made by dragging a floating window close to the bottom of the side. To go back to a stacked layout, it is necessary to float all but one of the tabbed windows, then re-dock them in the desired layout.
To dock windows that are floating use the smart docking markers ![]() which show you exactly where a dragged window can be docked. Simply drag the property inspector by the title bar to where you want it docked.
which show you exactly where a dragged window can be docked. Simply drag the property inspector by the title bar to where you want it docked.
If you grab the property inspector by the top border (title bar) and drag, you can undock (float) and dock. As you drag the property inspector you will see the smart docking markers appear. Continue dragging until a blue highlight shows the location where the Window will be docked when the mouse is released. If this is the desired location, simply release the mouse button and the window will dock. If not, continue dragging until the highlight changes to the desired location.
In this example, the three windows Jobs, Jobs by Inventory and Panels/Boards are floated, as per example above. We will now dock these windows in a Stacked Layout.
Dock the Jobs window by dragging the property inspector until you see smart docking markers. Drag the property inspector until the blue highlighted area displays the position of where you want to dock.
Example: Dock first window
Drag window towards the required smart docking marker. The blue highlighted area shows the location of where the window will be docked when you let go of the mouse. Click on image to view docked window.
Click to view docked Jobs window
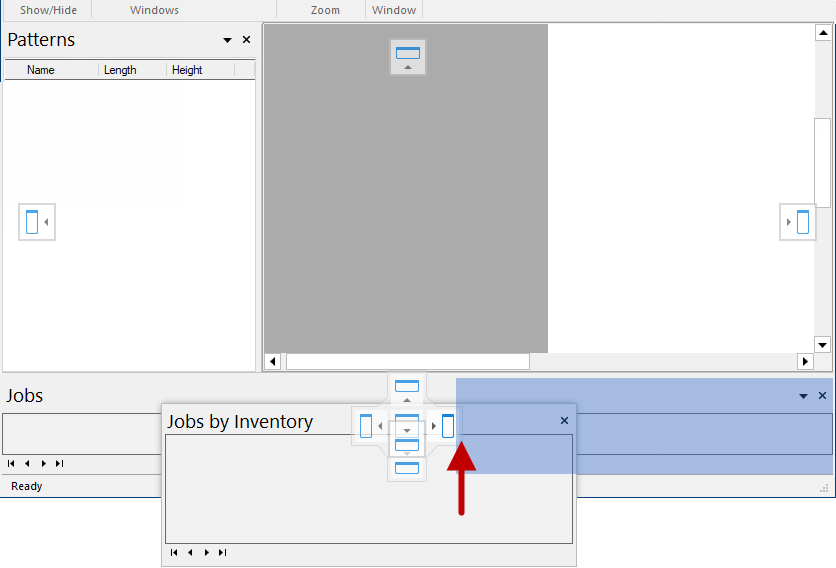
For a stacked layout, dock the Jobs by Inventory window next to the Jobs window by dragging the property inspector until you see smart docking markers. Drag the property inspector until the blue highlighted area displays the position of where you want to dock i.e. to the right of the first placed window, as shown.
Example: Dock second window
Drag window towards the required smart docking marker. The blue highlighted area shows the location of where the window will be docked when you let go of the mouse. Click on image to view docked windows.
Click to view these two windows stacked side by side
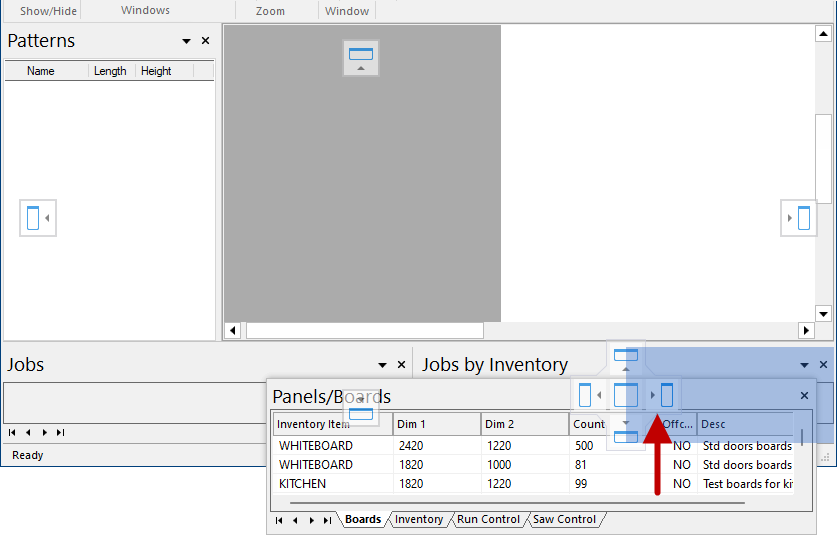
Now dock the third window i.e. Panels/Boards, next to the Jobs by Inventory window by dragging the property inspector until you see smart docking markers. Drag the property inspector until the blue highlighted area displays the position of where you want to dock, as shown.
Example: Dock third window
Drag window towards the required smart docking marker. The blue highlighted area shows the location of where the window will be docked when you let go of the mouse. Click on image to view all three docked windows in a stacked layout.
Click to view all three windows docked in a stacked layout.
When Panel Estimator starts, the dockable windows will be in the same location as when the application was previously closed.