
The Highlight Selected Steps option on the View tab, provides facilities for highlighting machining in Plan and 3D views. It is useful when looking at the built-in machining step list or individual machinestep property pages.

This option is only made available when for users with access to machinesteps property pages i.e. Developer Software.
To explain how the Highlight Selected Steps option works, we will first look at the Machining for a Floor 3 Drawer.
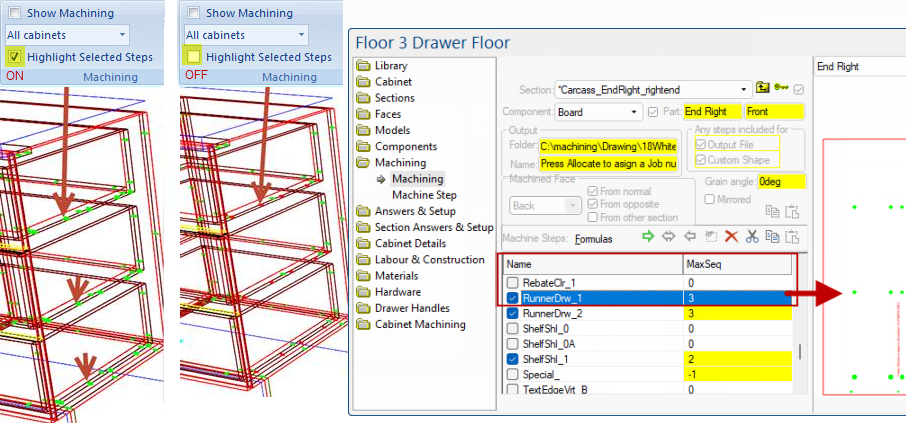
Now click on the RunnerDrw_1 machining step and the Machining for the set of drawer runner holes are highlighted in green.
You can also see that this has a sequence of 3 steps (i.e. MaxSeq=3) and all three are highlighted.
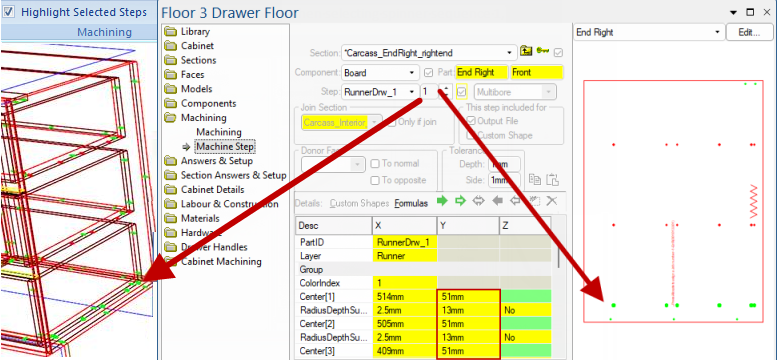
Go to the corresponding Machine Step page which provides a Spinner allowing you to select the sequence to be highlighted.
Example of sequence 3 is selected
When sequence 3 is selected, the corresponding machining is displayed in green.
You can use filters to restrict viewing to just machining of interest (a layer, a depth range, routing or holes only, etc), and the highlighting features discussed above work additionally to that. That is, visibility filters completely disable machining in the 3D view for machine steps filtered out. This leaves visible machine steps still able to be highlighted as you change your selection by previewing different parts, machine steps or sequence members.
The selections appear in machining in 3D (and plan, elevation if visible) when you turn on Show Machining in the ribbon.
Machining that is visible, can additionally be highlighted in a contrasting colour. Turn on this ribbon check box to see this happen.
Returning to the Machine Steps list, and looking at the 3D view with the Highlight Machine Steps turned ON and OFF respectively, we see this difference:

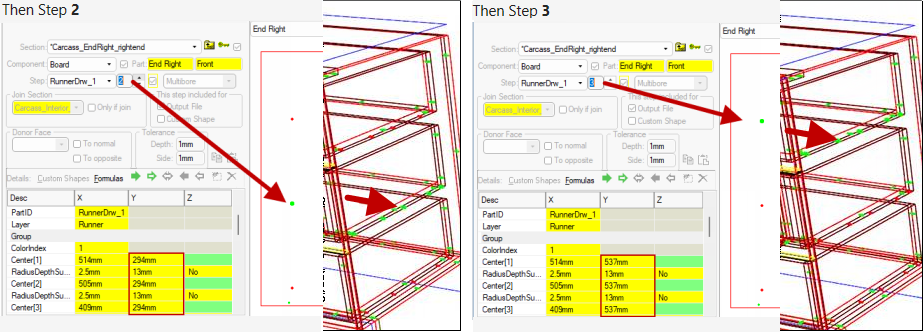
Using the using spinner, when the Machine Step page is on view, only the selected sequence member is highlighted, as shown.

The difference can be seen as the spinner is changed to 2 and then 3.
