CabMasterPro User Guide
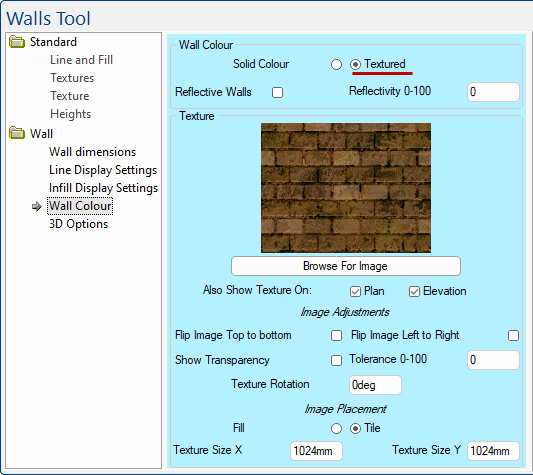
A custom Wall Tool has been integrated which simplifies the Standard category options. colour
For quick links to more information, click on  the options or page names.
The Wall Colour page corresponds to the Standard Texture page and Textures page.
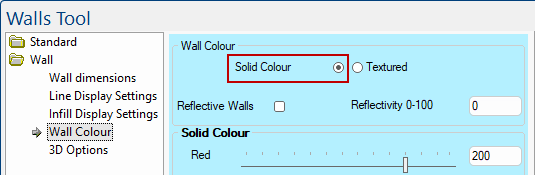
Radio buttons allow you to choose either a Solid Colour or apply a Textured finish which is an image drawn onto the face of a 3D object to give it a more realistic appearance, as shown above.
This is the colour that the face is drawn in for Solid renderings and is enabled by using the corresponding radio button.
Click to Expand
Use the slider or enter the RGB colour directly into the edit boxes, for example Red 200, Green 200, Blue 200 is a grey colour.
For RGB colour picker codes go to RGB Color Codes Chart 🎨 (rapidtables.com) 
An alternative way of selecting a solid colour is using the Textures option and using a bitmap - see tip below.
This option is available for both Solid and Textured images. Reflective properties work best on surfaces that are reflective or glossy in real life, like glass panes, metal sinks, and even polished benchtops. They are more noticeable when the viewpoint is moved around the surface, so the brightness changes dramatically. Curved surfaces show up even better, as can be seen in the example.
The Reflective check box turns ON/OFF this option an the Reflective value you enter is then in the range 0 to 100 where 1 is a perfect mirror, and numbers close to zero show the colour and texture of the face more than they show the reflection.
Example of Curved Surfaces
This is enabled by using the Textured radio button and allows you to browse for an image to be drawn onto the face of a 3D object to give it a more realistic appearance.
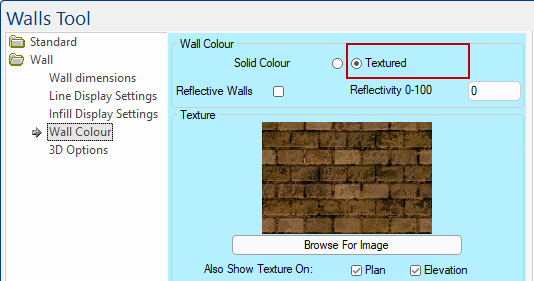
Each texture is stored as a bitmap, although they may be saved in a variety of different Image Formats. They are usually created by scanning in samples or photos of real material. CabMasterPro provides a large selection of textures when you install it, and new colour ranges or styles can easily be added with future updates.
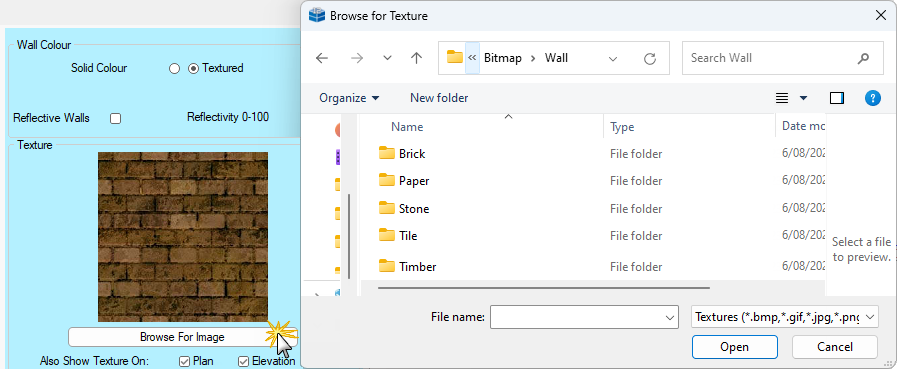
Use the 'Browse' button to quickly locate a texture in your Bitmap folder.
The .../Bitmap/Wall folder has a number of patterned textures but, as discussed below, you can use other folders e.g. .../Bitmap/Cabinet/Color folder.
These options offer better control over the display, as you can turn it on or off in each view mode.
You can choose to hide or show a section in Plan view (the drawing page) and/or in Elevation view.
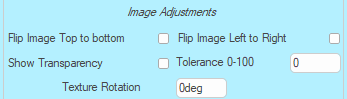
Ability to flip a selected wall or horizontal panel. Allows for Top / Bottom and Left to Right.
Enabling this allows you to show the background through the wall. Subject to Tolerance level specified i.e. 0-100
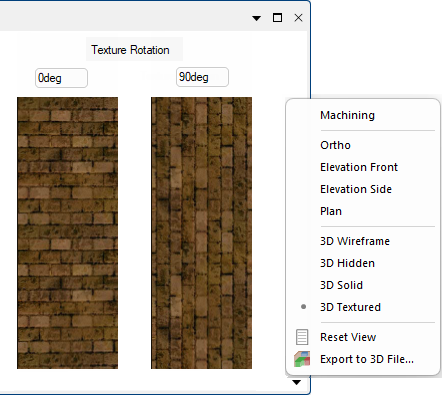
You can set the angle of the selected texture image to display.
Example
In this example, we have rotated the brick wall by 90° and viewed the change in the Preview pane.
Click to view example of Tile
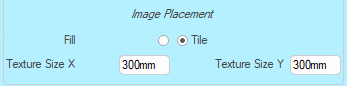
If the Tile radio button is enabled, you can specify the Texture Size i.e. how large a texture is meant to be in real life using the X Y edit boxes.
If you enter the dimensions of the texture, such as 300mm (click on image), it will be kept at that size and tiled across the face as necessary. The dimensions of the texture will not change if the surface changes size - only the number of times it is tiled.