
A texture is an image drawn onto the face of a 3D object to give it a more realistic appearance.
The Textures and Texture page relate and work in combination. See Tutorials on Creating Textures and Applying Textures.
For quick links to more information, click on  the options or page names.
 |
Refer Common Controls.
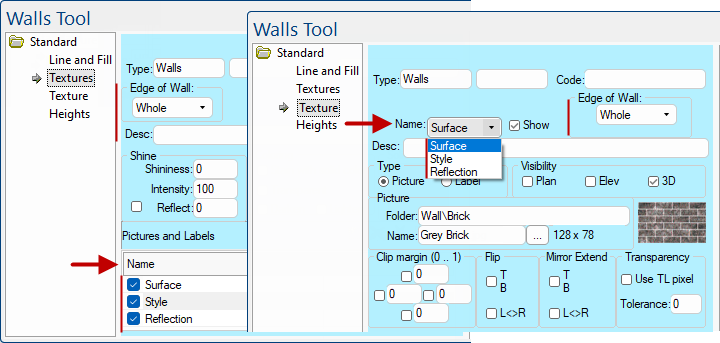
This page is populated and the drop list is created when you add a new entries to the list on the Textures page in the Pictures and Labels area.
Example of Wall Textures
The Name (Surface, Style, Reflection) on the Textures page are made available for selection on the Texture page, as each can be set independently.

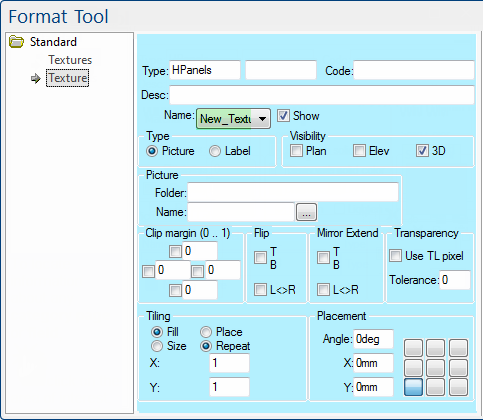
Radio buttons allow you to controls whether the view is a 'Picture' (discussed below) or a 'Label'.
Selecting the 'Label' option will allow you to type is text in much the same way as the Label page.
These options offer better control over the display, as you can turn it on or off in each view mode. You can choose to hide or show a section in Plan view (the drawing page), Wireframe/Elevation (including the cabinet preview window), and 3D views. The "3D" option includes Hidden, Solid and Textured rendering styles, but not Wireframe.
The Show check box still takes precedence over all of these - if it is unticked then none of these visibility options will have any effect.
These controls are used to specify the surface or style texture for this face. Use the 'Browse' button to quickly locate a texture in your Bitmap folder.
Each texture is stored as a bitmap, although they may be saved in a variety of different Image Formats. They are usually created by scanning in samples or photos of real material. CabMasterPro provides a large selection of textures when you install it, and new colour ranges or styles can easily be added with future updates.
Clip chops or clips that edge of the image file. For example, 0.2 on left means chop out 20% of the image from the left.