
 |
For quick links to more information, click on  the options or another page.
This drawing tool is located on the Insert tab and can be customised with the right click Format... option.
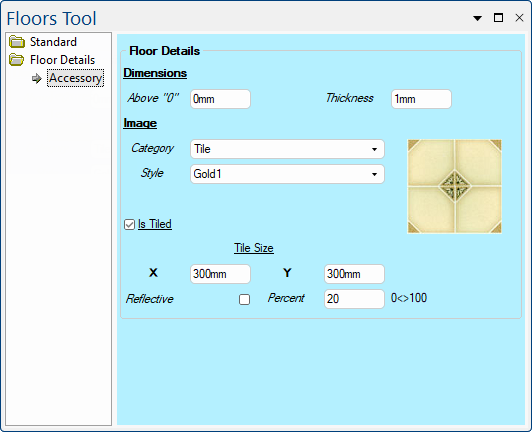
The above image is based on tool properties Floor-1.qtd located in the .../ToolData/Floor folder (see File Location notes).
The Above "0" edit box is the height of the floor from zero i.e. allows you to float the floor.
The Thickness of the floor can also be adjusted.
The drop lists allows you to select the <your CabMaster folder>/Bitmap/accessories folder that corresponds to the look of the floor in 3D Solid.
This drop list allow you to select the image (style).
If the Is Tiled check box is checked/on, then the Tile Size dimensions are used to set the image size using the X and Y edit boxes.
If unchecked/off, the image is stretched over the full size of the floor.
Turns on/off the reflective properties of the floor. Works best on surfaces that are reflective or glossy in real life.
The Percent sets the amount of reflection from 0 to 100.