
To access the Strategies Configuration, simply click on the icon on the main menu.
The Strategies Configuration window has four images across the top of the screen which provides a graphical indication of what that strategy type is for.
These are...
Clicking on any of these buttons to change the strategy category, will change the settings that are available in the Options panel on the lower left of the screen (click on image below to view).
The Offset Options are graphically displayed on each of the buttons.
- External - most commonly used for a 'border' layer to cut out parts on the CNC;
- Internal - cutting out sections from the insides of parts;
- Open - machining an open line/contour.
The Fill Options are graphically displayed on each of the buttons.
- Hatch - in a left-right-left-right style to groove out a section;
- Island - think of it as a spiral style but rectangular instead of round.
There are no additional options.
The user can edit a Strategy by selecting an existing strategy in the top-right drop list.
Create a new strategy by clicking on the New Strategy button. A dialog will allow you to enter a strategy name that doesn't currently exist and click OK.
Then click on Save This Strategy, otherwise if you select another configuration or close the window, you will loose all changes.
Tools can be added to the strategy by selecting a tool from the Tool drop list and pressing the
button. In the following example, '10Comp 3W' was selected using the drop list (click on image) and it was added to the Strategy table (displayed below the edit box) by pressing the plus button.
To remove the tool from the Strategy table, select the tool, in this example '10Comp 3W' by clicking on it and press the
button.
See notes on Define Layers > Design Depth as it is very important that the Design Depth matches the Strategy depth exactly.
The strategy is only saved when the Save This Strategy button is clicked.
The Delete This Strategy button will remove the currently selected strategy from the list, so it will no longer exist.
Feed Rate : The speed at which the cutting tool moves through the material (machining or cutting speed).
Final Pass Feed : If this is set, then the Use Final Pass on the Pass tab will be made available.
Plunge Rate : The speed at which the tool moves down into the material.
Spindle Speed : The speed at which the tool will spin.
See also Machine Setup > Parameters > Driver Units.
Click on the applicable button to change the cut direction.
Conventional : Left to right milling.
Climb Cut : Right to left milling.
The Close button returns you to the main menu.
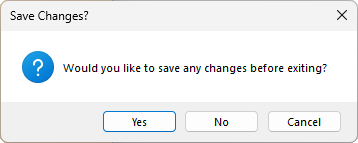
If the you have made changes to a strategy and Close without saving first, you will be asked if you want to save before exiting the current window.
