CabMasterPro User Guide

For quick links to more information, click on  the controls or another category/page.
To find out the property names for these controls, see the Model page under the Formula Reference.
This page allows you to assign a material (with one or more textures in it) to an object and it gets painted onto all the faces of that object, rather like the way a photo gets painted onto all the pieces of a jigsaw puzzle. Each piece has UV coordinates set up by the 3DM model so that it knows which part of the photo to use.
Files imported must be 3dm or rhino.
A 3DM model is a collection of objects and each object can have one or more faces. A face is usually a mesh piece of surface, perhaps curved in 3D or perhaps flat.
The 3DM model always has UV (texture) coordinates assigned to every vertex of the mesh that makes the face, so we know how to paint the texture onto the face.
A texture is generally a rectangular bitmap (jpg, png etc) and it has coordinates (0,0) at the bottom left and (1,1) at the top right. For example, if a model surface piece has texture coordinates (0.5,0.9) then it will get painted with a pixel that is half way across the image from left to right and 90% of the way up from the bottom to top (i.e. close to the top).
When importing a 3DM model into a container section, this lets you select whether to stretch the model to fill the container in all directions, or to keep the aspect ratio etc.
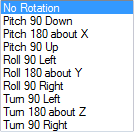
There are three options to choose from:-This drop box lets you select the orientation of the model with respect to the container, so for example if the model is a vertical chess piece, you could rotate it to make it lie down. The easiest way to see what these combos do is to change them while displaying an imported model in 3D, and just observe the effects.
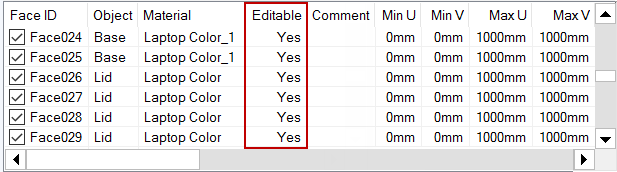
In the example above, we have imported a 3D Model of a Laptop. This provides details of each face, as shown. The column 'Editable' has Yes/No controls.
If set to 'No' then, when you press the 'Show Only Editable Faces' button, the applicable face will not be shown in this list. To view all faces press the button again.
Example
UV (texture) coordinates are assigned to every vertex of the mesh that makes the face.
This button will allow you to view the materials used in creating the 3D Model in the same way as the Materials page.
Double clicking on any of the listed materials will open the Material page, allowing you to have a different texture per face.
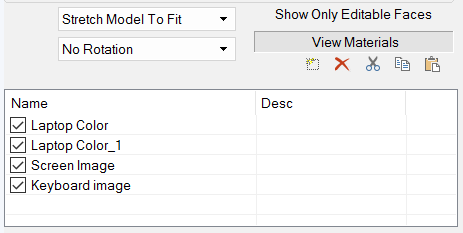
These five tool buttons  are used to edit. They are in order: Add, Delete, Cut, Copy, Paste.