CabMasterPro User Guide
For quick links to more information, click on  the controls or another category/page.
To find out the property names for these controls, see the Sections Import page under Formula Reference.
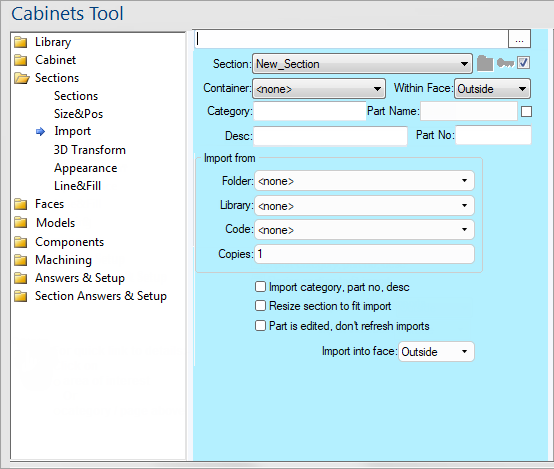
These are the main controls on the Sections > Import page as they are used to specify the section for importing.
You should set each list box in order as changing the value in one affects the contents of the lists below it. For example...
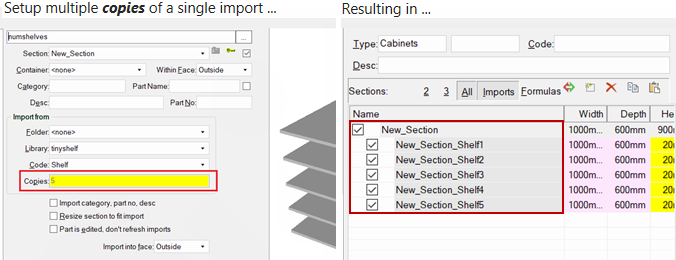
Multiple Section Import Copies example
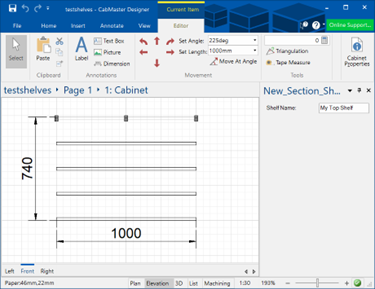
Each shelf has a section level property called "shelfname" which can be edited by the user and any changes will be preserved when doing an F5 refresh of the drawing.
When you import a cabinet into a section, any sub-sections (including previous imports) in the importing section will be cleared. In other words, when a cabinet has an import it cannot contain any other sections.
Importing a cabinet also causes all the sections in that cabinet to be automatically renamed. If a cabinet contained three sections called "carcass", "bench" and "door" and you imported this into a section called "mysection" the imported sections would be renamed to "mysection_carcass", "mysection_bench" and "mysection_door". This helps prevent problems with non-unique section names, but may cause issues with formulas that refer to hard coded section names.

When this box is checked, the Category, Part Number and Description of the importing section will be set to those of the imported cabinet.
Since cabinets do not have a Part Number field, the Code is used. This works well for parts sub-libraries, where the name of the "cabinet" is typically a part code anyway. The three fields are only set when you import an object - you are still free to edit them afterwards.


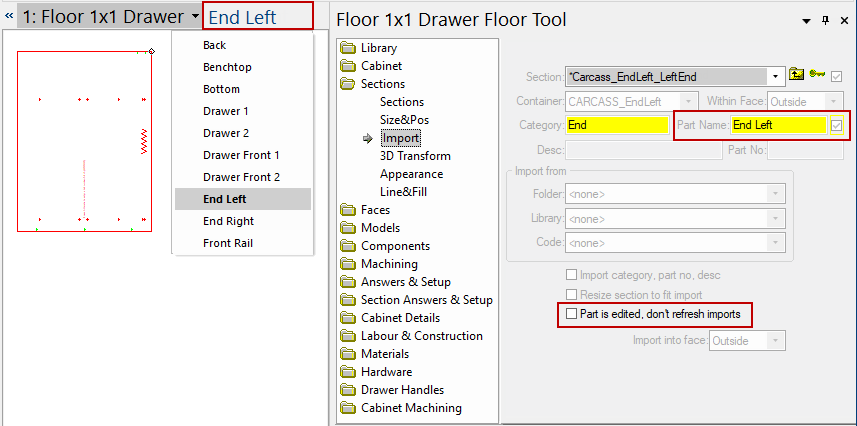
When you have a cabinet on view, the breadcrumb gives you the ability to select the cabinet and go into the item view and also to select the part. Because there are so many sections in a cabinet, when we are selecting the parts, we want to use friendly part names and not (by default) have 3 times the amount on display.
If we select one of them using the breadcrumb, for example "End Left" as shown below, the Part Name is filled in as "End Left" (as per breadcrumb).
At this point, the "Part is edited" flag is unchecked (turned off).
Example of Part selected from breadcrumb
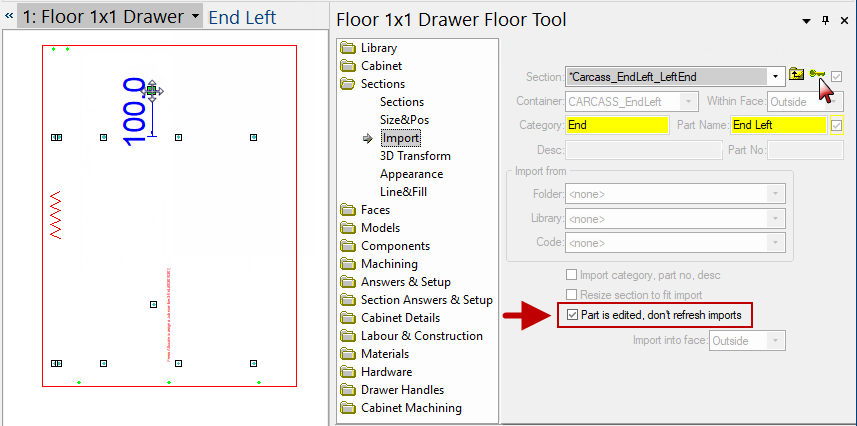
Now if we click to Select and hold down Ctrl (to unlock) and drag it, as shown in the example below, we are able to move the part.
When we move it, it retains its import specification but there is now an edit override being stored with the part and the “Part is edited” flag will automatically be checked (turned on) to reflect this.
Example of Part moved i.e. edited
Note that the Clear Import Spec key  icon is enabled (i.e. locked) as the section still retains its import specification.
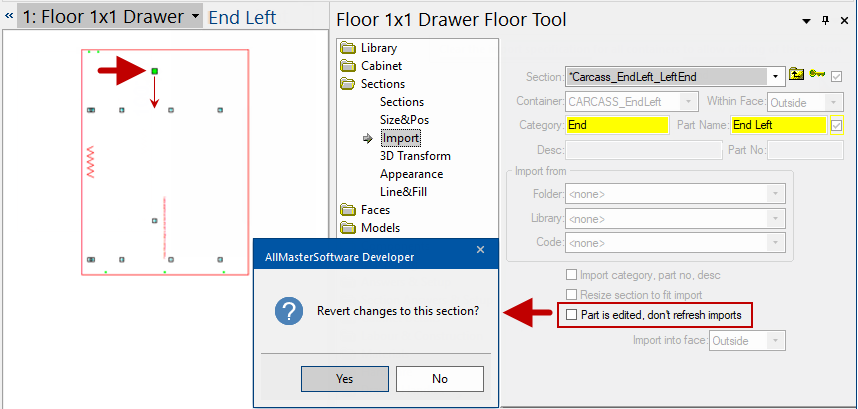
If we now uncheck the “Part is edited” flag, you will get a message Revert changes to this section? because unchecking will require the software to re-import. Therefore, if you click 'Yes' to this message, the hole goes back to where it was before we started to edit it.
Example Part changes reverted
If you click 'Yes' to this message, the hole which was previously moved will revert to it's original position.