CabMasterPro User Guide
This will create a new .oro file to allow job details to be entered manually (also called a Stand Alone job). The new job appears in the Jobs window - see example.
Each job has its’ own tab, so if you have several jobs opened you will have to use the small arrow buttons to locate the new job.
If any window, including this window, is not visible, select it using the check boxes on the View tab in the Window group.
Opens a .oro file which consists of job orders without pattern layouts. A standard ‘Open’ dialog box will prompt for selection of existing .oro file. The newly opened job will appear in the ‘Jobs’ window. Click on the corresponding tab to see the details of the panels requiring optimisation.
Saves a .oro file which consists of entries in the current ‘Jobs’ window. No pattern information is saved to disk.
Opens an existing pattern *.tab file. To view the pattern loaded, expand the pattern tree control.
Saves pattern information only. If there are any order in the ‘Jobs’ window, these do NOT get saved.
See Options and Data Directory for location of files.
When you exit from Panel Estimator you may get warning messages concerning Inventory (OIN file) and Available Boards (OAB file) concerning modifications made to the relevant file and asks if you wish to save the changes.
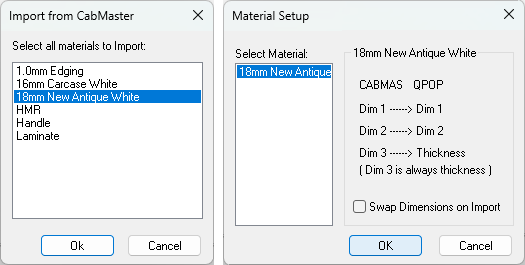
Once the required material(s) have been selected, click on the OK button.
The newly loaded job will be displayed in the ‘Jobs’ window.
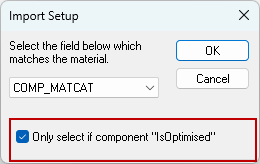
Turn on the Only select if component "IsOptimised" option. (You will only need to do this once).
COMP_MATCAT is the recommended selection from the drop list. [See CabMaster Output which discusses how the material name is determined].
Click OK to close and then you are ready to Import from CabMaster.
Click to Expand
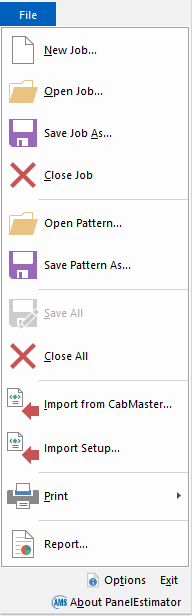
Printing in Panel Estimator is much the same as in any Windows application i.e. Print, Print Preview, Print Setup.
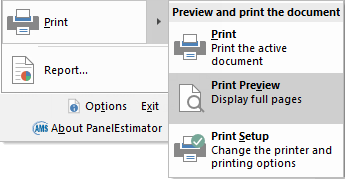
Click to view Print Preview
Print Labels that can be applied to panels/boards.