CabMasterPro User Guide
 The Automation Server dialog is used to send jobs to a remote computer for processing instead of doing them on the current machine.
The CabMasterPro Automation Server is an integrated add-on to CabMasterPro that allows you to send print jobs to another computer on the local network, which then generates and prints them itself. If your designer(s) spend a lot of time generating and printing reports, you might find the Automation Server useful, because it means a design computer can return to work immediately after requesting a print job. When a print job is created, it is then queued by the server and serviced as soon as other queued jobs are finished.
The Automation Server command is accessed from File > Report menu.
If this is disabled (greyed out) then this feature is not installed or not set up correctly.
For full details on setup etc, see documentation under Utilities.
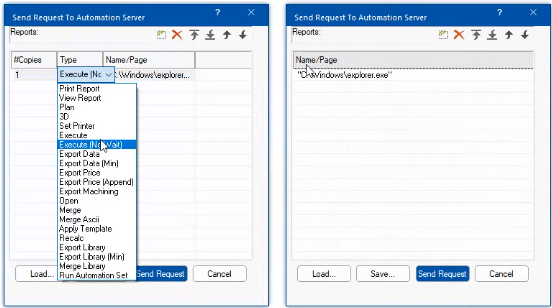
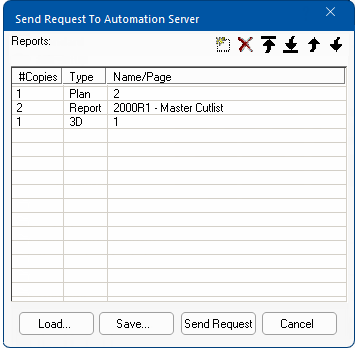
A print request is made up of one or more jobs. Examples of jobs are "print a plan view of page 3", "print 2 copies of this certain report", or "print a 3D view of page 1". Each line in the listing describes one job, and each specifies: the number of copies to print, whether to print a plan view, 3D view or report, and which page or report to print. To edit a job, click the field you want to change on the job list.
The toolbar buttons in the top right corner add a new job, delete the selected job, move a job to the top or bottom and move a job up or down the list respectively. Send Request passes the current list of jobs to the print server to start printing, and Cancel closes the dialog.
You can have several preset lists of jobs, which are saved as QRS (Quisine Report Set) files. To save the current list, click the Save button and specify a filename. Use the Load button to open an existing list of jobs.
From CabMaster on any client machine you can create, edit, save scripts.
Press the "New" button  for each step, configure them, and then click "Save..." to save the script.
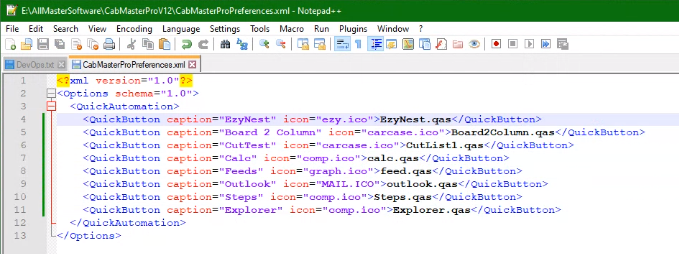
The scripts are simple text files stored with an extension ".qas" and can be edited also with Notepad etc.
With some extra configuration, these scripts can be set up to be triggered by a single button press. Quick Automation buttons will be created on program start if they are defined in an XML configuration file, located within the Programs directory [F10] and named "CabMasterProPreferences.xml".
Example of XML for Quick Automation
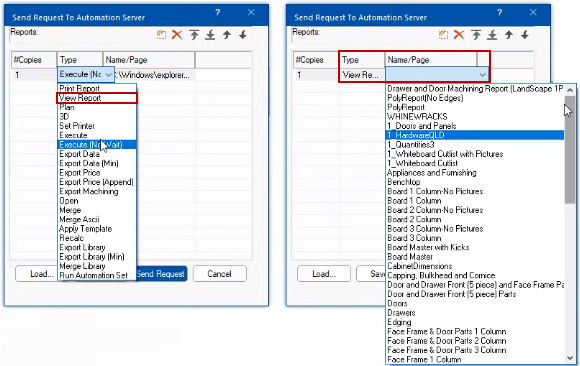
In this example the Type selected is View Report and the Name/Page drop list allows you to select the applicable report.
The Request selection is not limited to reports. Other executable files can be initiated such as the one shown here i.e. Explorer.