CabMasterPro User Guide
DXF snap items are fixed background (greyed out) 'grids' that can be optionally snapped to. Typically they would contain a full AutoCAD drawing of a house, for example, with a kitchen and its walls sketched in but to scale.
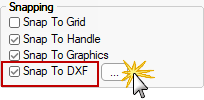
In normal use, DXF snap items are greyed out and form a background that can be snapped to, so that the scaled wall drawing can be used to place a new wall layout. They are not movable (by design) and not to be confused with Model Items that can host a DXF and be moved around and snapped to also. Model Items are part of the drawing whereas DXF Snapping grids are not.
During the initial setup of a 'DXF Snapping' grid, you can easily move and scale the dxf, but once setup it does not move around while you draw the walls over it.
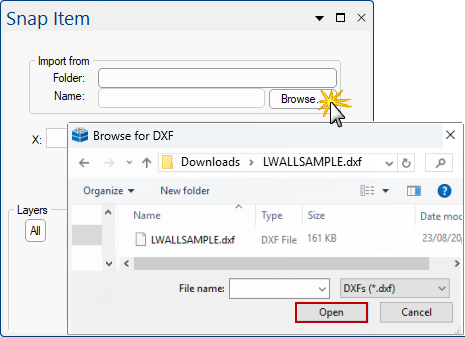
This tutorial will describe how to import a DXF, scale and position it and use it as a snap target. We will use a sample dxf file, of an L shaped wall, which you can get here: LWALLSAMPLE.dxf. (Just click the link to download the .zip file. Then go to your Downloads folder and Extract into this folder - see step 3).
Click to view Snap Item properties
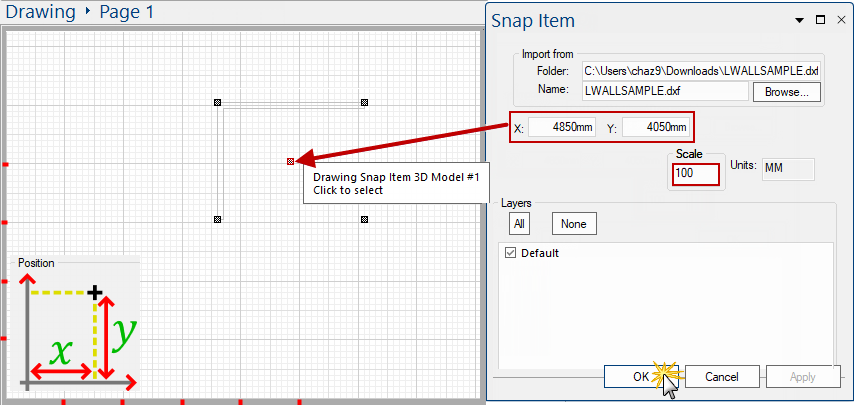
Now you can use the DXF to snap by dragging another item, e.g cabinet, until it snaps to one of the handles.
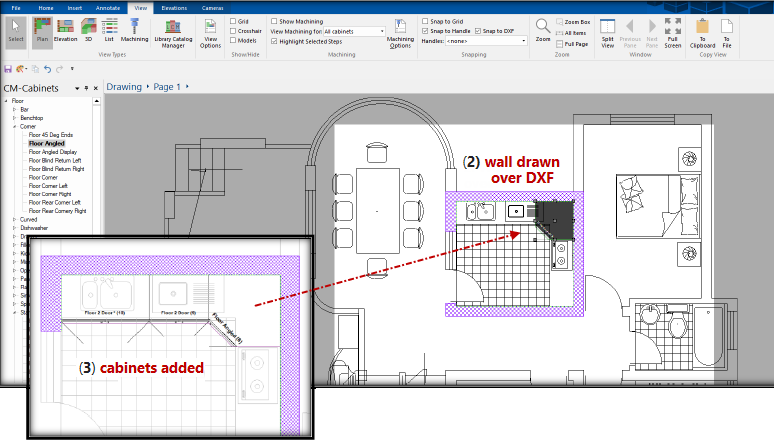
You have the ability to import a DXF as a background. This enables you to use this as a template and draw in walls in the correct position or the correct size and overlaying cabinets in the actual DXF plan drawings.
Here we have (1) imported a houseplan.dxf (2) have drawn in a wall and then (3) added a cabinet.
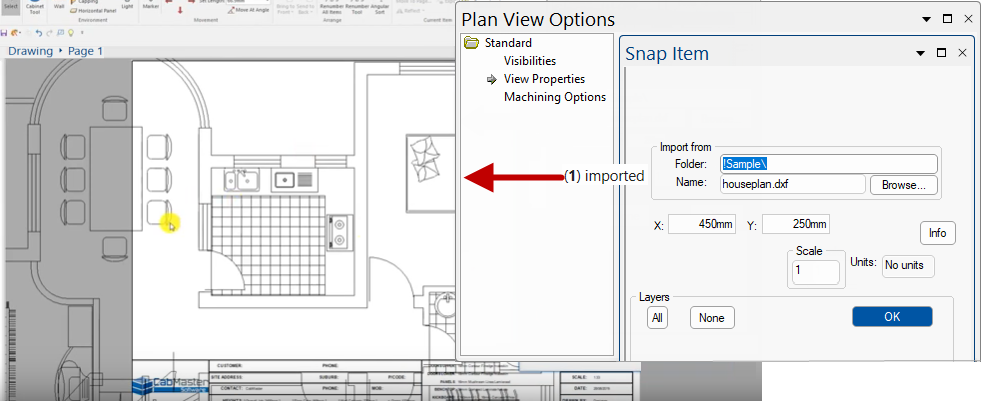
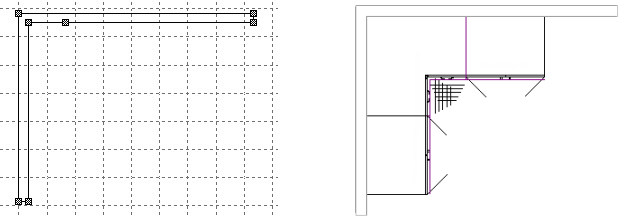
In this example, the walls in CabMaster have been changed to Purple to make them stand out a little more and a Cabinet has also been placed in the corner.
The individual DXF Layers can be turned off/on as required when drawing. The Cabinets are also transparent to make seeing the original DXF plan easier through the cabinets to ensure correct alignment etc.
The image shows the wall added to the DXF and then we have added a cabinet inside that wall (#2 shown below right).