CabMasterPro User Guide
 |
For quick links to more information, click on  the options or another page.
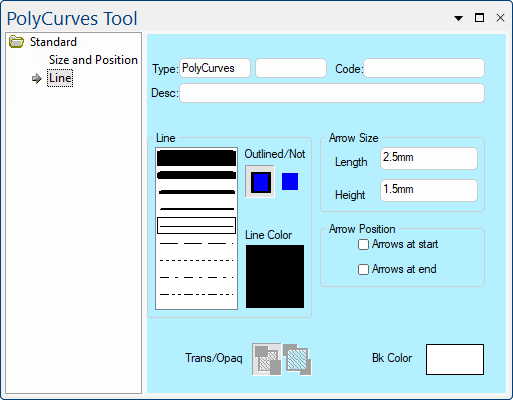
This drawing tool is located on the Annotate tab and can be customised with the right click Format... option.
This tool can be used for placing a smooth curved line onto a drawing. It is different to an arc because it is a constant curve between several points (a spline), whereas the arc has a fixed radius.
Refer Common Controls.
The Line controls consist of a pen style list, a pair of icon buttons and a colour select button. The two buttons labelled "Outlined/Not" ![]() control whether a line is drawn around the object at all. Click the button with the outlined blue box to turn the line on, or the box with no outline to turn it off.
control whether a line is drawn around the object at all. Click the button with the outlined blue box to turn the line on, or the box with no outline to turn it off.
When you have an Outline turned ON, the Pen Style List box becomes active. From here you can select the thickness of a solid outline, or one of four dashed pen styles. Click the preview of the line to select it.
The final option in this group is the Line Colour preview box where you can view or change the colour of the outline. Clicking it opens a standard Color Select dialog where you can select a preset colour or create your own.
The Size of the arrow head is determined by the Length and the Height controls as illustrated.
The Position controls allow you to turn On/Off the display of arrows at the start and end of the line.
The transparency controls are only available when the selected Line Style has gaps in it e.g. a crosshatch fill pattern or a dashed line pattern, as per example below.
When one of these patterns is used you can set the transparency option to either transparent or opaque ![]() respectively. When transparent is selected, anything behind the object shows through the gaps. Otherwise, with opaque, everything behind the object is obscured and the object's background colour is drawn in the gaps instead.
respectively. When transparent is selected, anything behind the object shows through the gaps. Otherwise, with opaque, everything behind the object is obscured and the object's background colour is drawn in the gaps instead.
With opaque, everything behind the object is obscured and the object's background colour is drawn in the gaps instead. In this example, the blue back colour is visible between the red line colour.
You can only set the background colour of an object when the Trans/Opaq controls are enabled and set to Opaque. Clicking the coloured preview box opens the Color Select dialog where you can pick a preset colour or define your own. The background colour is then used to fill in the gaps of the line or fill pattern, instead of drawing whatever is behind the object.