CabMasterPro User Guide
The triangulation calculator is a useful tool for computing the angle of a corner, given the lengths of its edges. It is specifically designed for working out and drawing non right-angled walls based on measurements taken from the field, and supports several different measurement methods.
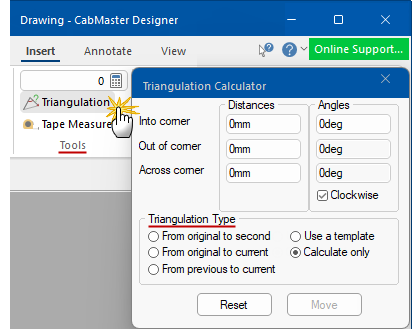
This tool can be accessed from the Insert tab in the Tools Group commands, as shown right.
The first four (4) Triangulation Types listed here are used for multi-step measurements...
The 'Calculate only' type/method is for one-off calculations and is used simply to calculate the angles based on the measurements you enter.
Start by clicking on the 'Triangulation' command button, shown above right. The following window will be presented.
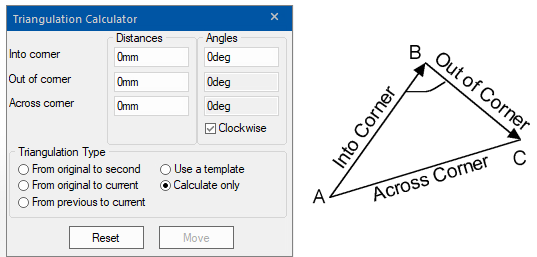
You must provide the calculator with the following information:
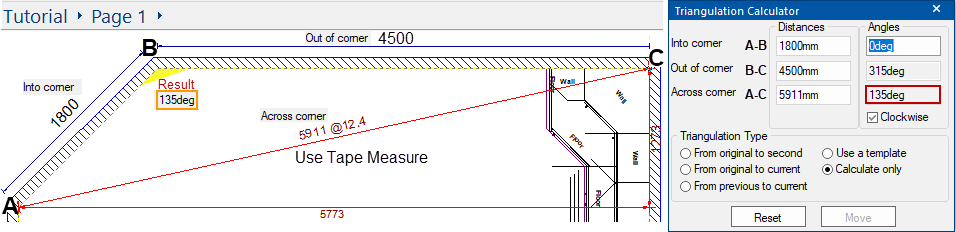
The triangulation calculator will work out the angle across the corner (at B) and the direction of the line coming out of the corner (B-C).
In this example we will use the 'Clockwise' method to calculate the angle of a corner.
To use as a calculator, you will need to know the measurements of the 3 sides of the triangle.
- We know that the walls we initially created were 1800 x 4500 and we can use the Tape Measure for the 3rd side.
Type in the three distances, as shown, and when you <tab> out of the (A-C) edit box, the calculator will work out the angle.
In the above example, we have confirmed the angle using the Annotate > Angular Dimension tool.
You can also use the calculator to draw walls and other shapes in multiple steps using the options discussed here.
Before you start, you need to decide the method of triangulation you wish to use from the Triangulation Type group of options.
The method you use depends on how you take measurements in the field. In addition, each method has different effects on accuracy.
When drawing in multiple steps...
The multi-step triangulation types are illustrated in the following diagrams and shows the difference between each type.
Original to second Original to current Previous to current Uses the triangles ABC, ABD and ABE. Uses the triangles ABC, ACD and ADE. Uses the triangles ABC, BCD and CDE. The line from the original to the second point (AB) is the 'Into Corner' line for each triangle.
Here, each triangle starts from the original point A and goes to the point just drawn.
In this case, the 'Out of corner' of one triangle becomes the 'Into corner' of the next.
Accuracy Note:
Will result in a precise location for point E, but the individual line segments (e.g. DE) may not be as accurate because the segment lengths are calculated rather than specified.
Accuracy Note:
Provides a good compromise.
The following tutorial will use this method.
Accuracy Note:
Will result in accurate segment lengths, but the location for point E may not be precise.
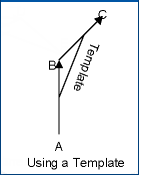
TemplateThis is done by placing a triangular template into a corner and recording the lengths of the three sides.
These three lengths are then used to calculate an angle.
It is this angle and the actual length of the wall (BC) that specifies the next point.
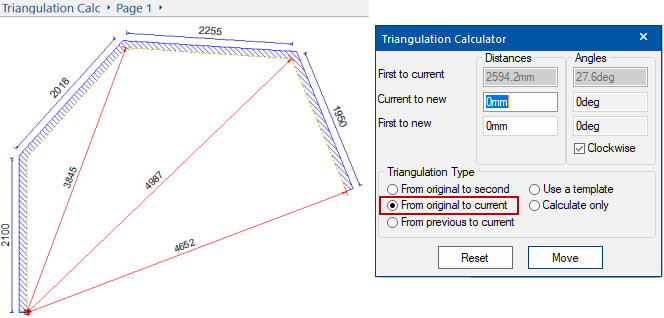
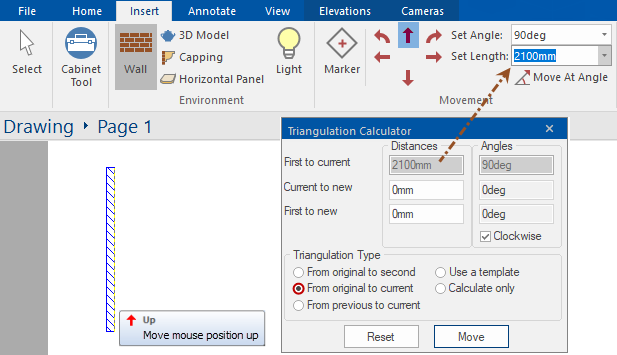
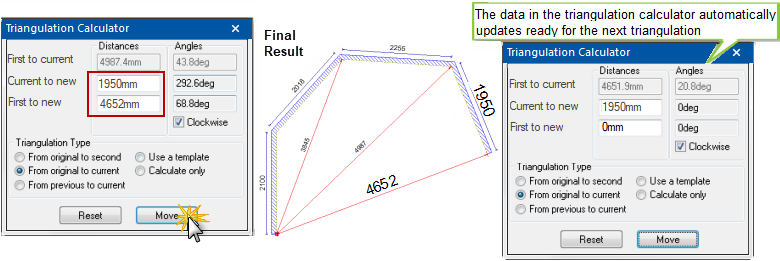
As the measurements are the individual wall lengths and the distances are from the first point, we will use the 'Original to current' triangulation method. Notice that the wall segments go in a clockwise direction from the bottom left.
Before drawing, start the Triangulation calculator and ensure you select 'From original to current' and tick the 'Clockwise' checkbox. Then follow the following steps to draw a wall as per the diagram, shown below right.
 Tab key, you will see that the triangulation calculator has automatically updated the ' Current to new' and 'First to new' angles to 48 and 138 degrees respectively.
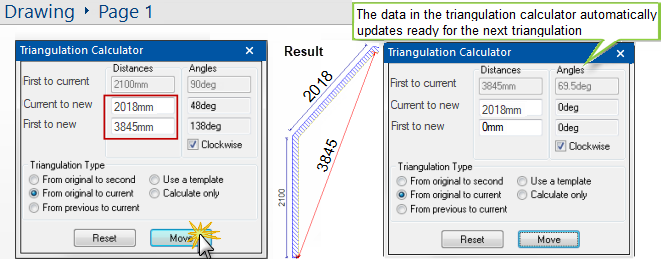
To stop drawing the wall, close the Triangulation Calculator and click on another command button.