In This Topic
The 3DM model always has UV (texture) coordinates assigned to every vertex of the mesh that makes the face, so we know how to paint the texture onto the face.
A texture is generally a rectangular bitmap (jpg, png etc) and it has coordinates (0,0) at the bottom left and (1,1) at the top right. For example, if a model surface piece has texture coordinates (0.5,0.9) then it will get painted with a pixel that is half way across the image from left to right and 90% of the way up from the bottom to top (i.e. close to the top).
The info button displays geometric coordinate information for the selected face. For example here is the info displayed for the "Top" face in the example above:
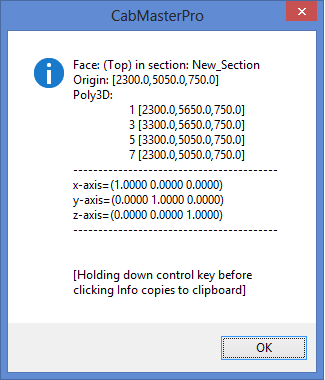
It shows the name and section name, and the 3D origin xyz coordinates. It then displays the vertices in the face polygon and face axes. Notice for the top face, the z-axis points up, and is (0,0,1). This information can be helpful if you need to analyse the geometry of a face mathematically, but it is not needed in general usage.
Hides or shows the
picture or text label on this face. This is a way to stop...
- temporarily stop a label being displayed on a face without deleting the text or the formula behind the label.
- a picture being displayed on a face without deleting the path and filename of the picture.
Controls whether the view is a 'Picture' or a 'Label'. Selecting the 'Label' radio button will allow you to type is text in much the same way as the
Label page.
These options offer better control over the display, as you can turn it on or off in each view mode. You can choose to hide or show a section in Plan view (the drawing page), Wireframe/Elevation (including the cabinet preview window), and 3D views. The "3D" option includes Hidden, Solid and Textured rendering styles, but not Wireframe.
The
Show check box still takes precedence over all of these - if it is unticked then none of these visibility options will have any effect.
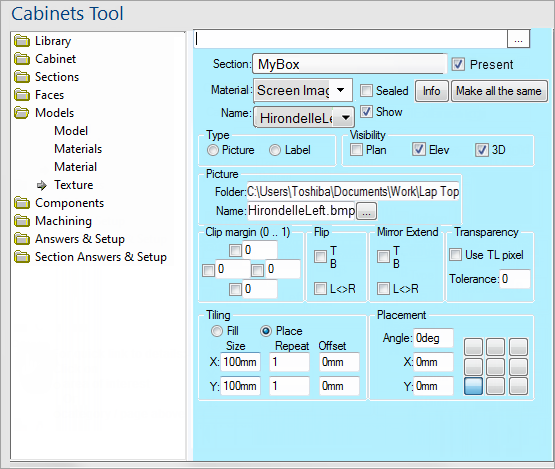
These controls are used to specify the surface or style texture for this face. Use the 'Browse' button to quickly locate a texture in your Bitmap folder. See also on
Image Search Order.
The middleware texture name uses 'texture' variable and the 'name' refers to the filename. For more detail, refer to
Surfaces and Texture References.
Each texture is stored as a bitmap, although they may be saved in a variety of different
Image Formats. They are usually created by scanning in samples or photos of real material (see the tutorial on
Creating Textures and
Applying Textures). provides a large selection of textures when you install it, and new colour ranges or styles can easily be added with future updates.
See also
Models and UV Coordinates.
Chops or clips specified edge of the image file.
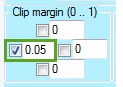
The Clip group has pairs of checkbox (to enable yes/no) and the proportion (a number from 0 to 1). For example, if we have an image of size 640 x 480 and we set "Left" to "0.05", as shown, then this clips a 5% margin (32 pixels) from the left, reducing the image to size 608 x 480 pixels.
Ability to flip a selected wall or horizontal panel. Allows for
Top /
Bottom and
Left to
Right.
Doubles the image size by extending it with a mirrored version. This means that a scene wrapped around a cylinder will not have a seam (if you LR extend). Allows for
Top /
Bottom and
Left to
Right.
The top left pixel is taken as the "transparent colour" and all pixels of that colour are treated as transparent i.e. showing the background through. Subject to
Tolerance
Level specified.
The
Use TL pixel sets transparency on. The tolerance variable determines where (0 = exact match) required, and setting the tolerance to be an integer means that any pixel with an RGB colour, where each is within this tolerance, will be treated as a transparent pixel.
For example, if you set the tolerance to be 10 and the top left pixel in the image (the reference pixel) has R=200, G=100, B=0 then these pixels are all treated as transparent:
- R=200, G=100, B=0
- R=190, G=110, B=10
- R=210, G=100, B=5
- but a pixel with any RGB value more than 10 away is not transparent. For example R=211, G=100, B=0 is not transparent.
The radio buttons allows you to control the tiling effect. After selecting one, you need to fill in the edit boxes beneath the selected option. Tiling and Placement determines how the texture is drawn on the face - either one, or tiled across the face a number of times.
Size is like a tiled texture, you specify how large a texture is meant to be in real life. You enter the dimensions of the texture, such as 300mm, and it will be kept at that size and tiled across the face as necessary. The dimensions of the texture will not change if the surface changes size - only the number of times it is tiled.
Repeat means a stretched texture, where the texture is resized to only fit across a face a certain number of times. When you resize the surface, the texture will resize accordingly so that there are always the same number of copies across the face, so this is where it differs from Fixed Size mode. The default tiling is to used Repeated mode with 1 copy in each direction. This means the texture is not tiled at all, but always stretches to fit across the whole face.
Place allows for a combination of the above and an offset.
These five tool buttons  are used to edit. They are in order: Add, Delete, Cut, Copy, Paste.
See Also
 the controls or another category/page.