CabMasterPro User Guide
Using the middleware function "Acceptor", we can control properties of donor machine steps. For example, if we are donating holes from a shelf to an end panel, the thickness of the panel may have an impact on the size and position of the holes we drill. Alternatively, if we are using a tongue join, we can control whether the shelf is machined with a tongue if it meets a panel.
This topic contains three advanced donor/acceptor tutorials...
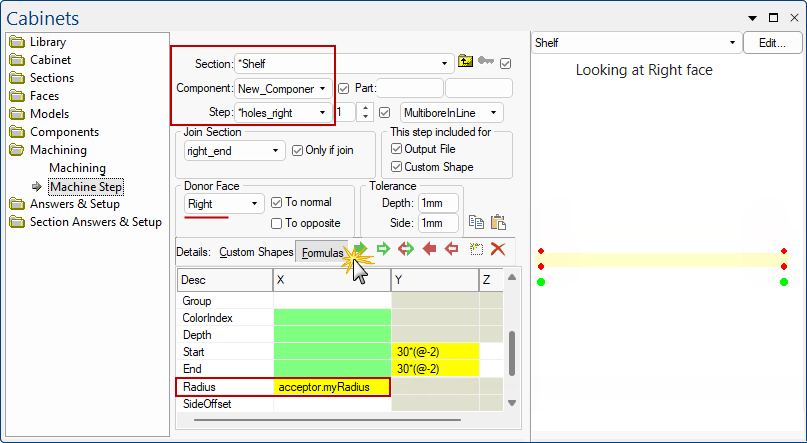
In this tutorial, we control the radius of a hole from the acceptor section, rather than the donor.
Load the example file created in the Donor Machine Steps tutorial.
Alternatively, load DonorContextTutorial.qid into CabMasterPro.
Select the "holes_right" step belonging to the shelf.
In the Machine Step page, click the Formulas button and add the formula "acceptor.myradius".
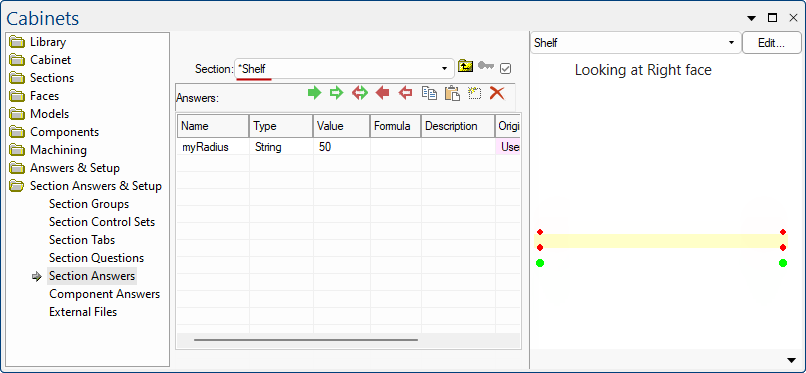
Go to the Section Answers page and add a new answer "myRadius" for the Shelf. Give it a value of 50.
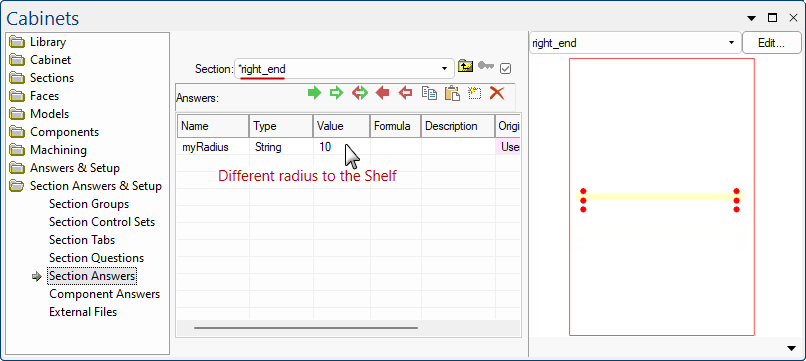
Then from the Section drop list, select the right panel and add a "myRadius" answer for it. Give it a different value, for example 10.
The holes drilled into the right panel should be 10mm in radius. This is because the formula for the donor machine step has picked up the context of the acceptor and used its variable, rather than the donor's.
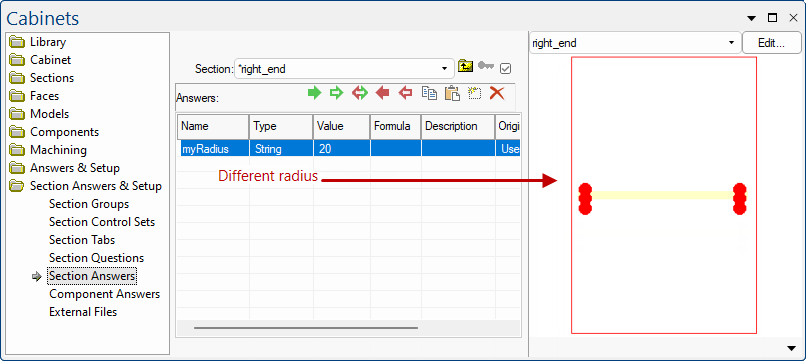
If you change the acceptor's myRadius, the holes will change size, as shown here.
If we remove the accepting section, by unticking the 'Present' check box for the step, the formula will use the local context.
Individual steps within the sequence can be controlled by the 'Present' check box for the step.
The machine step sequence can also be disabled by setting MaxSeq to -1.
After removing the formula, you can see that it is now using the donor section's "myRadius" which is 50mm.

In this tutorial, we will change the properties of a machine step belonging to a donor section based on whether one of its donor steps is accepted or not.
Open the example created in the Tutorial 1.
Alternatively, load DonorIsAcceptedTutorial.qid into CabMasterPro.
Click to Expand
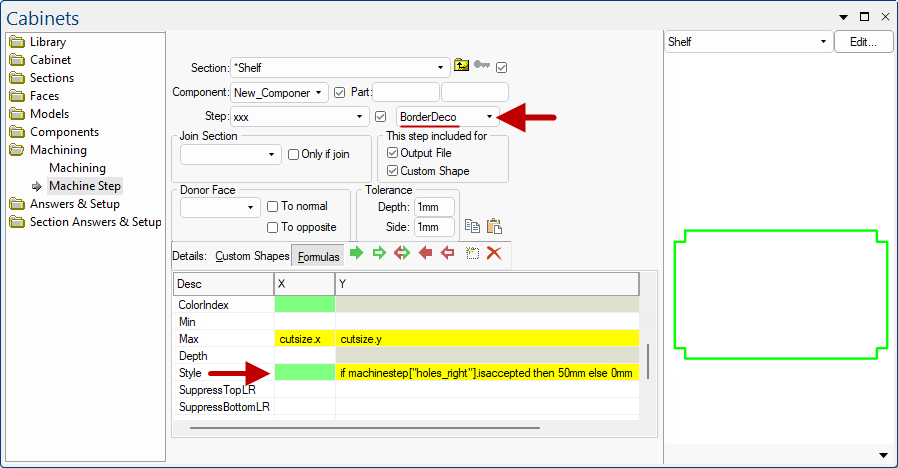
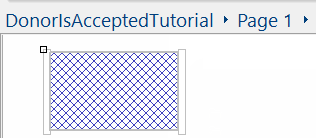
Switch to the Shelf component and create a new border step.
- Make it a BorderDeco step with a style of 4 (square insert).
- Add a new formula to control the size of the square insert
- if machinestep["holes_right"].isaccepted then 50mm else 0mm
In the image above, because the "holes_right" step is already accepted, the square insert is drawn.
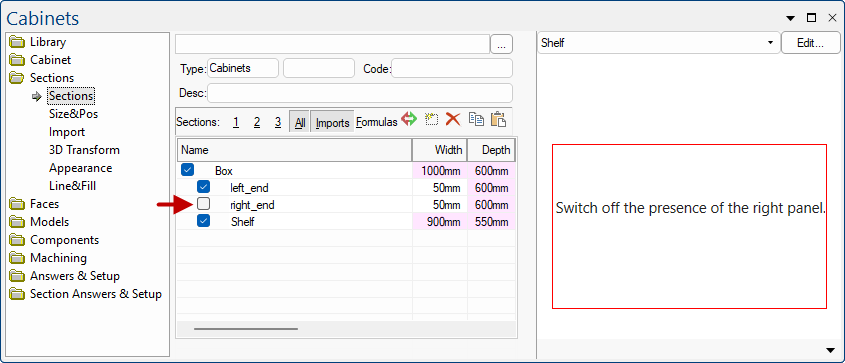
Switch to the Sections page and switch off the presence of the right panel, as shown below.
- Note that now the "holes_right" step is not accepted and therefore the square insert is not drawn.
- Switch the right panel back on to see the square insert return. (Click on image to view).
Click to view right panel turned back on
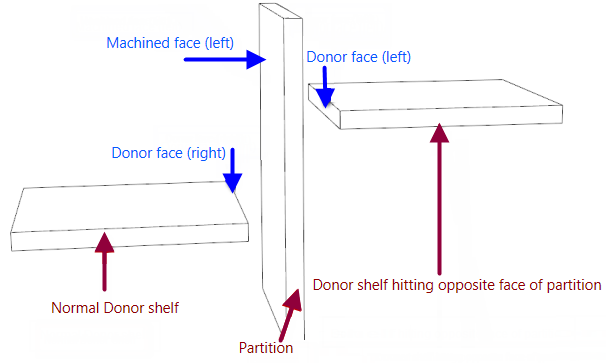
In some situations, you may have partitions which have parts connected to it on two sides.
For example, here we have a partition with a shelf hitting its "back", or "opposite" face, and a shelf hitting its "normal" face. You may only want to machine one face of the partition (rather than both sides). In this case, the holes for the back shelf will need to be drilled right through the partition.
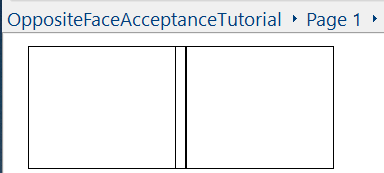
Alternatively, load OppositeFaceAcceptanceTutorial.qid into CabMasterPro.
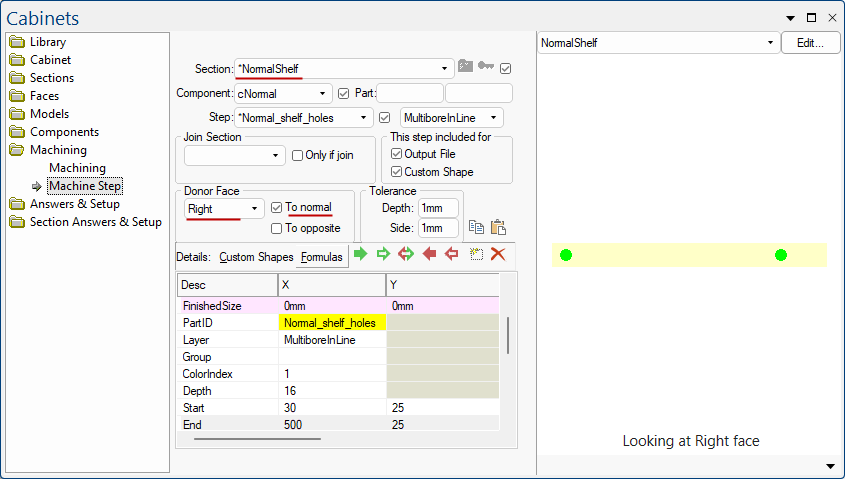
Create the donor machine step for the normal shelf.
- The right face of the shelf is hitting the partition, so set the Donor Face to "Right".
- Check the "To normal" check box, indicating that this step is intended for the normal face of the partition.
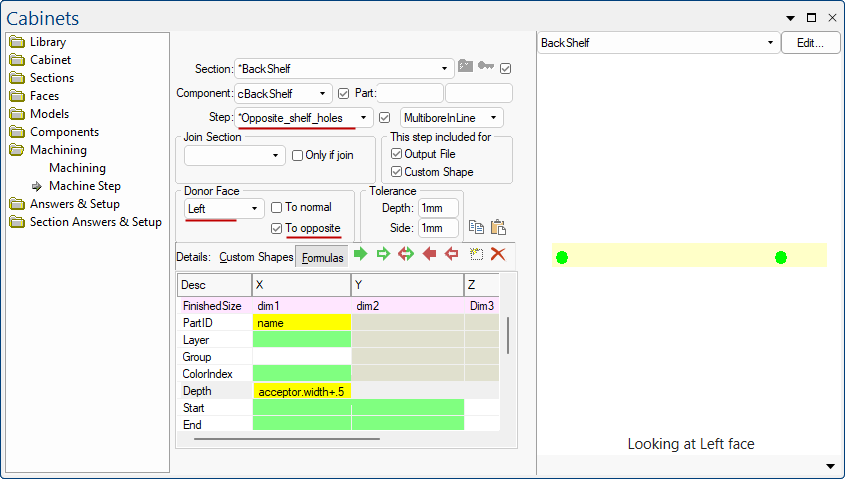
Create the donor machine step for the back shelf.
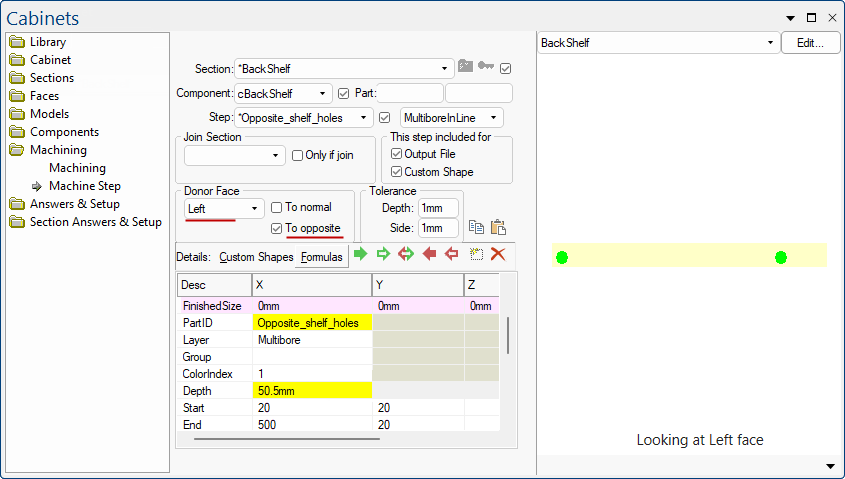
- Note that it is the left face of the shelf which is hitting the partition, so set the Donor Face to "Left".
- Since this part is hitting the opposite face, check the "To Opposite" checkbox.
- We want these drill holes to go all of the way through the accepting section, so set the formula for the depth of the drill holes to 'acceptor.width+0.5'
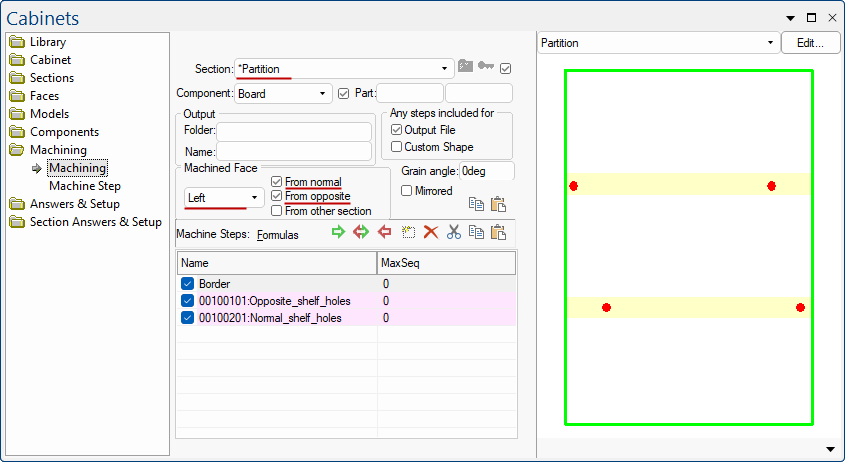
Specify the face of the section that you want to be the "top" face when the part is being machined.
- In the example provided, this is the left face of the Partition, so from the Face drop list select "Left" .
- We want to accept donor steps from both the front and back of this part, so tick both the Machine From Normal and Accept From Opposite check boxes.
- The accepted parts will appear in the preview pane.