CabMasterPro User Guide
In this tutorial, we create a simple cabinet with two ends and a shelf. The shelf is joined to the panels using holes which are drilled into the panels.
The location of these holes will be controlled by the shelf, rather than the panel.
Sample of what will be achieved in this tutorial.
We will be adding 3 rows of two holes on either side of the shelf to secure the shelf to the panel.

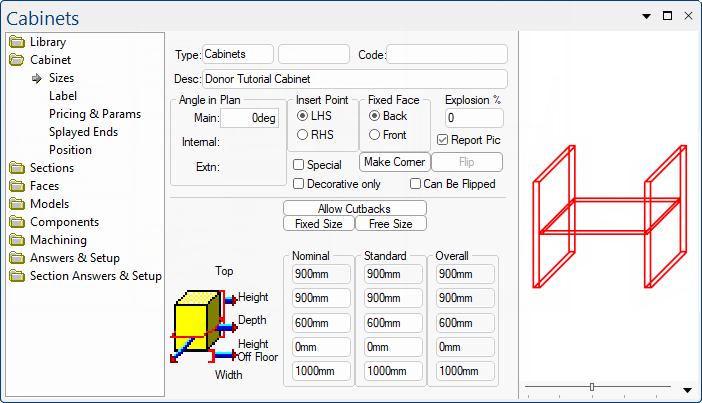
Create a standard cabinet with...
Alternatively, load DonorTutorialStart.qid into CabMasterPro. This file has the cabinet already built, ready for Step 2.
We will be adding 3 rows of two holes on either side of the shelf to secure the shelf to the panel.
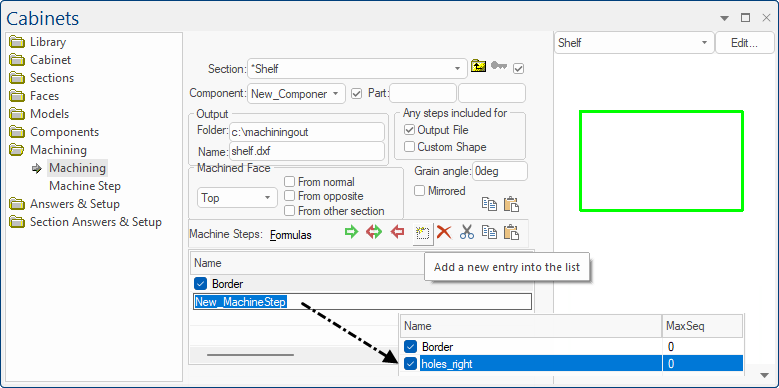
Go to the component you created for the Shelf and create the holes to be donated, as per the following instructions.
We are going to create holes defined by the shelf (not drilled in the shelf). So the donor holes will come from the shelf and get donated to the end panels. Since our example cabinet has already been built, the section name is preceded with an asterisk i.e. *Shelf, which indicates that it is accepting an item.
First we will create the right holes to be donated. Later in Step 5 we will repeat steps 2 to 4 to create the left holes to be donated.
Example and Tip
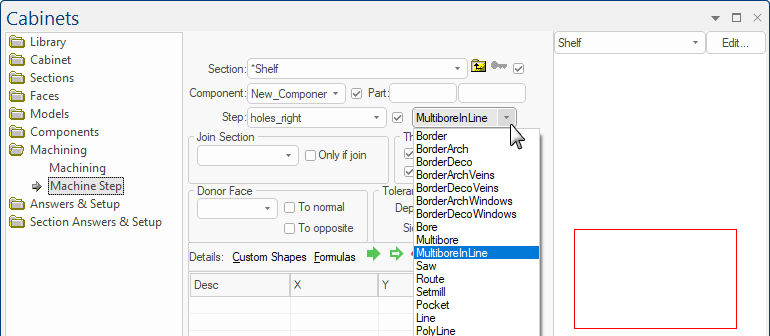
Tip: To quickly get to this page, simply double click on the 'holes_right' entry created above.
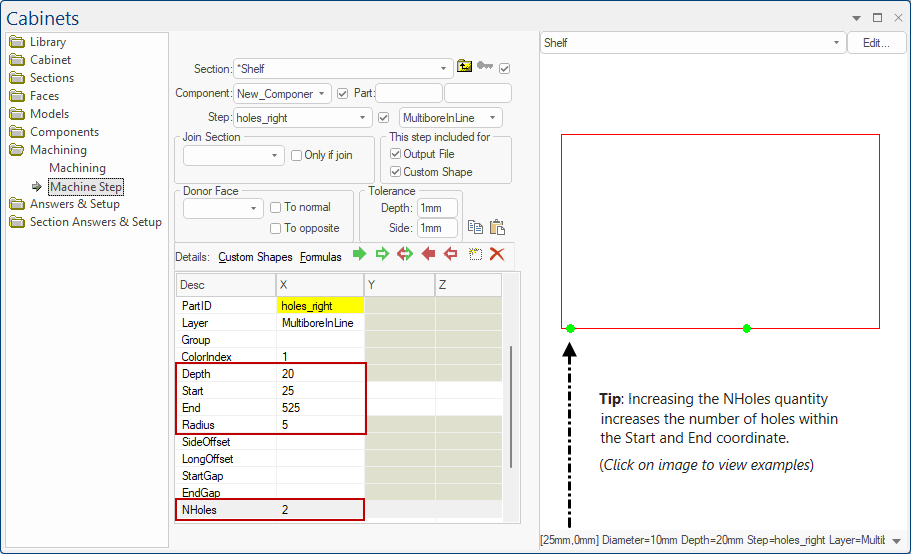
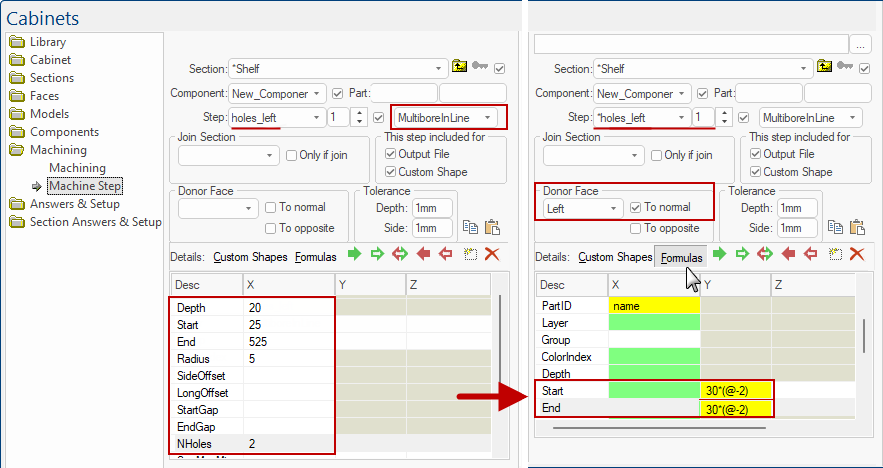
Then use the drop list, as shown, to select 'MultiboreInLine'
This will give you one set of 2 holes - click here for an example and tip on NHoles.
The preview shows the holes, which may look odd but remember the holes will end up drilled into the panel which, in this case, will be adjacent to the right end of the shelf.
Tip: Here, we only want 2 holes but increasing the NHoles quantity increases the number of holes within the Start and End coordinate. (Click on image to view examples)
Click to view more examples of NHoles
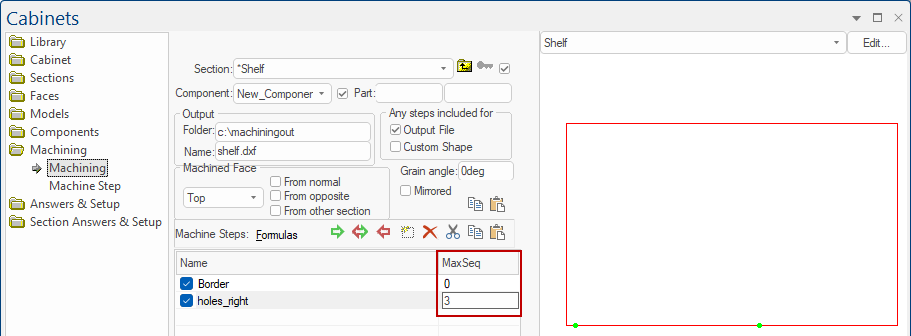
Click to view corresponding Machine Step for holes_right
The formula should automatically be added to Sequence 2 and 3 but check each using the Spinner. The @ operator extracts the last numeric sequence using the parent context, so that the Y value changes depending on the sequence value. See Built in Variables.
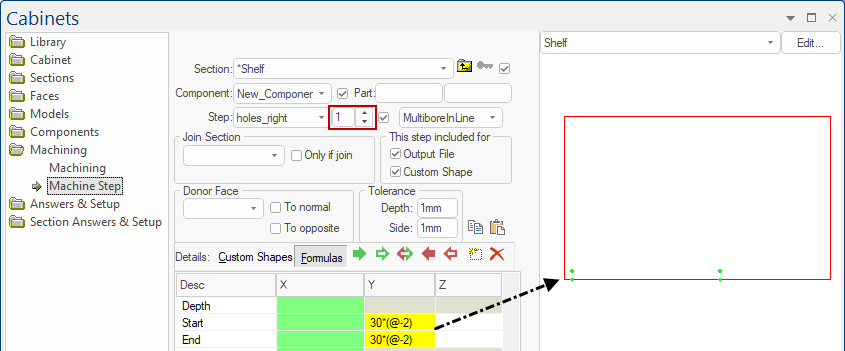
Example of a simple formula using the @ operator
Here we have simplified the formula to 30*@ which creates 2 sets of 3 holes but not at the correct position - Click on image to compare.

Click to view a holes using the formula 30*@ compared to 30*(@-2)
To confirm the formula behind a value, simply double click on the value. An information message will be presented.
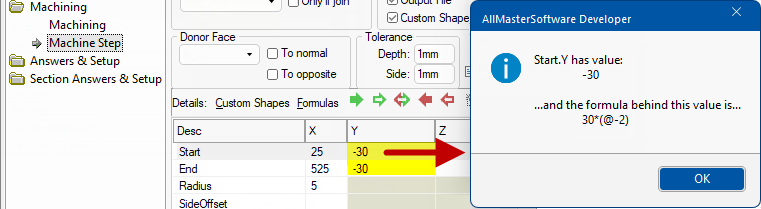
Click to view Formula behind this value
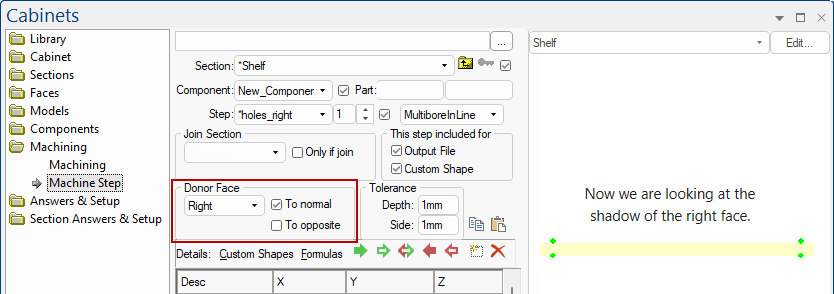
We want to the holes to be drilled into the right end panel (not the shelf) by making them donor steps, so on the Machine Step page...
Now the holes are capable of donating but we need to make the right end accept steps from the shelf, as discussed in step 4.
Optional: The tolerance specifies the maximum distance an accepting item can be and still be able to accept the donor step.
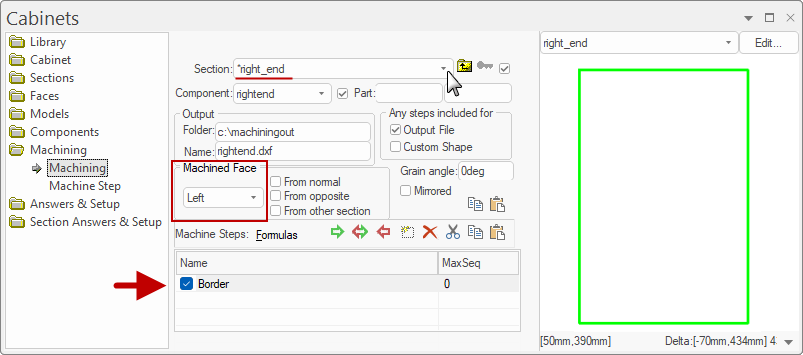
Go to the Machining page for the right end...
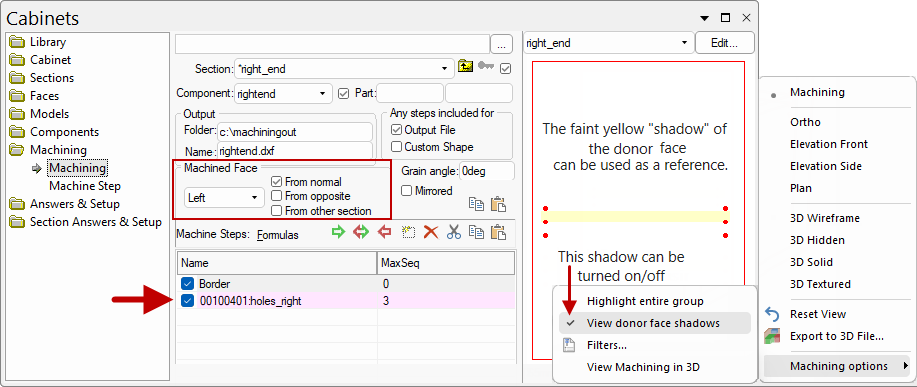
Click to 'View Machining in 3D' option turned ON
Donor steps do not have to lie inside the donor face and indeed, in this case, the holes do not.
Be aware that the Machined Face normal/opposite options work very differently to those on the Donor Face.

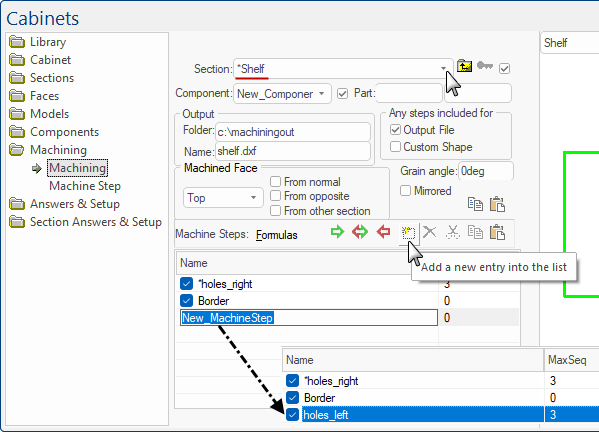
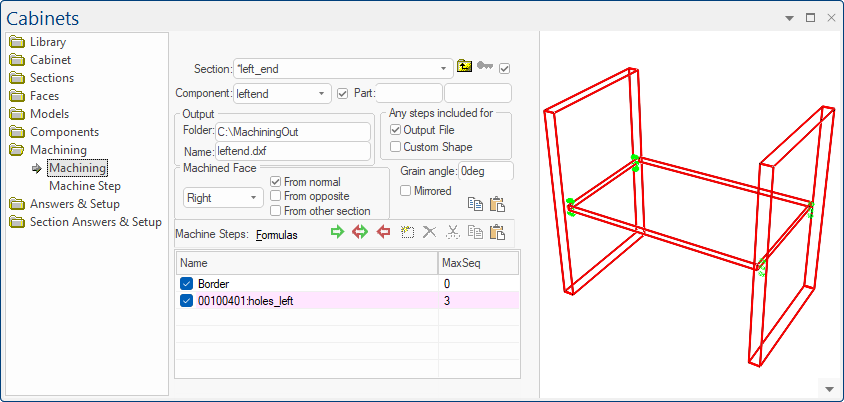
Repeat Steps 2 to 4 to add machining holes for the left panel, summarised here.
Example
Example
Example
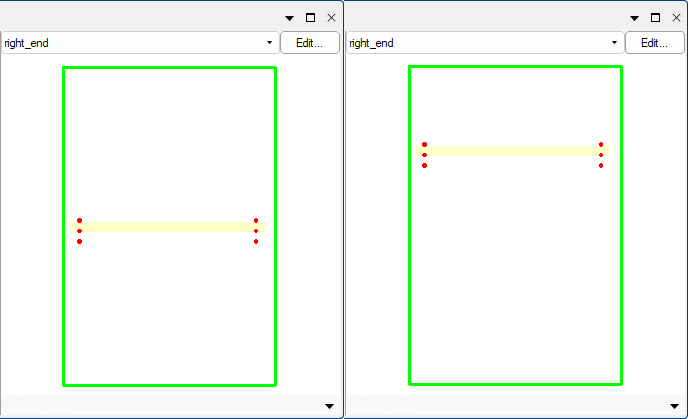
Move the shelf up and down to see the holes move accordingly.
There are a number of ways to move the shelf.
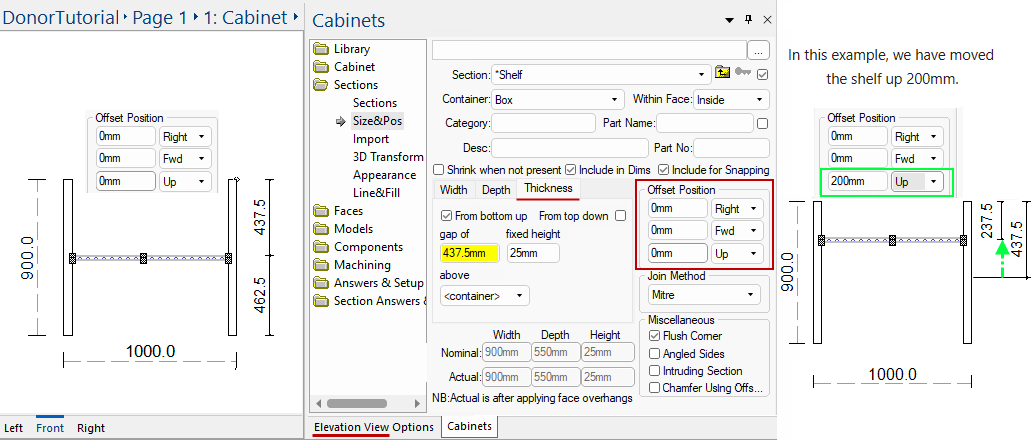
One way is to change the Offset Position
You can move the shelf up/down using the Offset Position options on the Sections > Size&Pos page.
The example shows the affect in elevation view, comparing the original position to the moved shelf position.
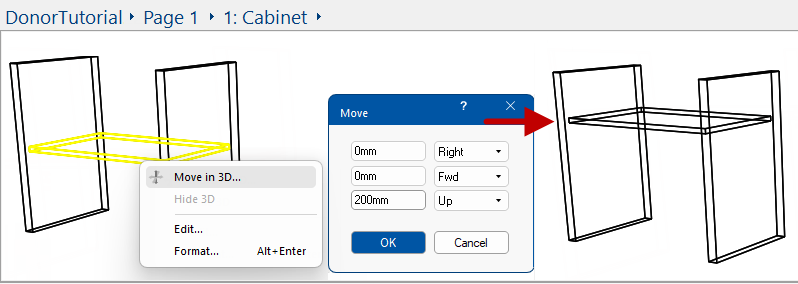
Another way is to use the 3D Move dialog
In 3D Display, you can use the Move in 3D menu option. In this example, we have moved the shelf 200mm Up.
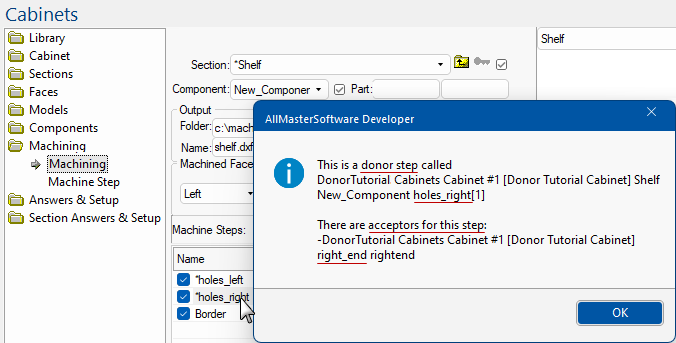
To find out which components are accepting our donor steps...