CabMasterPro User Guide
Camera view items provides the ability to :-
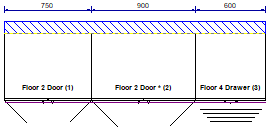
For this tutorial, simply place cabinets on your plan. Used in this example are 2 x Floor 2 Door and 1 x Floor 4 Drawer (dimensions are not important).
 Watch the video A Minute with Mike on how to set up Camera views and using the Visibilities [F9] to enhance your drawings.
 Now we will add and define a camera view.
Step 1
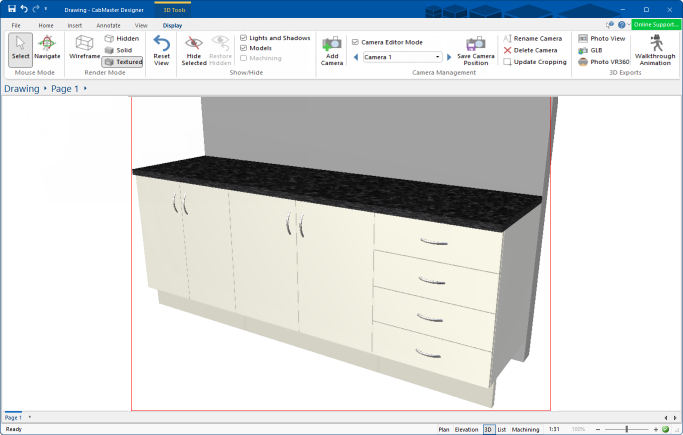
Change your View to 3D which will make available the 3D Tools | Display commands, as shown.

'Add Camera' allows you to create multiple 3D views defined as required i.e. you can zoom and/or crop portion of a view in any Render Mode.
Step 2
A red rectangle will be automatically presented, showing the portion of the 3D view selected.
A great way to navigate around in 3D is by clicking and dragging the mouse on the 3D view. Hold down [Shift] at same time to pan.
Use the scroll wheel on your mouse to zoom in/out or use the 'Update Cropping' command (example below) to change the selected portion of the 3D view.
You can even Format individual cabinets at this stage, for example to open/close doors/drawers.
Visibilities
View filters can also be set up for any camera view and therefore for 3D callouts in plan view.
For more details see the tutorial on 3D View Filters : Hide and Restore and watch the video included in that tutorial.
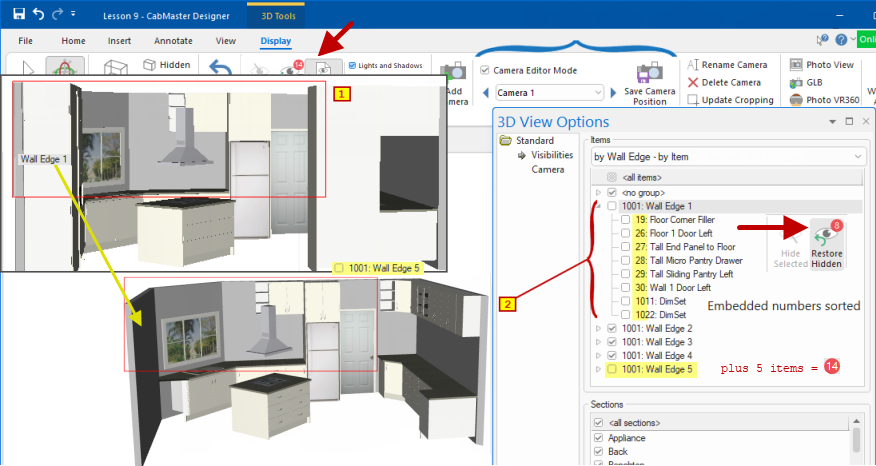
Example of Camera Editor Mode and Visibilties
In the following example, "Camera Editor Mode" is turned on and (1) Camera 1 selected and then (2) Wall 1 cabinets (8 items) unchecked/hidden as well as all cabinets on Wall 5 (5 items). The red tag therefore shows a total of 14 items hidden.
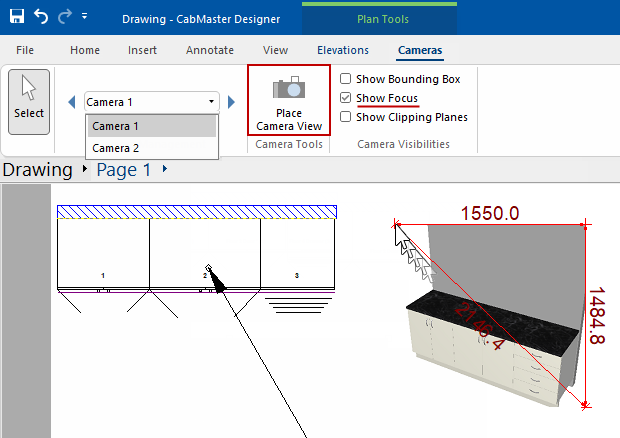
Switch back to Plan View and select the Cameras tab on the ribbon.
You can create as many camera positions as you want by using the Add Camera command icon.
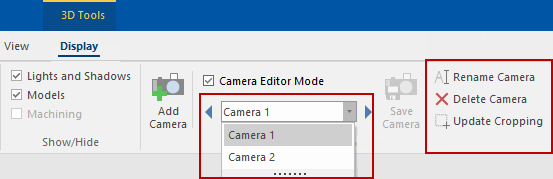
The Save Camera command will be made available only if you make adjustments (i.e. rotate, pan or zoom) to a selected camera view.
Switch between camera view items by using the left and right arrows or selecting them from the camera drop list, as shown.
You can also...
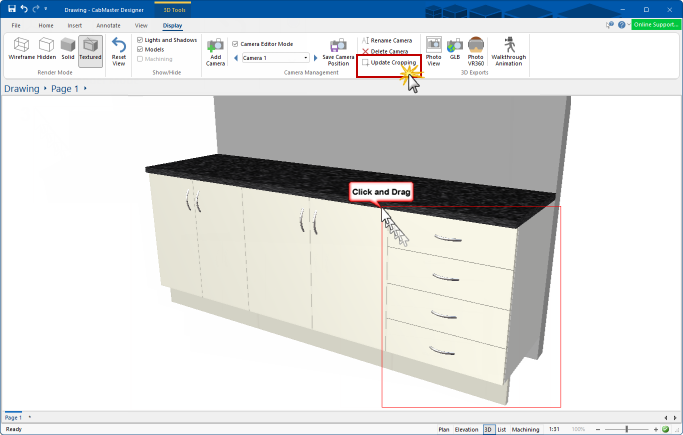
In this example, we selected Camera 1 and ...
- clicked on the Update Cropping command;
- clicked on the 3D view and using the mouse, selected the required area i.e. click and drag;
- a red rectangle will display the area of selection.
- You can now place on plan or, if previously place, it will be dynamically updated.
- Click on image to view cropped selection.
Click to view cropped selection of Camera 1 previously placed
The camera view item is dynamic, which means that as the drawing changes, the 3D view will update automatically.
Example 1 - Open and close doors and drawers
The first example shows the drawers on an individual cabinet opened and displayed dynamically as settings are changed. (Click on image)

Opening Drawers on individual cabinet - Click to view cabinet options
The second example shows the drawers and doors opened dynamically for the whole drawing by amending the settings in the Drawing Properties.

Click to view Drawing Property options
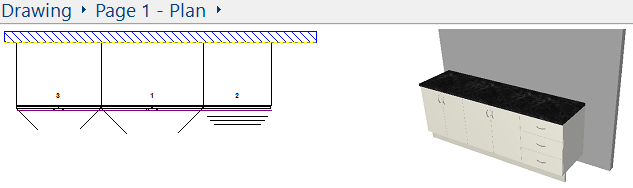
Example 2 - Change placement of cabinets
In this example we placed three cabinets and created a camera view.
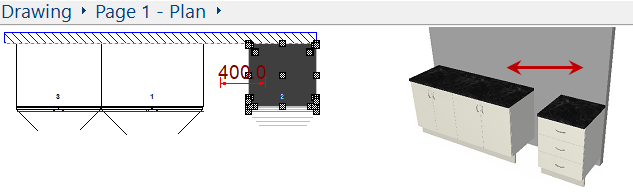
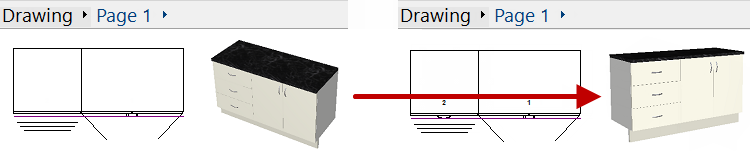
As the cabinet on the plan is moved, the camera view is dynamically updated.
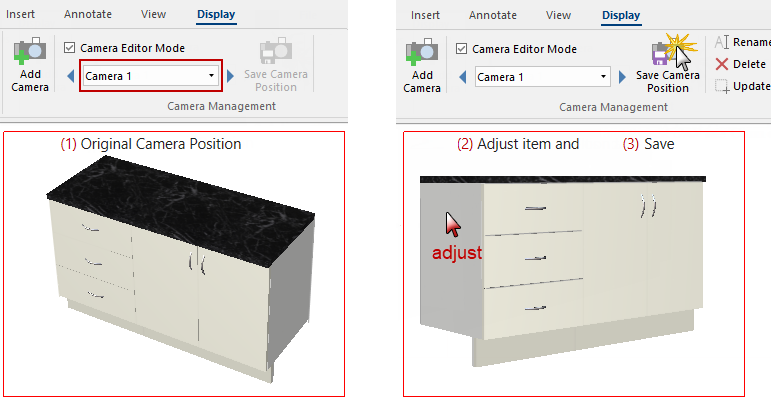
To adjust the viewpoint of a single camera view item, you need to be in 3D Display and ...

The following image shows the result on the Plan.
A Minute with Mike : This video shows you how to set up your camera views and Visibilities [F9] to enhance your drawings. [1:59 mins]