CabMasterPro User Guide
 |
This drawing tool is located on the Insert tab and can be customised with the right click Format... option.
The above image is based on tool properties Ceiling-1.qtd located in the .../ToolData/Ceiling folder (see File Location notes).
The drop lists allows you to select the <your CabMaster folder>/Bitmap/accessories folder that corresponds to the look of the ceiling in 3D Solid.
This drop list allow you to select the image (style).
If the Is Tiled check box is checked/on, then the Tile Size dimensions are used to set the image size using the X and Y edit boxes.
If unchecked/off, the image is stretched over the full size of the ceiling.
Turns on/off the reflective properties of the ceiling. Works best on surfaces that are reflective or glossy in real life.
The Percent sets the amount of reflection from 0 to 100.
This checkbox determines whether the top of the ceiling (i.e. when rotated) is visible or not in 3D Display. When ticked/on, the image will be visible from the top side of the ceiling, obscuring whatever is below. When unticked/off, you will be able to see through the ceiling.
The radio buttons allows you to control the type of ceiling.
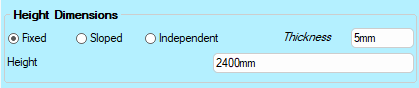
Click to view example of Fixed ceiling
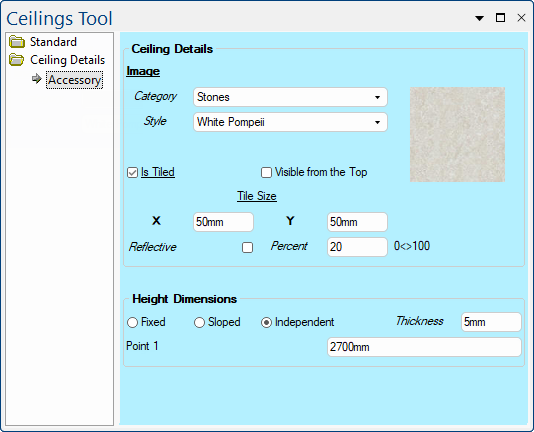
When Fixed is selected using the radio button, the Height of all points will be formula controlled by the Ceiling Height set in the Drawing properties. This creates a flat ceiling profile - click on image to view.
The Height edit box allows you to override this manually. If you select one of the other height options and again select Fixed, the formula will be reset to Drawing properties.
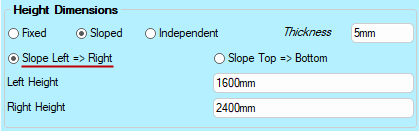
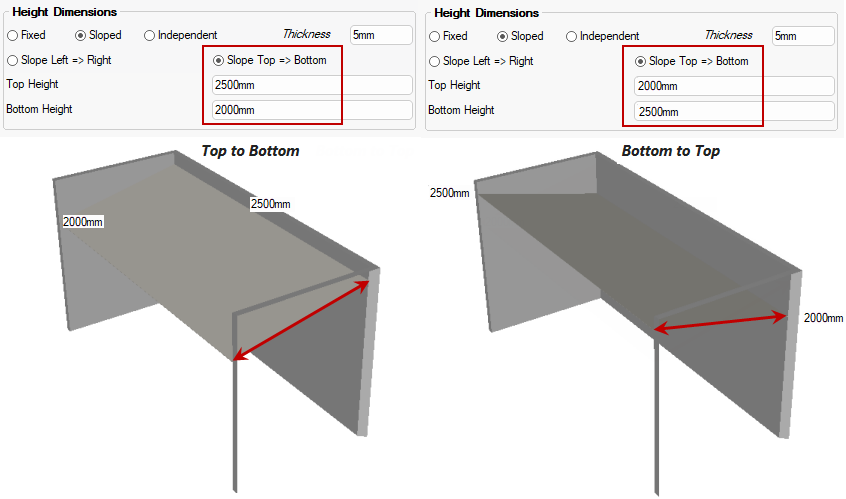
Click to view example of Sloped ceiling Left to Right
When Sloped is selected, the height dimensions will be assigned to the far end points in the direction of the slope, with the remaining points averaged between the two (2) dimensions.
The direction of the Slope can be either Left => Right (click on image above) or Top => Bottom using the radio buttons.
The height dimensions Left Height and Right Height can also be used in relation to the direction of slope, as shown in the following example.
Examples of Top to Bottom
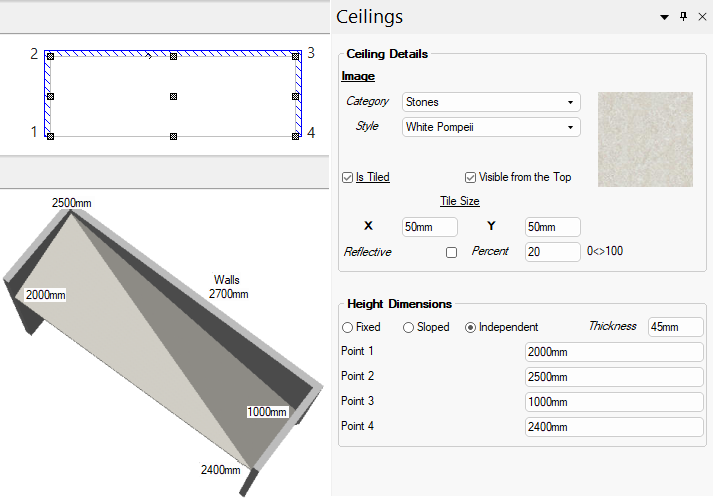
The Independent option allows you to be creative and independently set any number of points to a placed ceiling and set them at different heights.
When first selected, all point heights are set normally at Fixed height. You can then change the vertex heights to split ceilings (and floors) into multiple segments to allow peaks and valleys.
Example 1 - Peaks and Valleys
Here we have created 4 points and changed the vertex heights. The ceiling is therefore not in one plane and so has to have a peak or valley to fill in the shape.
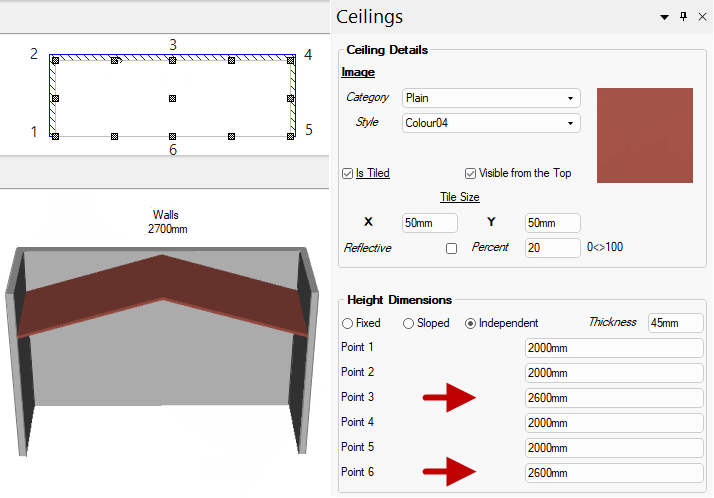
Example 2 - Pitched Ceiling
In this example we have created 6 points. Note that Point 3 and Point 6 are higher than other points, which creates a pitched ceiling.
See Ceiling Tutorial for step by step instructions.
Multiple edit boxes are only provided after a ceiling is placed and points added.
If you do not see the multiple Point Height edit boxes, click on one of the other options and back to the Independent option. This will refresh the dialog allowing height dimensions to be entered manually.
The Thickness of the ceiling can be adjusted using the edit box.