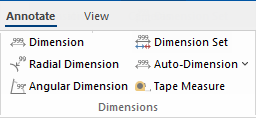

Tools used for measuring different parts of your drawing are located on the Annotate ribbon in the Dimensions group of commands.

In this tutorial we will discuss how to use the following...
The advantage of this over using the Triangulation Calculator is that you do not need measurements.
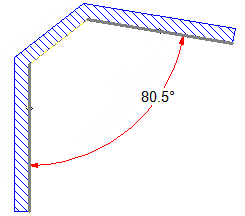
The Angular Dimension tool allows you to dimension angles quickly. Simply select the line of wall (or item such as a cabinet) with either one or two clicks, depending on where you click. You will see a rubberband movement of the arc dimension line until you click to place the dimension.
To get angular dimension click on the Angular Dimension  command icon on the Annotate ribbon, then...
 command icon on the Annotate ribbon.
The angle here is useful as we want to place another Floor Corner Filler and need to ensure that the Internal Angle is correct for placement. The angular dimension on the placed cabinet in relation to the wall has also been added i.e. 90deg.
To delete the Angular Dimension, simply select it and hit the keyboard delete key.
To select walls that are not adjacent, as in this example, you use two clicks.

This could be handy if this is a small chamfer and you are trying to get the real dimension between walls. You can then build a corner cabinet with the correct angle and chop off the back, allowing you to simply push the cabinet snugly into place.
The Radial Dimension tool allows you to dimension either the radius or diameter of placed circles, cutouts, benchtops etc.
The text and lines displayed are set using the Format option before or after placement - see discussion on Radial Dimension Tool.
To get a radial dimension click the Radial Dimension
command icon on the Annotate tab.
- Hover over the item and it will highlight the section that can be dimensioned.

Click on section and then pin it with a second mouse click, shown below left.
- You can click again if you want to extend the leader line, shown below right.
To end, simply use the Keyboard Shortcut Esc which returns you to the Select command.
You can also click the dimension command icon again or another command.