CabMasterPro User Guide
 |
For quick links to more information, click on  the options.
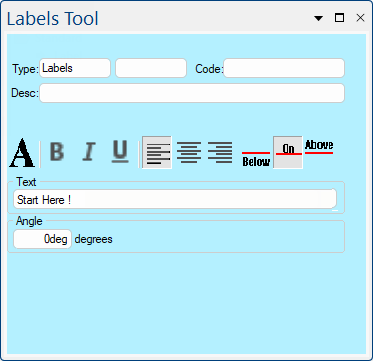
This drawing tool is located on the Annotate tab and can be customised with the right click Format... option and lets you place text into a drawing and is especially useful when creating templates using supplied variables (see topic on how to Use Variables).
Watch the Video  below to see how easy it is to utilise the Label Tool for Annotations !
Refer Common Controls.
The Text edit box allows you to set the text that will be displayed and is therefore the most important control on this page. As you type into the Text box, the label will update itself if it is visible on the drawing page.
Dimensions use this edit box to show a range of different items such as units, decimals, notations - see Dimensions Format Label tutorial.
The Legacy tool was used to create the formula controlled text that can be selected from the Label drop menu, shown below left.
This v12.1 tool allows you to Use Text in the same way as discussed above or Use Variables which are formula controlled, used mainly for templates.
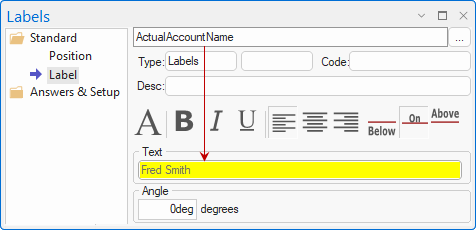
This example shows how the Label Classic Tool variable "Customer Name" picks up the Account Name provided in the Drawing properties.
This is equivalent to using the legacy variable "CustomerName" from the Label drop menu, shown below left.
Formula Controlled Text Variables
A variable in this context is a unique, descriptive label used to refer to the stored data in the code and is therefore formula controlled text for use with template creation and is defined by being highlighted in yellow, as shown right.
If the .../ToolData/Label folder is empty contact our CabMaster Support Team.
Only Developer Software Users can formula-control the Text box of a label.

Clicking the large "A" icon opens the standard Windows Font dialog, where you can set the typeface, point size, style, effects and colour of the text. There is a sample area on the font dialog where you can see how the selected options will affect the text appearance. When you close the dialog, the text in the edit box updates to reflect the selected font.

These buttons are used to turn the three style options on or off - 'Bold', 'Italic' or 'Underlined'. Each button is independent so you can use any combination of styles at once. When a button appears depressed the corresponding style is enabled. The three styles are also available from the Font dialog.

The Justification buttons control where the text of a label appears horizontally relative to its attachment point. Unlike the Style buttons, these are linked so you can only select one at a time. From left to right, the buttons select left, centre and right justification, just like in any word processing application. With a Label, this only shifts the text left and right.

The Alignment of a label is similar to the justification, except it controls the vertical position relative to the attachment point.
The three buttons Below, Thru and Above are linked so you can only select one at a time.
This is the angle that the text appears at on the drawing, with normal horizontal text being at zero degrees. You can enter any angle in either degrees or radians, and the text will be rotated around its attachment point by that angle.
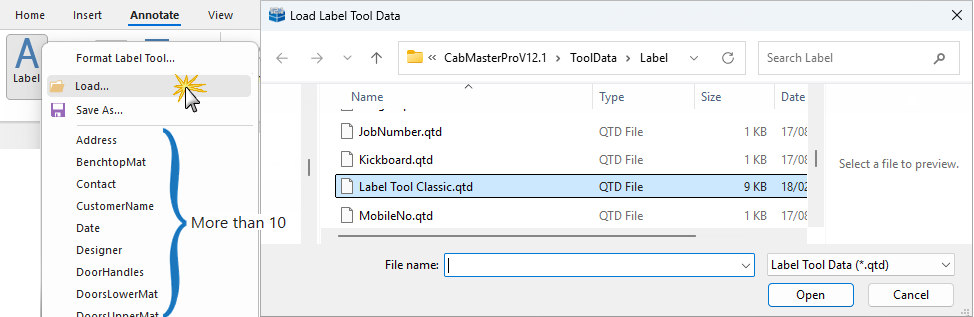
The Label Tool Classic has been added in v12.1 and will make formatting text simpler.
You may need to use the Load command if the Label Tool Classic QTD file required is not on your list - remember the list only displays up to 10 available tools (in alphabetical order). When selected the following dialog is presented and you can simply select the required tool file, as shown.
A Minute With Mike : Utilising the Label Tool for Annotations [1:41 mins]
