CabMasterPro User Guide
When cutting square corner of a door profile, the tool needs to be a conical tool, with a sharp nose, as the tool will lift in the corner at the angle of the tools profile to the surface and back down to create this squared look of an internal corner on a bevelled line.
The tool needs to have a needle point.
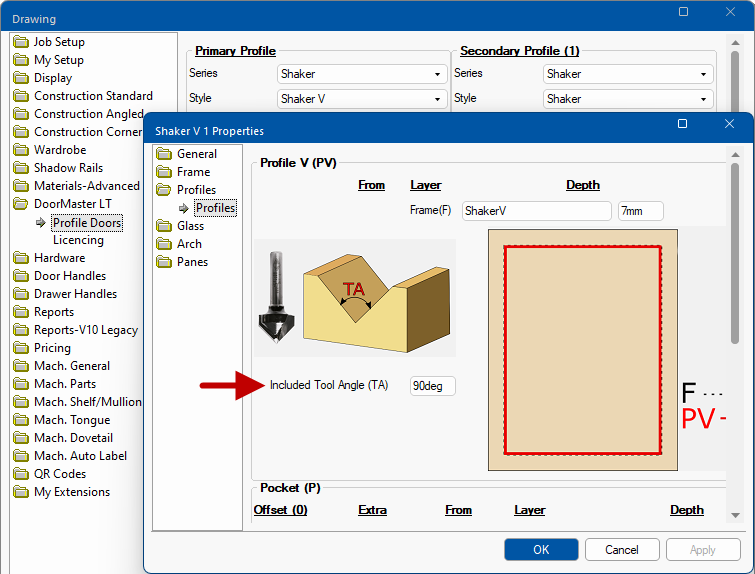
In CabMaster's DoorMaster-LT, the toolpath of the Shaker V profile is automatically offset by a calculation using the Angle of the Tool.
Shaker V Tool Angle
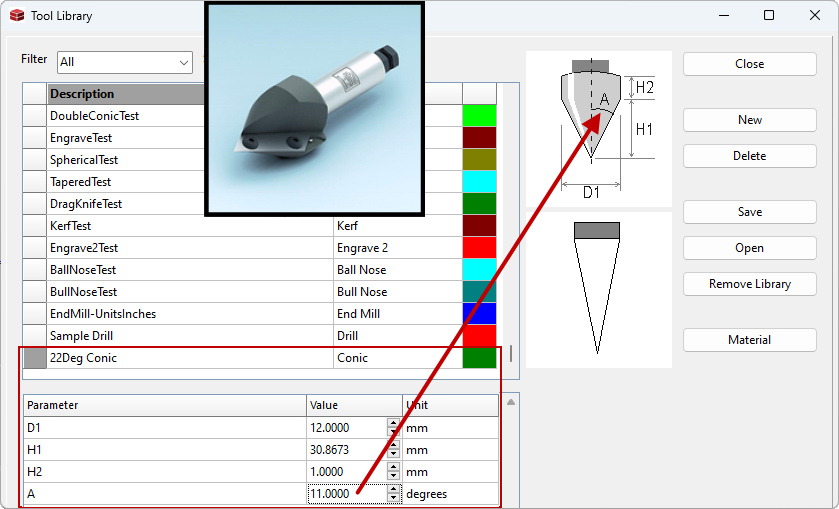
Tools and Strategies can be amended in CNC Config (CabMasterPro Machine View) or in EzyNest (diagrams used in this topic).
The diagram below is a setup of an 11 Degree cutter (otherwise known as a 22 Conic).
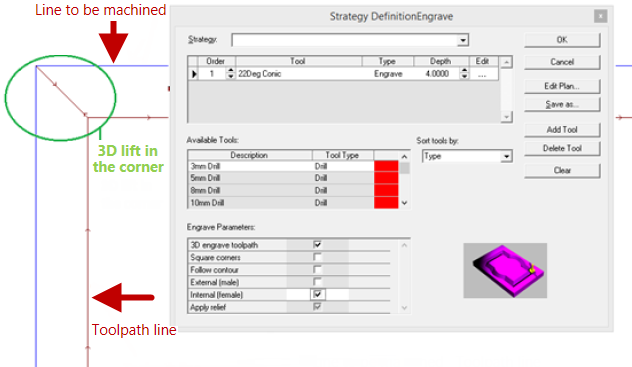
The Strategy to use on EzyNest is a 3D Engrave, and it will create a toolpath line that looks like the example below.
The 3D lift in the corner is calculated in EzyNest according to the angle specified as the “A” of the tool (see above diagram). EzyNest only requires the angle of the tool from the centreline out to the profile.
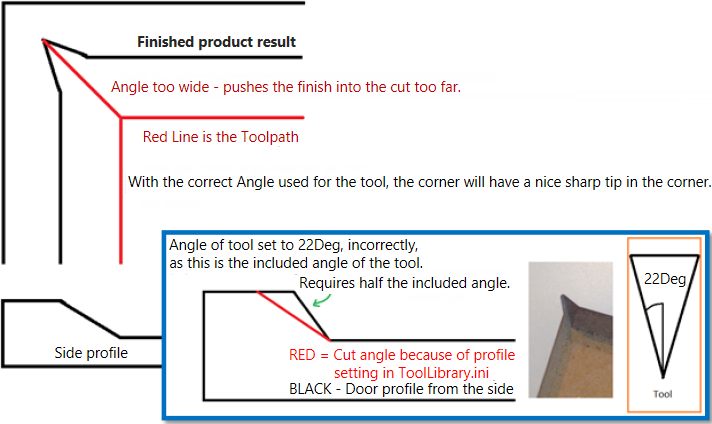
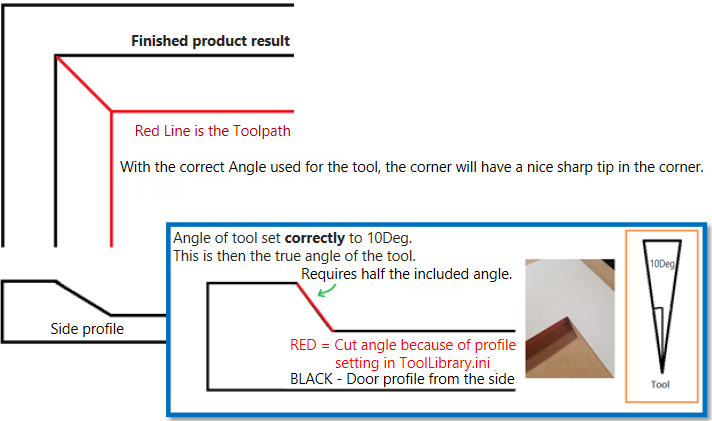
When you set this angle in the EzyNest tool library, you can get a poor finish in the corners - described below.
If we set the angle of the tool too wide (for example if the angle of the tool was 11Deg, and we mistakenly called it 22Deg), when EzyNest creates the 3D rise in the corner, it will be rising on a 22Deg which will make the tool to cut into the finished product too far.
If we set the angle of the tool too shallow (for example if we set the angle of the same tool to 7.5Deg instead), we will make EzyNest do the 3D rise in the corner too steep, and not trim away the corner to create the sharp corner it is intended to do.