
 |
For quick links to more information, click on  the options or another page.
Text Boxes can be useful for drawing attention to specific areas on your drawing. See also Leader Lines Tool.
This drawing tool is located on the Annotate tab and can be customised with the right click Format... option.
Refer Common Controls.

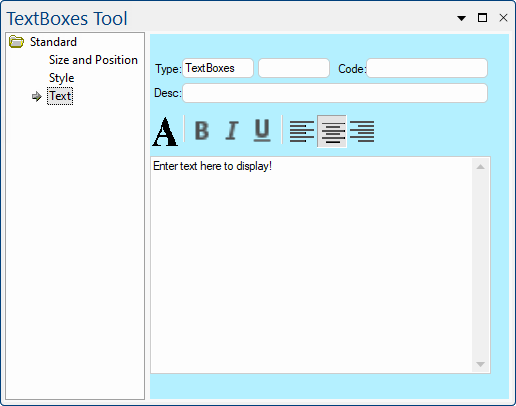
Clicking the large "A" icon opens the standard Windows font dialog, where you can set the typeface, point size, style, effects and colour of the text. There is a sample area on the font dialog where you can see how the selected options will affect the text appearance. When you close the dialog, the text in the edit box updates to reflect the selected font.

These buttons are used to turn the three style options on or off - bold, italic or underlined. Each button is independent so you can use any combination of styles at once. When a button appears depressed the corresponding style is enabled. The three styles are also available from the Font dialog.

The Justification buttons control where the text of a label appears horizontally relative to its attachment point. Unlike the Style buttons, these are linked so you can only select one at a time.
From left to right, the buttons select left, centre and right justification, just like in any word processing application. With a Label, this only shifts the text left and right but with the Text Box it aligns all the lines of text to one side (or the centre) of the text box.
A text box is an object you can add to your document that lets you put and type text anywhere on your drawing. It is very similar to the Rectangle tool, except it can have a block of text inside it, with the standard Size, Position pages (when placed), and Style pages.
It does not have the vertical alignment controls, but does have an area for you to enter the text it will display.