CabMasterPro User Guide
In order to do this tutorial, we will create a test drawing in CabMaster called 'Smith'.
This tutorial assumes that your Panel Estimator is setup correctly - see Introduction.
 Watch the Video which discusses setting up and using panel estimator.
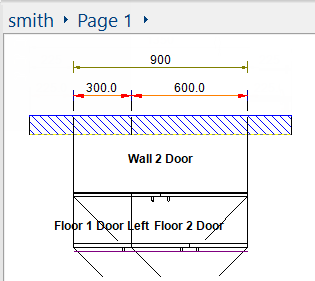
Open CabMaster and place the following cabinets i.e. Floor 1 Door 300mm, Floor 2 Door 600mm and Wall 2 Door 900mm.
Click to view Materials used for this drawing
Then export from CabMaster from the File menu i.e. Export > Companion Products > Panel Estimator
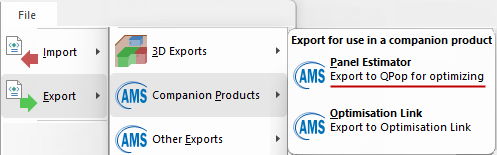
Click to Expand
This will automatically open Panel Estimator enabling you to import this job/drawing.
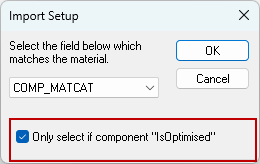
If this is the first time using Panel Estimator you will need to turn on the Only select if component "IsOptimised" option. (You should only need to do this once).
File > Import Setup and enable option by ticking the check box, shown. The drop list allows you to select the field which matches the material - See Extra Notes.
Click to Expand
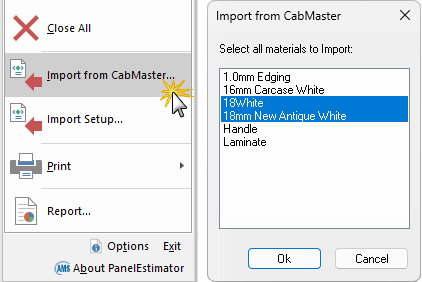
From the File men in Panel Estimator, select Import from CabMaster which will open the corresponding dialog, as shown.
Select the required material(s) to import from CabMaster and click on the Ok button.
Click to Expand
Import from CabMaster dialog lists all the components used in the cabinets within our ‘Smith’ CabMaster drawing.
For this lesson, the materials that we wish to optimise are Door and Whiteboard as illustrated. Multiple materials can be selected/de-selected by clicking on them.
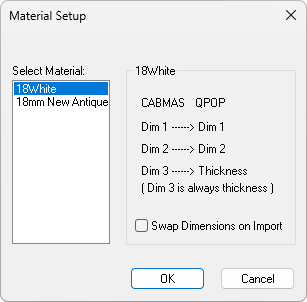
The Material Setup dialog will be displayed allowing you to select the field which matches the material.
Click to view Materials Manager > Optimise settings
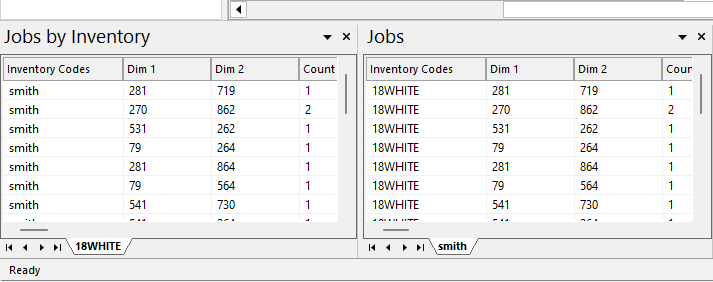
When you click OK, the following windows will be populated i.e. Jobs by Inventory [18White tab] and Jobs [smith tab].
Click to view Panels/Boards window
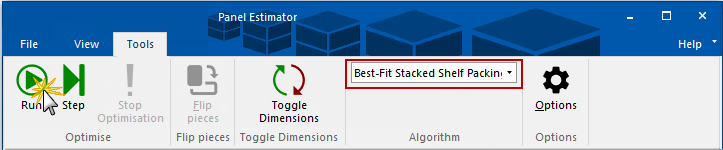
Select one of the four Algorithms from the drop list and click on the Run button to 'optimise' panels using the boards available from your inventory.
Click to view an example of an Inventory message
In the Patterns window you will now see a list of the materials and all the optimised patterns for each material.
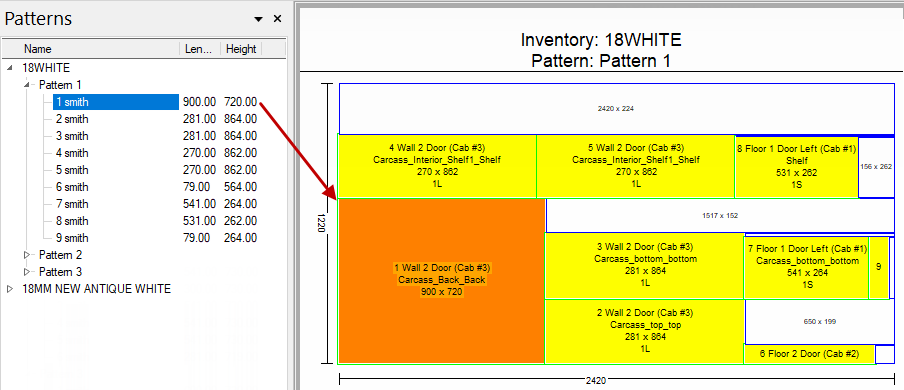
Click to Expand
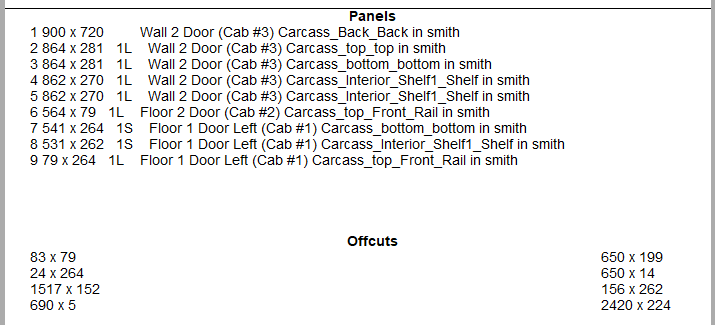
View window - List of Panels and Offcuts
The following relates to the example above i.e. 18WHITE Pattern 1. Simply scroll to the bottom of the display...
Panel Estimator handles any size board on which you may want to place panels.
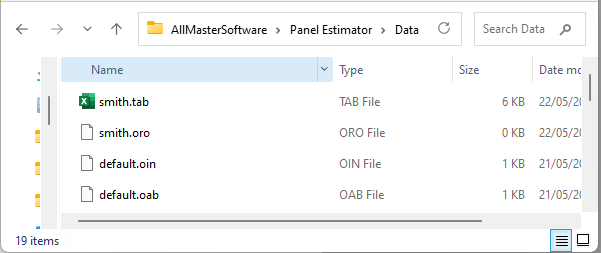
To Save your files to the Panel Estimator/Data folder...
Example of Data folder
This video is a recording of a webinar which discusses setting up and using panel estimator. (31:34 mins)