CabMasterPro User Guide
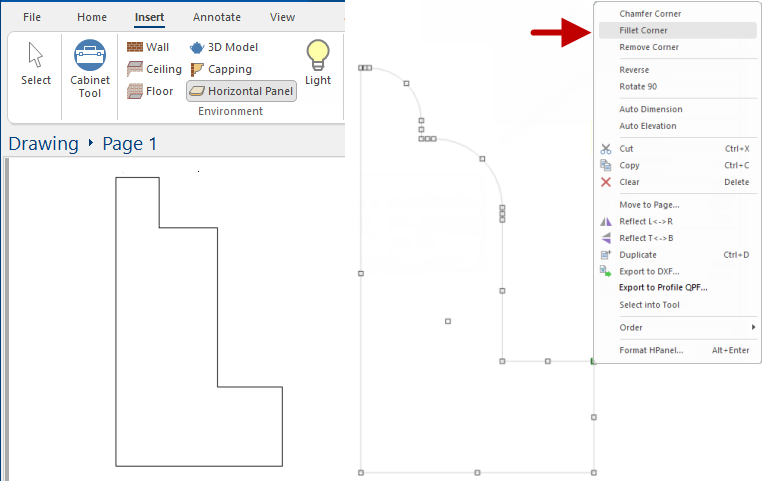
This command lets you insert a Horizontal Panel (or HPanel) into a drawing. A HPanel is drawn in a similar manner to a Poly and allows you to place horizontal sections that may form unusual shapes, which can represent benchtops or shelves for example.
 Watch the Video : A Minute with Mike on how to use the Horizontal Panel to create unusual shapes or benchtops. You can also create for example, a border of a polyshape, for Export to DXF and then import this dxf file for reuse at a later time for machining.
 In this tutorial we will create a shape for a skirting/capping profile using the Horizontal Panel Tool located on the Insert command tab.
To place simply select the tool and click the corner points on the plan view.
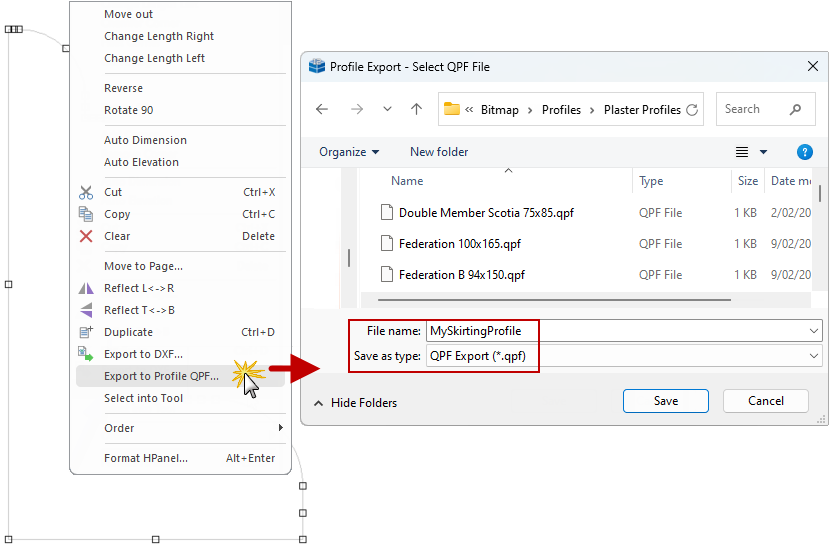
Once you the shape you want, right click and select the 'Export to Profile QPF...'
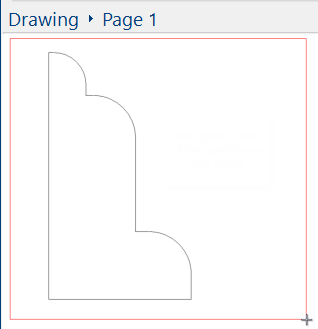
You will also need to create a .jpg image of the profile that you just created for CabMasterPro to display in the Drawing Properties.
 which is a utility provided with Windows, to grab a snip of the profile on your plan.
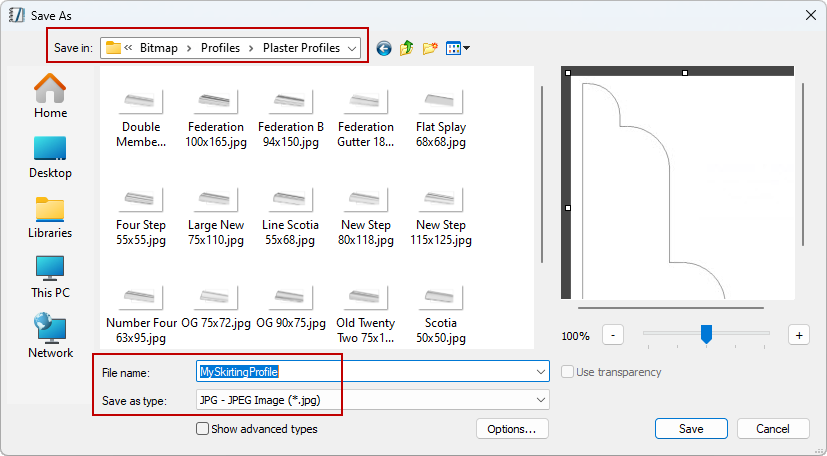
 Now you must save the .jpg in the same folder as the .QPF file saved in Step 2 with the same name.
Example
 that uses the new profile you have just created.
 A Minute with Mike : This video takes you on a fearless journey through the realm of horizontal panels. [2:06 mins]