CabMasterPro User Guide
Label Designer is a simple design facility that allows you to layout the label using the available data fields. These include the ability to add pictures, static/default text, fonts, barcodes etc.
LDS and LDL files.
The Label Designer has a configuration file (xml format) which resides in the same folder called LabelDesignerSettings.lds
Names of available data fields are stored in 'LabelDataConfiguration.LDL' in an xml format.
Any number of data fields can be used, but the data field names should match those being exported by the source of the data (when using a CabMaster Software™ product this is done through the LabelXMLExtras.txt file, discussed later in this topic).
 Watch the Video which discusses using Label Designer.
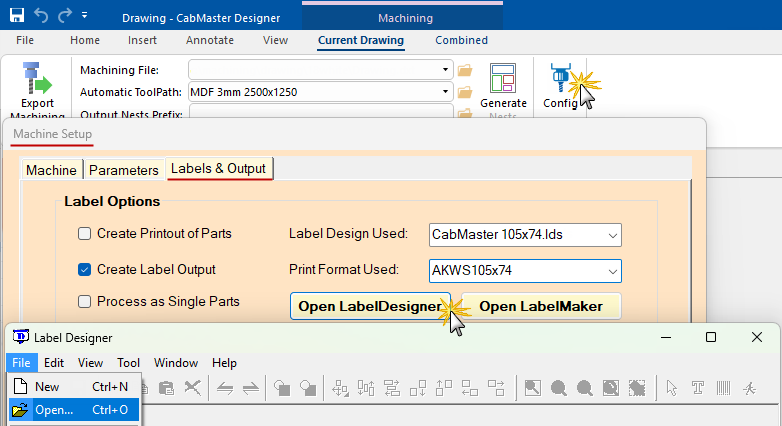
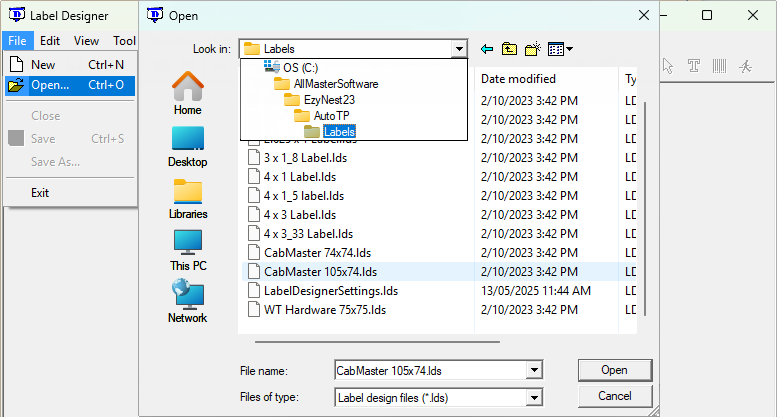
LabelDesigner can be opened from a desktop shortcut. Alternatively, you can...
OR
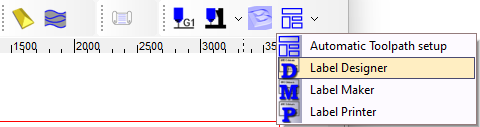
Located under the ATP menu drop list (EzyNest 6 and later)
EzyNest 6 and later : From the ATP toolbar button drop menu, select Label Designer or from the File menu (click on image).
Click to Expand
OR
Exe files are located in the AutoTP/Labels folder (EzyNest 5 or earlier)
EzyNest 5 or earlier : You will need to open the Label Designer application directly from the windows file explorer.
This is found in the EzyNest folder, typically located in C:\AllMasterSoftware\EzyNest5\AutoTP\Labels\LabelDesigner.exe
Once you open the Label Designer, you will first want to maximize the application. This will make it far easier to modify the label design once it is opened.
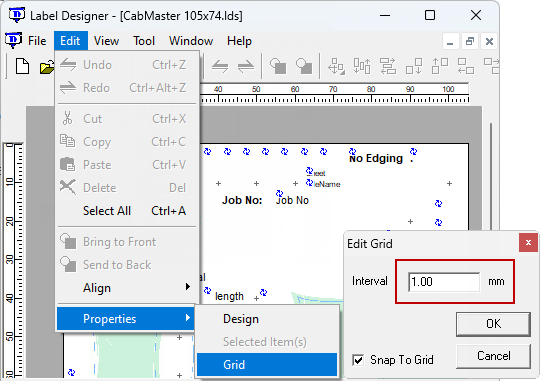
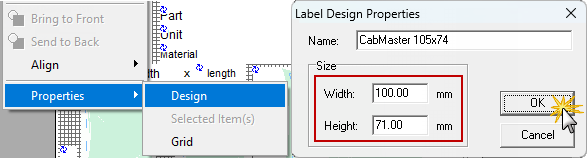
If you need to adjust the size of the label or the name of the label design, this can be done in the Design properties of the label.
From the Edit menu, select Properties > Design as shown.
Click to Expand
Keep in mind if you are making the label design smaller, some objects on the edge of the label may no longer fit on the label design. To avoid this, it is best to move everything on the design away from the edge before reducing the label size.
The Name specified in the design properties is not automatically the same as the file name of the label design. This label design name is referred to in some other aspects of the label settings in EzyNest, so the best practice is to set this design name the same as the label design’s file name.
Name can be selected on either the CNC Config Machine Setup > Labels & Outputs tab or the EzyNest ATP > Processing tab
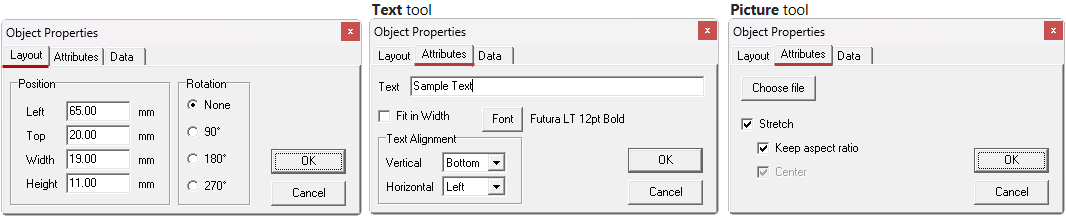
There are three tools to add information to your label designs i.e. the Text tool, Barcode tool and Picture tool...
To create a new text field or picture and place on the label design, simply...
- click on the tool to select it,
- then click and drag on the space you want it to occupy on the label design.
- notice that the cursor indicates that the Text tool is used in this example.

Modify existing text or image objects properties on the label, by double clicking on them with the Select Tool
This will open the Object Properties dialog, as shown above, allowing amendments to existing details.
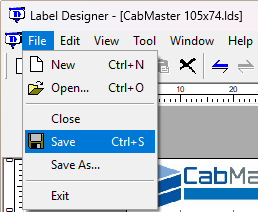
Remember that, like all file after additions or amendments you must Save your changes.
In a production environment, many of the text fields will need to contain different information for each part or drawing (e.g. part measurements, job number, etc). This can be achieved by using placeholders when placing or editing an object.
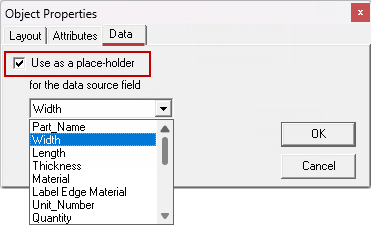
Open the required Label Designer file, then create a new text field and place on the label design, then...
For example, if you want to display the width of the part, select the ‘Width’ from the data source list. This will then replace the text field you placed with the actual width of the part when the label is generated.
You can also use the Data tab to check which data source is being used.
Simply use the Select tool  and double click on the area acting as a placeholder to open the Object Properties.
Use the Zoom In tool to make it easier to select (also available from the View menu).
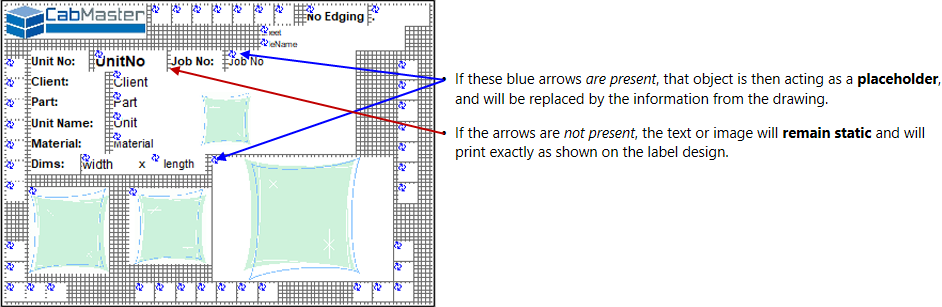
When looking at the existing label design you can see which objects are placeholders and which are static by checking whether the object has blue arrows in the top left corner.
In some cases, there may be certain job information you want as a placeholder on the labels that is not available as a pre configured data source.
In order for the data to be available in the label designs, the information needs to be present in both the exported files that are processed through EzyNest, as well as the label data configuration file from the label designer itself.
The first step is to make sure the information you want to show on the labels is included in the ‘dxt’ list file that is exported from your CabMaster Software™ application. This is the file that includes all the information for the job and each part as it is processed through EzyNest to create your labels and output files.
We will now discuss how.
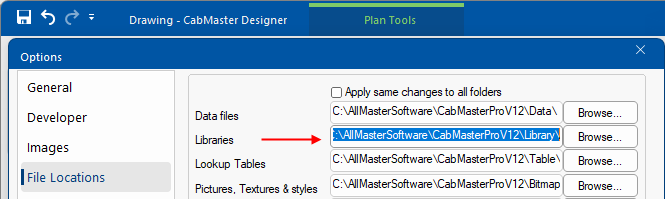
In order to add any new data fields to the exported machining files, you will need to adjust the LabelXMLExtras.txt file in the Library folder of you program's installed location. To locate, go to File Locations [F10] in the CabMaster Software™ application and copy the Libraries file location into Windows Explorer.
File Location of LabelXMLExtras.txt
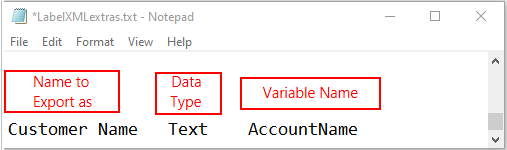
The LabelXMLExtras.txt file will have a list of pre configured data fields, to add a new one you will just need to make a new entry at the bottom of the file. The text file is in a tab separated format, this means that you will need to press the <tab> key between each column for it to read the data correctly when exporting.
The structure of the file is as follows:
Exported name <tab> Data type (usually 'Text') <tab> Variable from program
For example, if you wanted to add the Account Name from CabMaster...
- you can hover over the text field from within the program and it will tell you what the variable name is.
- Then you will just need to add that variable into the LabelXMLExtras.txt file, as shown below.
Make sure you separate the three columns with tabs, or it will not export correctly.You can then check if this exported correctly by restarting the CabMaster program, then...
- exporting [F8] a file; and
- opening the exported dxt file.
- usually found in C:\Machining\drawing name\material name\
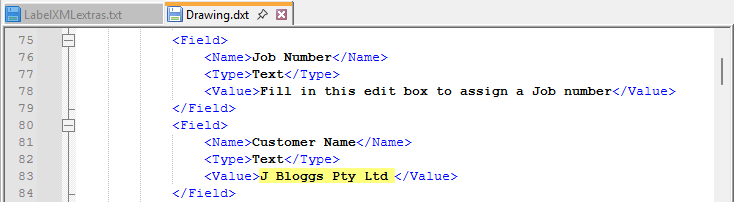
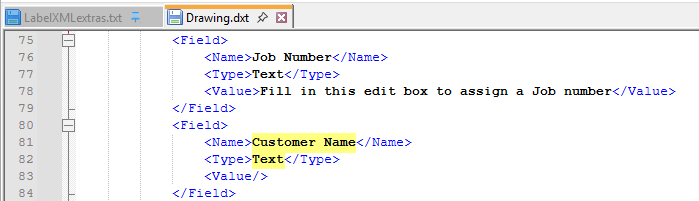
The dxt should now show the custom field you entered into the LabelXMLExtras.txt
Notice that the Customer Name value above is blank, as you now need to add a reference to this new field in the Label Data Configuration within the Label Designer to assign a value, discussed next.
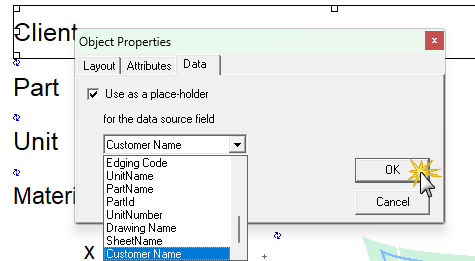
Once the information you want to add to the label is present in the dxt file, all that is left to do is to add a reference to this new field in the Label Data Configuration within the label designer. This can be done from within the Label Designer application when assigning a placeholder.
Simply use the Select tool
Use the Zoom In tool to make it easier to select (also available from the View menu).
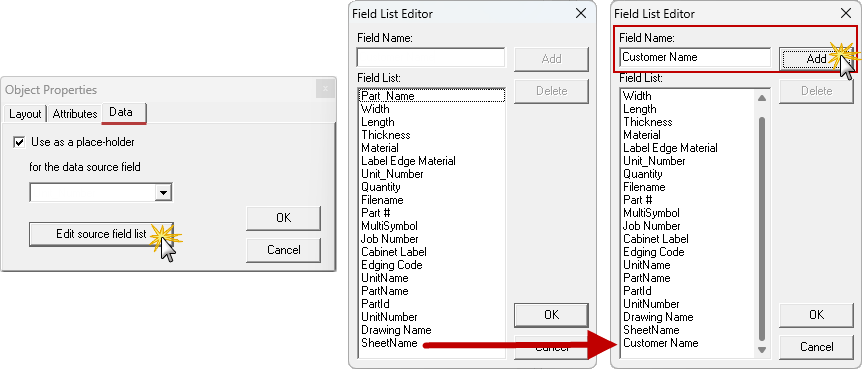
To add a new data source, go to the object properties like you usually would when adding a placeholder, then in the Data tab...
- click on the Edit source field list button.
- This will then pop up with a Field List Editor window which will allow you to add (or remove) any data fields from your data source list.
- to add your new data source is type the name of the field as shown in the dxt file and click 'Add'.
- you should now be able to assign that value as a placeholder in the Label Designer.
 The field name you enter into the field list editor must exactly match the entry you made in the LabelXMLextras.txt file, bearing in mind the case (i.e. Upper and Lower), as well as any separator or special characters (e.g. spaces etc.)
The Customer Name value now picks up the data added to the Drawing Properties.