Measuring In Machine Preview
In This Topic
How do I measure a part in Machine Preview?
The machining view in the preview pane has its own status bar with similar behaviour to the Status Bar for the main application window.
Place a Floor cabinet on the drawing plan, then...
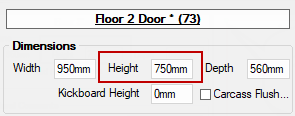
- For this example, ensure the Height is 750mm and the Kickboard Height is 0mm.
- Change the Preview Pane to Machining using the menu button, bottom right (click on image).

Click to see how to change preview to Machining
Now we will measure the height of the carcass Back (select from drop list).

Click to Expand
If using this method, then it is a good idea to maximise the preview pane, i.e. double click the title bar or use maximise button top RH corner, as status bar details will be truncated if too short. Also ensure the cabinet's property inspector is set to Floating.
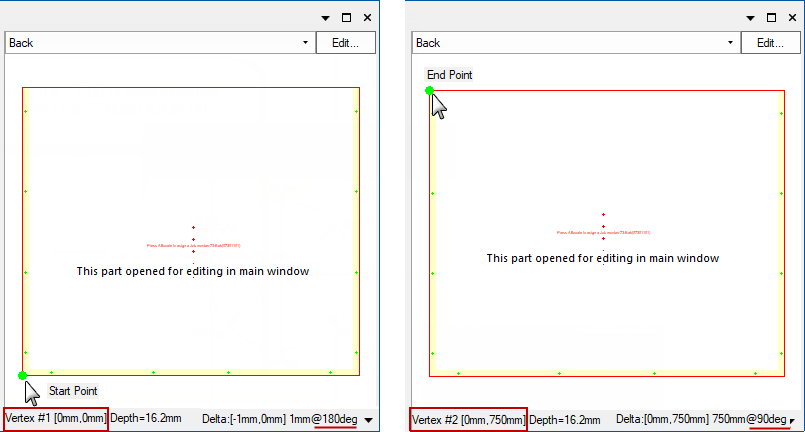
- Start measurement by clicking at applicable start point on the part.
- Note the bottom left hand corner of preview pane gives you the x, y coordinate i.e. 0mm,0mm.
- The 'Depth' of the material is also shown, in this case 16.2mm.
- End measurement by again clicking at applicable end point on the part.
- The bottom RH corner shows you Delta and Distance Information and Angle.
- Note that in this example, the Dist corresponds to the 'Height' of the cabinet i.e. 750mm, as we are measuring the back of carcass.
Clicking on the part edge will display like this...

- [544mm, 0mm] relates to the point at which you clicked
- which is on the line going right to left (544mm,0mm) to (0mm,0mm) i.e. the line is 544mm long.
See Also
Machining > Machine Editing


