CabMasterPro User Guide
The Machining Editor allows you to easily edit the machining of each part of a selected cabinet.
Features include:-
The simplest way to select a Machine part and access the Machining Editor is to use the Breadcrumbs Bar to select required part.

Alternatively, you can use the Property Inspector discussed next.
When the cabinet's Property Inspector is floating, the Preview Pane is parallel, to the cabinets options.
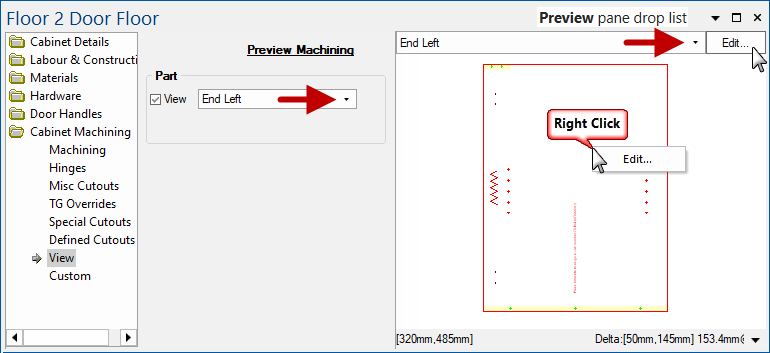
Step 1: Select the Part that you want to edit.
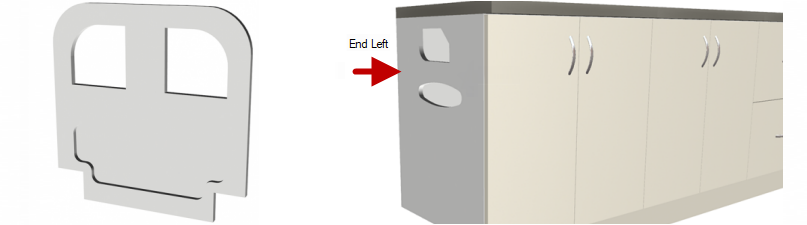
In the following example, the End Left has been selected. This can be done either from...
- Cabinet Machining > View page using the Part View option;
- simply tick View and use drop list to select part.
or
- Use the Preview pane drop list to select the required part.
Step 2: Click the Edit button (or the rclick Edit selection).
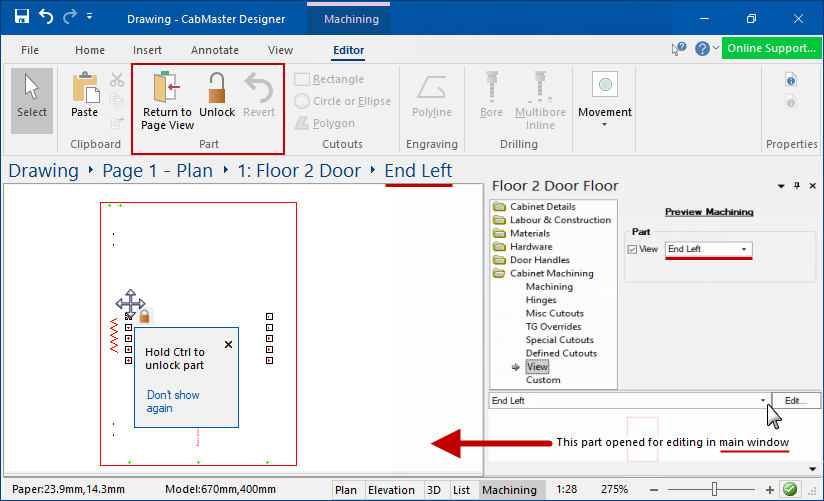
After the 'Edit' button is clicked, the cabinet's Property Inspector is automatically Docked.
The selected part will be opened in the main window, ready for editing.
Example
When the cabinet's Property Inspector is docked, the Preview Pane is vertical to the cabinets options.
Edit the part in the same way as discussed above. The part will be opened for editing in the Main window, as per the example.
Example
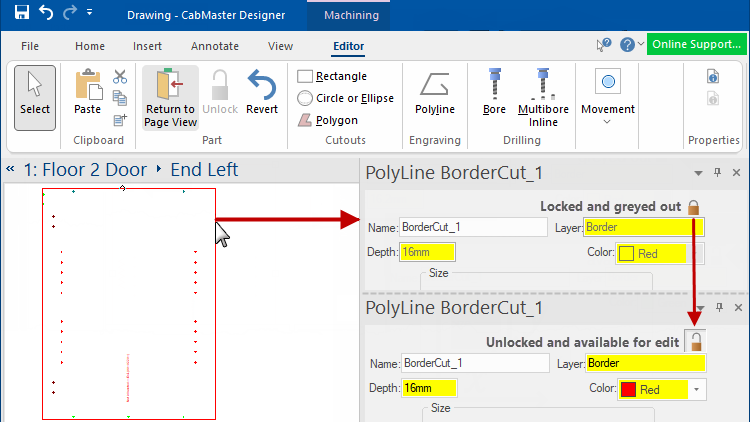
When you hover over your selection you may see that they are locked. To enable part editing you must first Unlock it.
There is a separate property inspector for sections and machine steps which are independent of item/tool properties windows. This means that you can turn the two property inspectors 'ON' and 'OFF' independently of each other, allowing you to make the main view be totally occupied by :-
- an individual item in the drawing, or
- an individual section (part) of the selected item.
You can also edit/add/delete machine steps in a selected part, or even copy/paste the whole part (e.g. edit an 'End' panel, then copy it to another cabinet or cabinets).
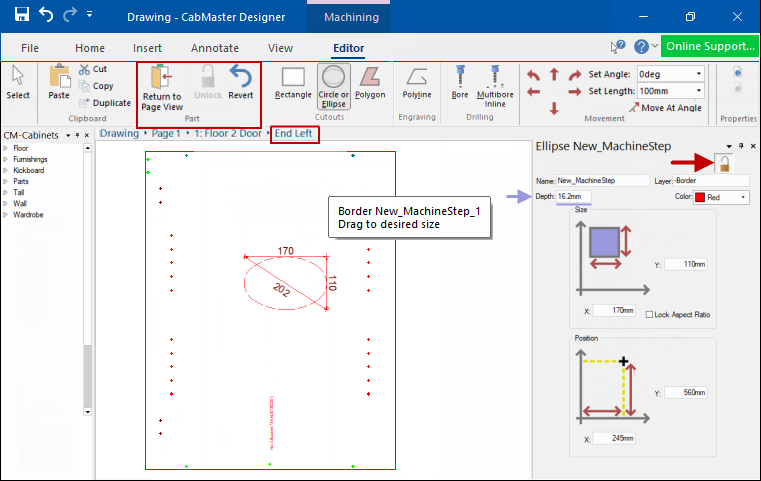
When you first select a part, or a formula controlled item, it will need to be unlocked. This allows any machining to be added/edited as required e.g...
To exit the Machining Editor, click on Return To Page View on the command ribbon.
All editing you add to a part, including cutouts and holes, will be visible in 3D views from wireframe to textured, making the edited part display on the final product.
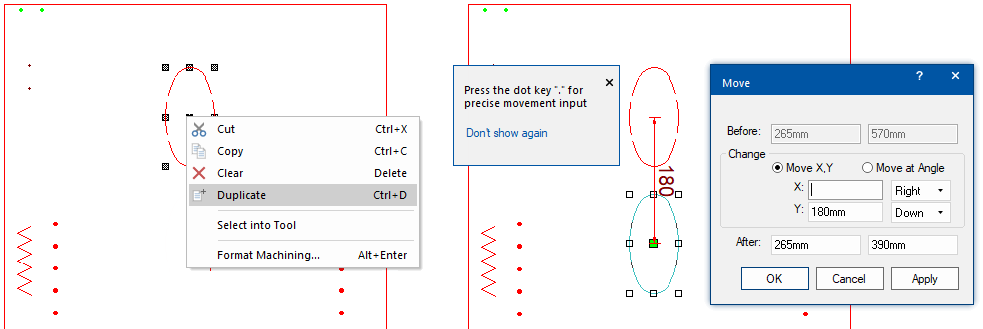
The right click Select Into Tool option can be used when you have created a cutout and want to place it on another part with the same characteristics.
Alternatively, you can use Keyboard Shortcut Ctrl+D to create a Duplicate of the selected item.
The new copy will usually be in exactly the same position as the original, so you may have to move one to see both copies.
To ensure you do not accidentally modify the machining of a part, all parts are locked until specifically requested to unlock before editing can take place.
This is very simply done by clicking the padlock ![]() command button or, after selecting, by simply holding down the Ctrl key. This will allow you to add or modify machining that is not currently formula controlled. To relock the part, use the 'Revert' command button.
command button or, after selecting, by simply holding down the Ctrl key. This will allow you to add or modify machining that is not currently formula controlled. To relock the part, use the 'Revert' command button.
Items that are formula controlled, such as the depth of existing holes, layers names and display colours can also be unlocked by clicking on the padlock button located within the MachineStep editor, as shown. This will remove the parametric formula in the background and let you override with your new requirements.