CabMasterPro User Guide
These menu commands are only available when the active pane is in 3D View. Access by right clicking anywhere on the drawing page.
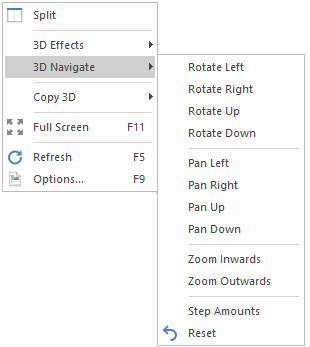 |
To locate information about any part of this menu,  click on the area of interest.
See also 3D Menu, Mouse Shortcuts and Navigate in 3D Tutorial.
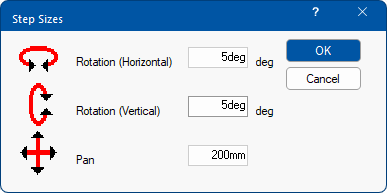
Displays the Step Amounts dialog. Allows you to set how far the camera will Rotate or Pan in a 3D view.
This will spin the point of view (camera position) by the angle specified in the Step Amounts dialog, shown above.
When you spin a 3D object around the centre of the screen, it is actually the viewpoint (or camera) that moves while the object stays still. This means that clicking Rotate Left will rotate the viewpoint to the left, so the object will appear to rotate the other direction, to the right. It might sound backwards, but it is very simple and natural once you try it.
To rotate with the mouse see Mouse Shortcuts. You might want to set the rendering style to Wireframe to rotate more smoothly.
This will move the point of view (camera position) by the default distance specified in the Step Amounts dialog. Like rotating, you can also Pan in any of the four directions and it is the viewpoint that moves and not the object itself.
Panning is the same as the filming technique - the camera moves sideways or up and down without actually changing the direction it is pointing. This means once you pan, the object will still be facing the same way but will be further up, down or across the screen than it was before.
To pan using the mouse, simultaneously hold down the left and right mouse buttons and move the mouse in the direction you want to pan.
Using Zoom enlarges or reduces a 3D image so you can either view detail or fit the whole design on the screen. This will move the point of view (camera position) closer to or further from the objects in the drawing, focusing on the centre of the screen, by the distance specified in the Step Amounts dialog.
These commands are only available when the active pane is in 3D view. To zoom in on an object near the edge of the screen, you must first pan across so that object is in the centre of the screen then zoom in on that.
To zoom in/out using the mouse - See Mouse Shortcuts
Moves the camera position in 3D mode back to its original position and angle. This is useful if you lose the image by accidentally moving it out of the view window.
You can also use the Reset View  command button.