CabMasterPro User Guide
This is a listing of all the items currently on the drawing. Also included are library items which have no visual representation in the plan and items which do not represent any physical items such as freight etc, allowing pricing information to be added independent of any specific cabinet.
All items added here will be included in reports and other exported information about the drawing, even if they are not visible in the plan view.
In List View all you need to do is select the basic cabinet type and change properties for each cabinet as required. It is important, however, to understand that in "List View" you are setting up a job and amending cabinets for the current job only.
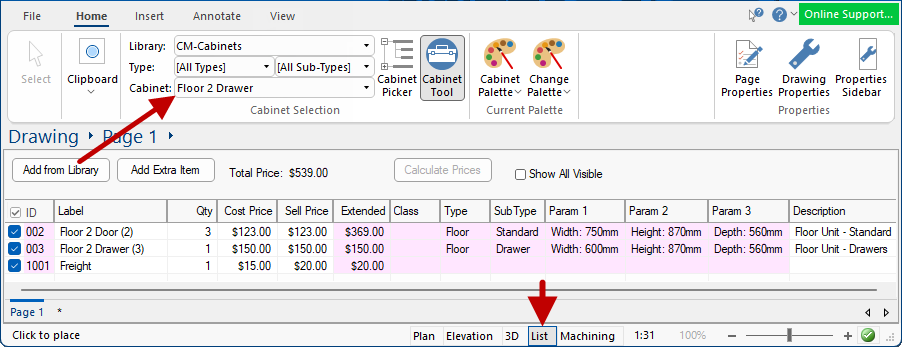
On the Home tab, select your library and a Cabinet using either the Cabinet Selection drop lists, the Cabinet Picker or the Palette.
A Property Inspector can be opened before/after addition to list. It includes a Preview Pane that displays changes in real time. It also allows for rotation if the cabinet in 3D to enable you to clearly see the effect of changes you make using the options.
To customise a cabinet using the Cabinet Tool, either press the Keyboard Shortcut F12 or use the Cabinet Tool command button.
The Keyboard Shortcut F12 can be used to both customise the cabinet and, if F12 is pressed again, to add to the list.
To customise a cabinet in the list, either double click on the list item or use the right click menu and select Format Item...
Example
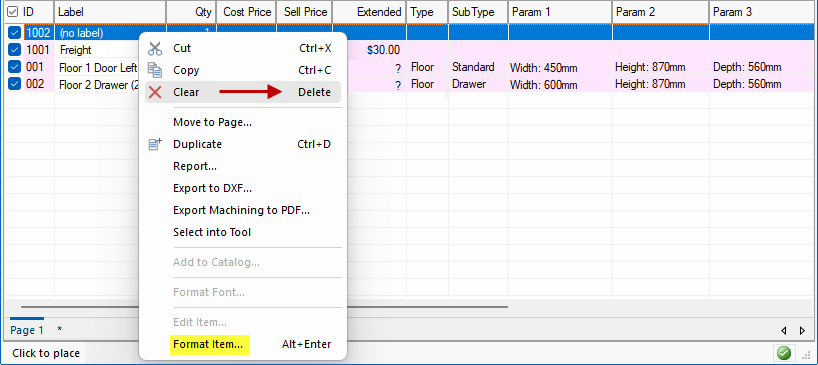
The right click menu provides more commands such as Clear/Delete and Format.
If the command is greyed out then the command is, as shown for this example, not available for selected Extra Item.
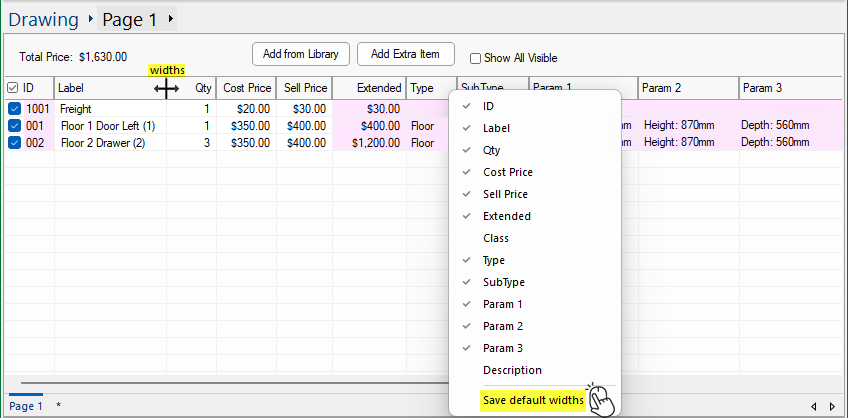
The columns displayed can be customised by using the right click menu on any of the column headings, as shown. Simply click on the column description to turn on/off.
The ID checkbox  can be used to select/deselect all items in List View and the Library Catalog Manager.
The column widths can be moved by hovering over the column until you see the cursor change to  . This allows you to change the column width by dragging it left/right. When you are happy with the result, again use the right click menu and click on Save default widths, as highlighted.
You can manually add items such as Freight, Installation costs etc by clicking on the Add Extra Item button.
An extra row will be made available with (no label), allowing you to enter details as required.

Another way to customise an extra item/cabinet is to use the right click menu and select Format Item... as shown below.
The Cost and Sell prices can also be manually entered. For more on Pricing see CM-Cabinets Library User 
To delete an extra item/cabinet from the list, use the right click menu and select Clear.
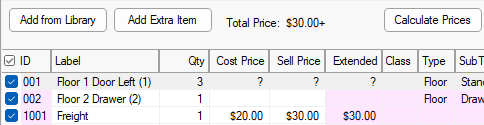
As items are added, you may see ? (question marks as shown above) in the Cost, Sell and Extended Pricing fields.
Pressing the Calculate Prices button will evaluate and also provide a Total Price (i.e. total Sell/Extended Price).
If the Cost and Sell prices are blank, as shown for Floor Drawer, then no pricing has been set. For more on Pricing see CM-Cabinets Library User
The ID in List View is useful for reporting purposes and corresponds to the cabinet Label ID displayed in brackets i.e. 002 is Floor 2 Door (2).
The Use ID  check box provides the ability for quick selection or "de-selection" of all items in the current list.

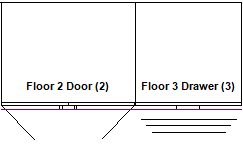
In the example used above, there were originally three cabinets in the list and then the first one was deleted i.e. the List View shows ID 002 to 003.
When the Insert > Renumber All Items button is clicked, all items will be resequenced. Shown below left, the cabinets have been reassigned ID's 001 to 002.