CabMasterPro User Guide
There are a number of ways to reposition and resize walls. The following discusses three (3) methods i.e...
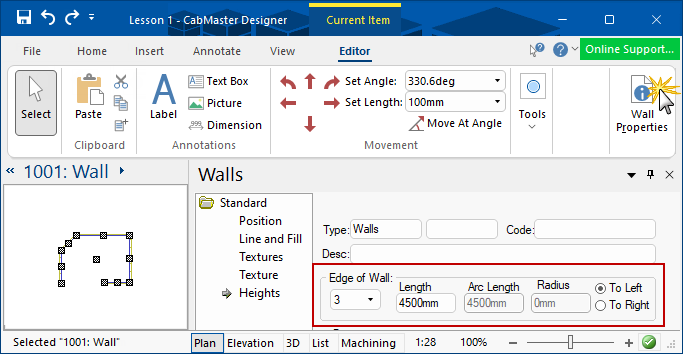
The best and easiest way to move a wall or change its dimensions after you have placed it, is to Format Wall which allows you to directly edit the length of the wall, edge by edge.
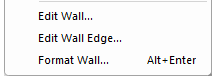
The right click menu in Plan View has three menu options for easier selection when editing walls i.e. Edit Wall..., Edit Wall Edge... and Format Wall...
Format Wall
The rclick menu shown allows you to Format Wall...
The related property sheet is opened allowing you to select each wall separately and make changes as required - click on image to view.
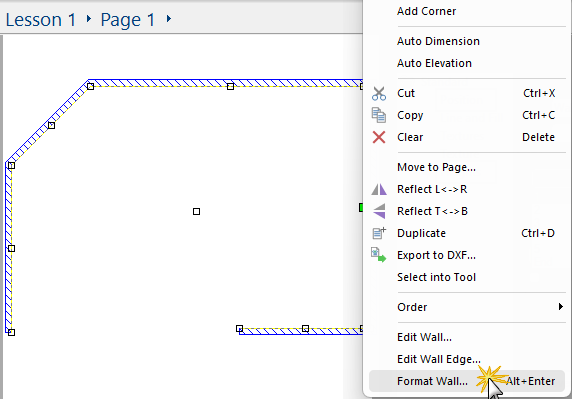
Click on view Format Wall property sheet
If you use the Edit Wall rclick menu options, the wall will be opened in the Current Editor where you can also access the Wall Properties.
Edit Wall and Wall Edge
Wall Properties can also be accessed using the Breadcrumbs Bar.
The following shows the Wall in Plan View but you can also access the Wall Properties in Machining View (click on image).
Click for Machining View
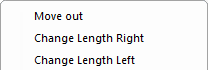
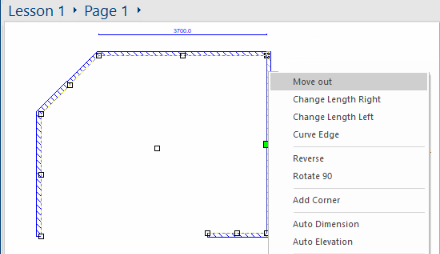
The right click menu in Plan View also reveals a large selection of useful commands including Move Out, Change Length Right and Change Length Left.
Move Out
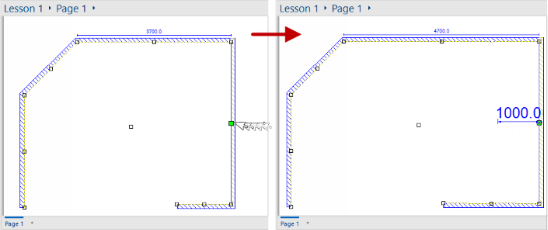
In this example Edge of Wall 4 will be 'Moved Out' by 1000mm, increasing the dimension of Edge of Wall 3 from 3700mm to 4700mm.
Click to Expand
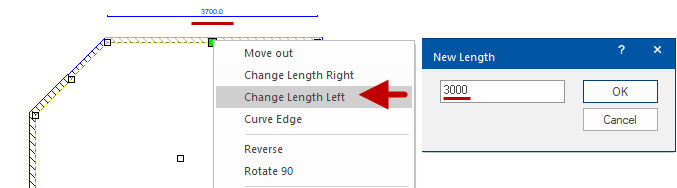
Change Length
In this example, we will 'Change Length Left' of Edge of Wall 3 from 3700mm to 3000mm
Click to Expand
The 'Reverse' command turns a wall inside out in case you have drawn it the wrong way - see notes on Wall Direction.
Other useful commands allow you to add and remove corner points and curve wall sections.
Another way to move a wall or change its dimensions after you have placed it, is to move its object "handles" to the desired position.

Turn on Select
and click on the wall.
You can either:-
- Click on the center handle, as shown below left, and drag the walls to another position, as shown below right.
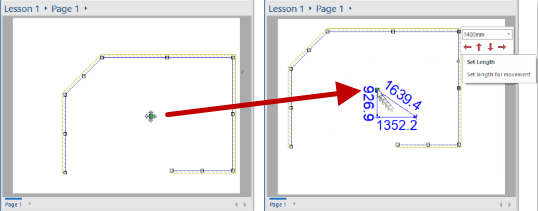
or- Click anywhere on a wall edge and use the movement commands from either the ribbon or the hover commands as shown below right.
Click to Expand
Turn on Select
There are two types of handle, those at the ends of the wall and those at the mid-points.
Dragging by the handles at...
- the end-point (or corner) of a wall will alter the angle of the corner.
- the mid-point of a wall will alter the length or move that whole straight section. For precise control use the Movement commands.
If you experience problems you can use the Undo command or File > Revert to the last save point.
Since you will usually want walls to be square, you may want to turn on Snap To Grid on the View tab.
Change Length of Walls
Mouse click on one of the mid-point handles and drag it to shorten or lengthen the wall.
- In this example we have dragged the mid-point of Edge 4 of the wall, increasing the length from 3700mm to 4700mm.
Click to Expand
When a wall handle is 'selected' then its small square is filled inwhereas handles that are not selected have open small squares.
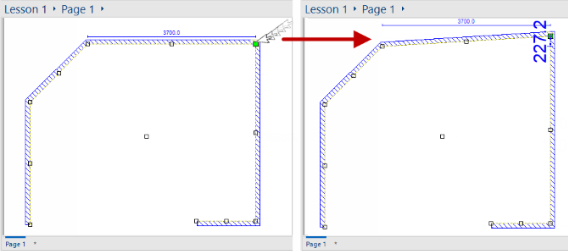
Change Angle of Walls
Mouse click on one of the end-point handles and drag it to alter the angle of the wall.
- In this example we have dragged an end-point (corner handle) and altered the angle of the wall.
Click to Expand