CabMasterPro User Guide
The ATP (“Automatic Tool Path”) is a simple method for nesting in EzyNest. Accessed by pressing the ATP Setup  button on the toolbar, it allows you to...
CNC Config replaces the need for accessing the ATP in EzyNest. Simply use the  command button on the Machining View [Current Drawing] command tab in CabMaster.
The Automatic Toolpath Setup screen has six tabs (follow the links for more details on each tab):
Location of ATP on Toolbar
The ATP command button is normally located on the top right of the toolbar, as shown.

Prior to EzyNest23: In previous versions there were five tabs i.e. Define Layers (now Map), Ordering and Nesting, Parts List (or AllMasterSoftware if using EnRoute), Select Files and Setup. To view the pdf pertaining to older versions, click on the link to Understanding the ATP created in 2020.
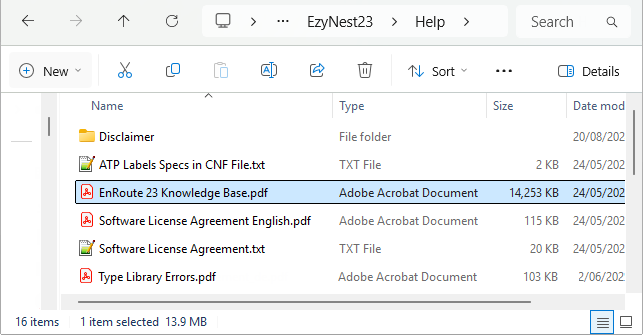
Help documentation provided by SAi is also available in the Help subfolder of your EzyNest/Enroute software.
Shown below is the EnRoute 23 Knowledge Base PDF which is also applicable to EzyNest 23 software.
The Type Library Errors PDF is also useful for Troubleshooting.
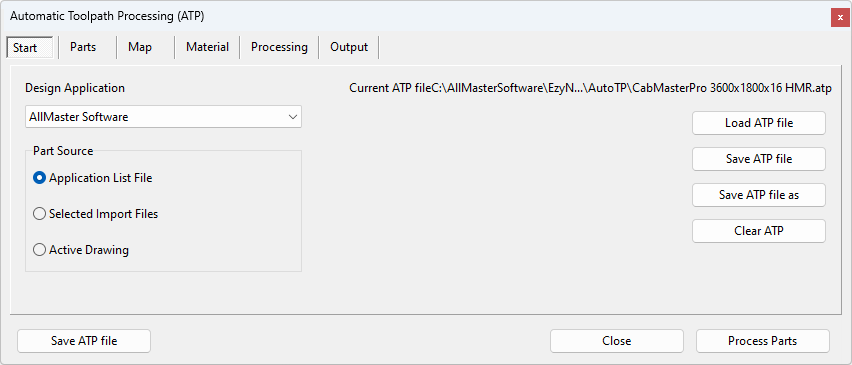
When using CabMaster, the active Design Application is 'AllMasterSoftware' (drop list) and the Part Source is 'Application List File' (radio button).
More on Part Source
Parts can be loaded 3 different ways into the ATP dialog.
Application List File
Process files from the active application i.e. CabMaster Software™ products.
With a design application specified, the parts to process will be loaded from a list file in the Parts tab of the ATP dialog. (The list file is a list of all of the DXF files to be processed, along with additional information such as material, quantity, and rotation for each part).
Select Import Files
Select the DXF files that contain the part information. This allows parts to be imported individually and then by selecting each file in the Parts tab.
Active Drawing
Process the parts in the currently active EzyNest design. The ATP can be used to toolpath parts from the current EzyNest workspace.
ATP files can be used to save ATP settings, such as Layer mappings, strategies, nesting, and output options, to automatically configure future jobs. This means that processing a new job can be as simple as loading an ATP file and generating output.
The Current ATP file loaded is displayed and, as shown above, provides details of the sheet size and material type that will be used for nesting.
It is important to Load the correct ATP file for your job, as different materials can require different cutting methods.
For example, shown above,
the sheet size is 3600x1800 with a 16mm thickness - note that this would be incorrect if your job requires 18mm thick material.
The ATP can be set using the 'Load ATP file' button or using the CNC Config command button (see Machining View).
If you make any changes to the currently loaded ATP file you can...
Save ATP file - Save changes to the currently loaded parameters file. If no parameter file is loaded, the Save As dialogue will open.
Save ATP file as - Save the current settings as a new ATP parameters file.
Clear - Clear the loaded ATP settings and reset all fields to the default values.
After exporting the Machining from CabMaster you will need to process the output through EzyNest via the Automatic Toolpath [ATP].
Step 1
Click on the ATP Setup
Step 2
Ensure the correct ATP File is loaded...
- the Start tab (discussed above) displays the current ATP;
- if you need to, click the Load ATP file button and select ATP based on the material type/sheet size required.
Step 3
Select the Parts tab and click on the Add List File button.
Example
Step 4
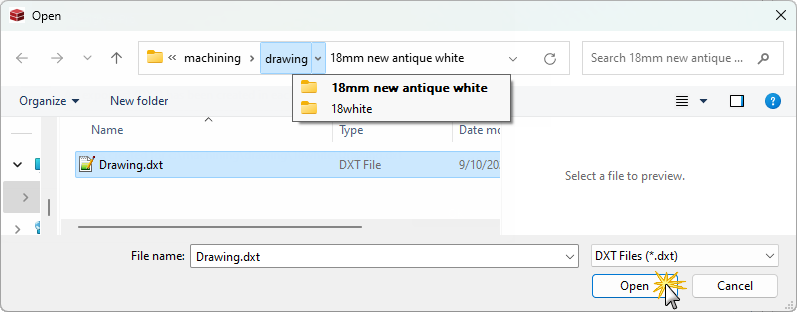
Select the DXT file to process, normally located in the machining directory on your C drive.
Example
CabMaster creates machining files (click on image). Each material used in your drawing will be separated into different folders under the job name, which can be brought into EzyNest for nesting by selecting the .dxt file for the material you want to nest. In this example, Job Name is 'Drawing' and the Material is '18mm new antique white'.
Select file and click Open.
Click on image to view CabMaster message displayed after machining files were created.
Step 5
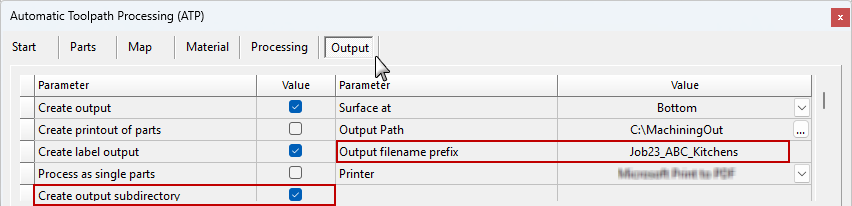
On the Output tab, give the job a name and if you want to group all the output files together (including G-code and labels) and put them in a folder of their own, then tick the Create output subdirectory option.
Output tab example
It is suggested to use a short Job Name, followed by a keyword for the Material you are going to run to the machine e.g. “Smith_Carc” With most machines it is best to avoid any special characters and spaces.
Step 6
Finally, click Process Parts.
Example
The Number of Parts in this example is 2 which relate to our Floor 2 Door cabinet exported.
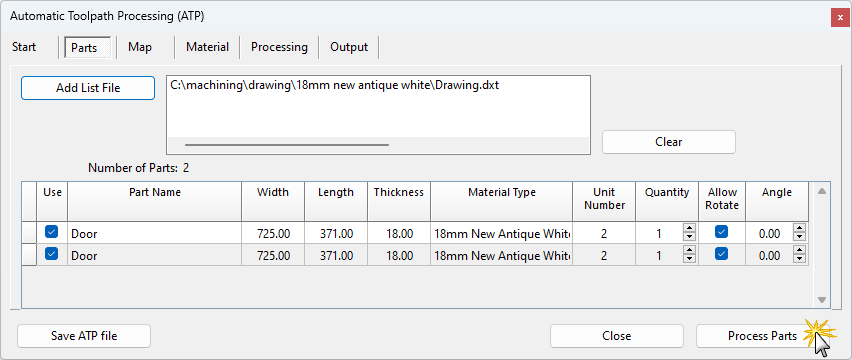
Click to view processed parts for the two doors
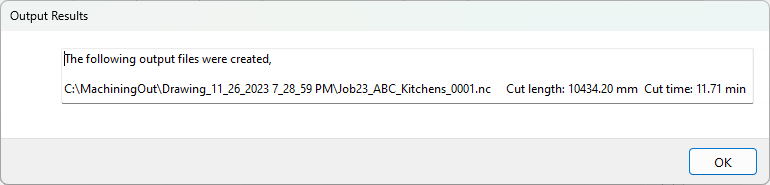
Result
EzyNest will process the parts (click on above image) and create output files.
Example of Output files
As a result of ticking the Create output subdirectory option, all the output files have been put in a folder of their own.
Naming convention: drawing name_mm_dd_yyyy time