CabMasterPro User Guide
There are a number of ways to access elevations, depending on how you want to view these...
Example
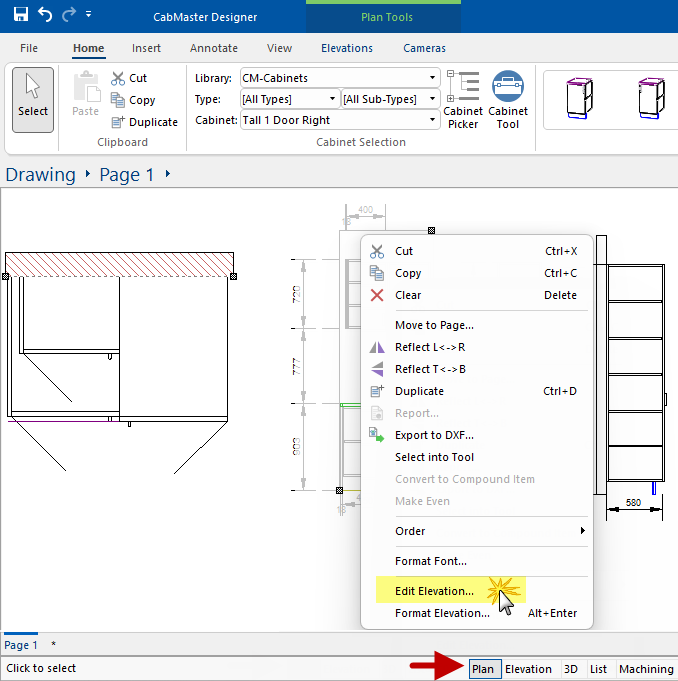
If you want to quickly generate an elevation of a single cabinet, you can also use the right click Item menu Auto Elevation option, which was used to create the side on view of the Tall 1 Door cabinet.
Note that the red elevation lines are not all shown at the same time, added here only as a visual aid.
Example
The right click Item menu has the options to Edit or Format the selected elevation item.
Example
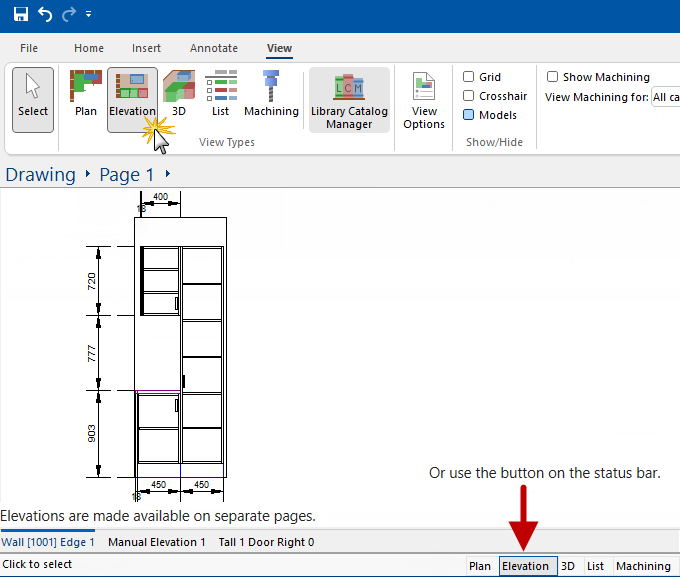
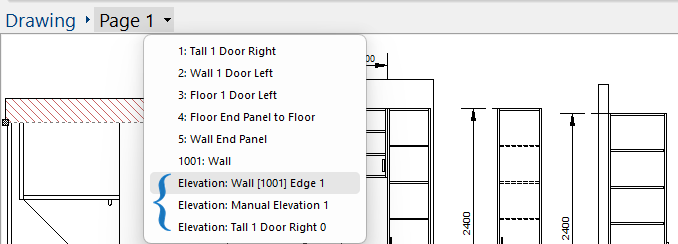
When you use these commands, both automatic and manually created elevations are made available on separate pages.
You can select a placed Elevation when in Plan or 3D View.
The drop list allows you to select any of the items/cabinets placed on the page.
Click on the image and you will see that if you select any 'Elevation' for viewing, all elevations will be made available on separate pages for subsequent selection.
Click to view resulting elevation
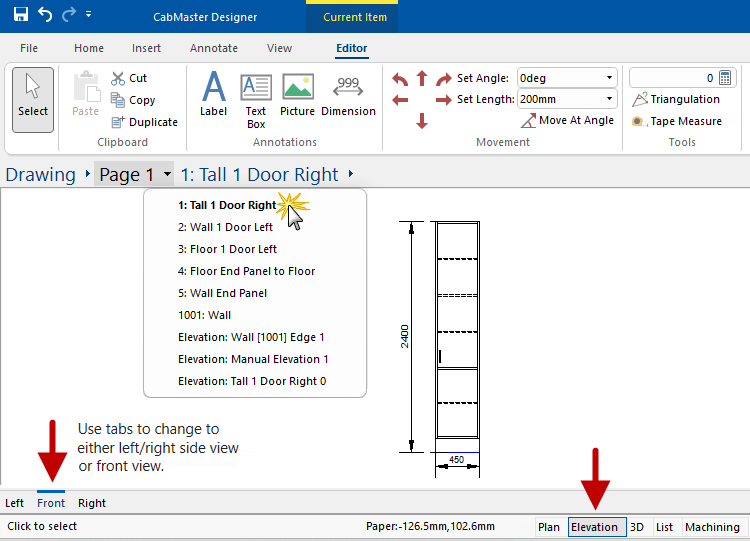
You can select a placed cabinet when in Plan View.
When you select a cabinet, in this example the 'Tall 1 Door Right', it opens the Current Item Editor and you can switch to Elevation using the shortcut button on the status bar, as shown. Note that additional Left/Right and Front view tabs are made available.
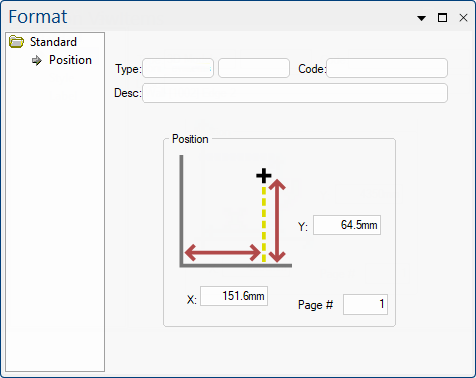
Dimensions are added to the elevations automatically. Elevations are associative, which means that if you insert or delete cabinets after defining the elevation, then CabMasterPro will automatically update the elevation. What and how elevations are displayed can be controlled on the Elevation Property Sheet.
Dimensions and other annotations can be added manually but not directly on the plan view - see Annotating the Elevation tutorial.
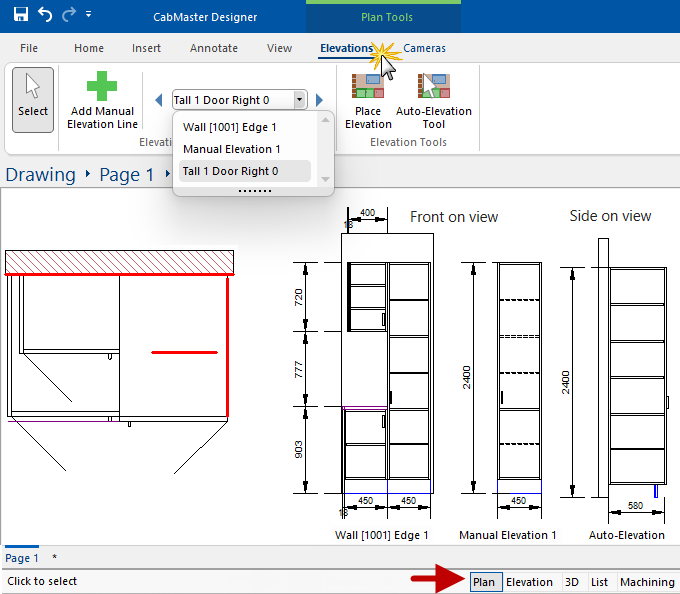
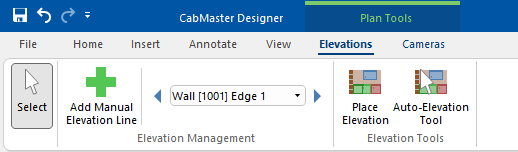
CabMasterPro automatically generates an elevation of cabinets along each wall and manual elevations can be created. All elevations created can be accessed and placed on your plan using the Elevations tab (which can only be accessed when in Plan View).
Tools for use in Plan View - Click to see difference to View > Elevations
To place any elevation, whether it is a wall with cabinets or a manual selection, simply...
 command button;
Examples of selection and placement
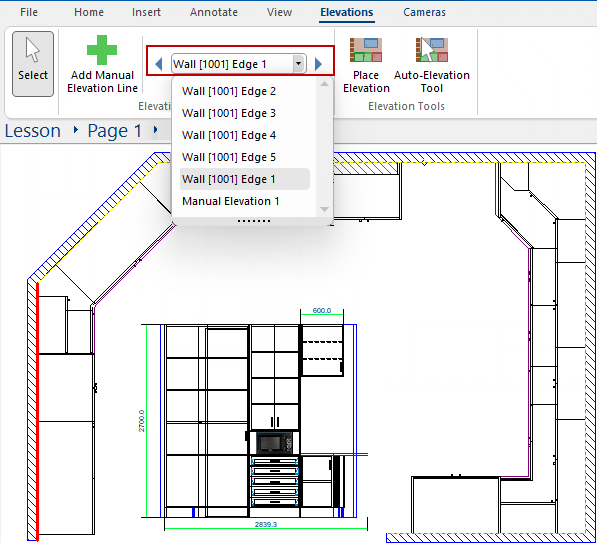
The illustration below shows a Plan View with Wall Edge 1 selected and the placed elevation of the cabinets on this wall.
* Click on image to see Manual Elevation 1 selected and placed.
Click to view Manual Elevation
To move an elevation to a separate page, first ensure that the drawing Page you want it moved to is already created.
Then select the elevation to be moved and either...
Example
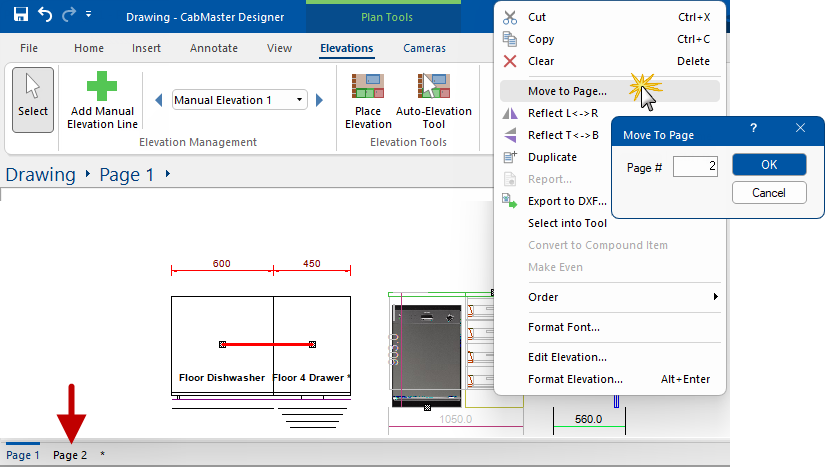
or
Example
You can also use the Auto-Elevation Tool  command which automatically adds an elevation for a wall, a single cabinet or a run of cabinets.
Simply click on the tool and then on the specific wall or cabinet/s.

This command is also available on the right click menu of a specified cabinet or wall, shown right.
When using the Auto Elevation Tool, always select from the back of the cabinet as elevations, like walls, work in a clockwise direction. This means that if you elevate from the front, it is looking from the inside of the cabinet outwards back to the face.
Elevation Door Swing Mirrored and example of incorrect direction
In the first example, we have created an elevation by selecting the back of the Tall 1 Door Right and the elevation is correctly displaying the door swing.
However, in the second example, the front of the cabinet was selected and as you can see the door swing is displayed in the wrong direction.

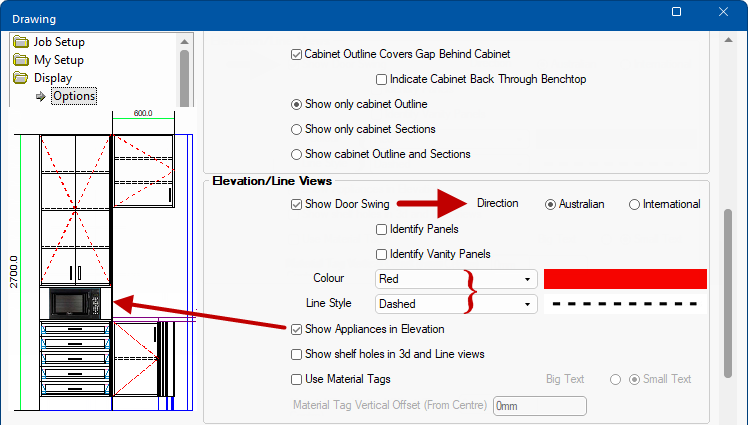
Elevations can be further enhanced by turning on/off the Show Door Swing option on the Display > Options page  of the Catalog/Drawing Properties [F4].
The colour and line style, and more, can also be changed here.