CabMasterPro User Guide
Elevations can be annotated, using the commands on the Annotate tab. Simply Edit Elevation to add any of the following...
Dimensions etc cannot be added to an elevation directly on the plan view but you can add these for display on the plan by...
To close editing function, simply return to Plan View.
To illustrate some of these, we are going to look at the rails on a Floor 3 Drawer cabinet. To do this we first need an elevation line.
- Click the 'Add Manual Elevation Line' command icon and drag a line between two points.
Hold down the Shift key for a straight line.
- The red line will be displayed which defines Elevation View.
- Click the 'Place Elevation' command icon and then click a point on the drawing to add the elevation on the plan.
- You can select the elevation after placement and manually drag to another position, if required.
Elevation of Drawer cabinet with Rail (Front On Edge) - Click to Expand
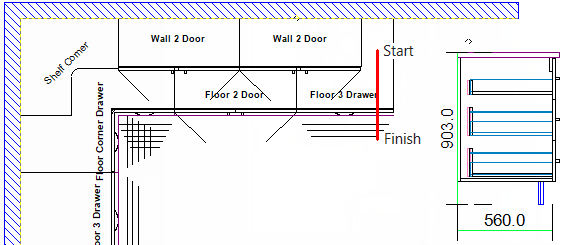
Dimensions (inc. Side view ) are displayed depending on where you start and finish the Manual Elevation line.
Compare the placement of above height dimensions (903.0) to the image below.
Now we want to add more detail by adding a dimension of the rail, which is set 'On Edge' (click above image to view cabinet properties).
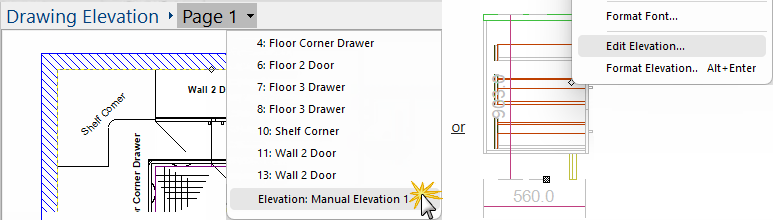
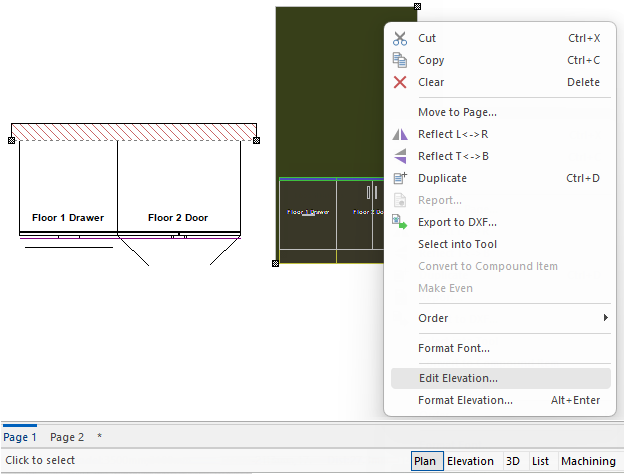
To do this you need to go into the Elevation view of the cabinet placed on plan using either...
- the Breadcrumbs drop list;
or- the right click menu 'Edit Elevation...' option.
The Status Bar will confirm that you are in Elevation View and the tabs above tells you which elevation you are editing - see image in step 4.
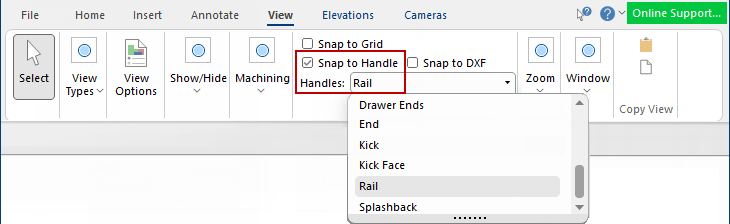
To make our focusing a little easier, use the Snapping feature on the View tab and select the Snap to Rail components
- Snap to <all sections> would also work.
Now we will add a rail dimension of the placed cabinet (remember you need to be in Elevation).
- Annotate by clicking the relevant command icon and place.
- In this example click the Annotate > Dimension command and use 3 click process.
- We also added a Text Box which is a simple click and place.
- Annotations can be further edited by selecting the annotation and using the right click menu 'Format...' command.
- Click on image to see how to change angle and colour of the dimension.
The Callout command icon is greyed out and unavailable for adding here - See Callouts Tutorial.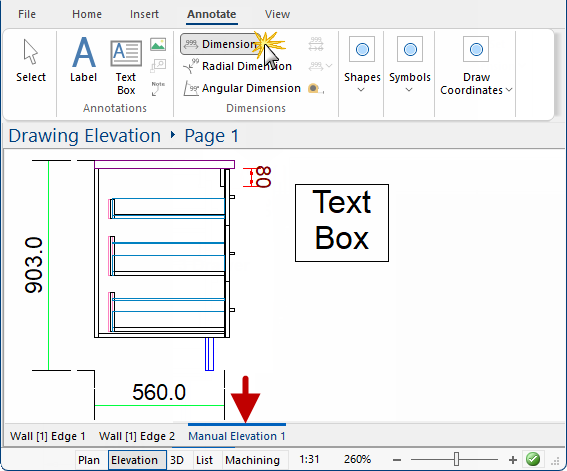
Edit Elevation view - Click to see how to change angle and colour of dimensions.
You will see this amended elevation on your plan.
The quickest way to return to Plan view is to simply click on the Status Bar shortcut.
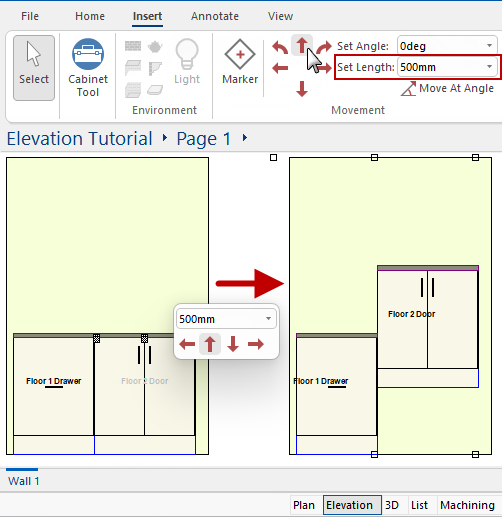
Elevations can be moved in Elevation View (not Plan View).
Example
When you return to Plan View, the changes will be reflected in the corresponding elevation.