Markers and Move 3D Tutorial
In This Topic
Use a Marker command button located on the Insert tab if you need to set out some geometry on screen for the placement of walls, cabinets, or Paper Space objects. They provide a snap handle to assist in the easy placement of other objects and text.
The following tutorials will discuss...
- Placing a cabinet a fixed distance from the end of a wall;
- Leaving a gap in the wall to represent a doorway;
- Placing a door accurately using Move in 3D command.
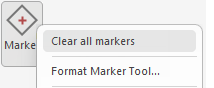
Clear all markers is available by right clicking on the Marker tool. This deletes all marker objects from the drawing, regardless of which page they are on. This command is typically used after a drawing is finished and you wish to remove any markers that were used as layout guides.
The Style default is a square but this can be changed to a diamond, plus or cross by formatting the Marker Tool.
Tutorial 1
Tutorial 2
When placing entry doors we need to be more accurate with our measurements. To place an entry door we do exactly the same as placing any other cabinet from the library and to accurately place we can use either the Marker command or the Move Cabinet 3D option discussed in Tutorial 3.
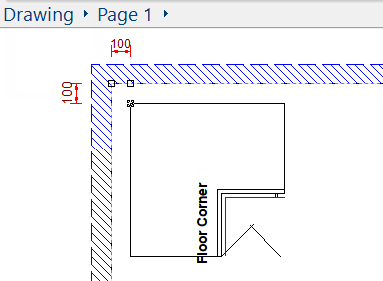
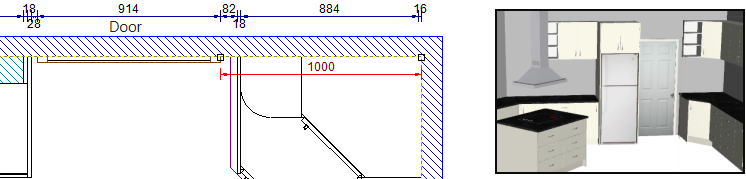
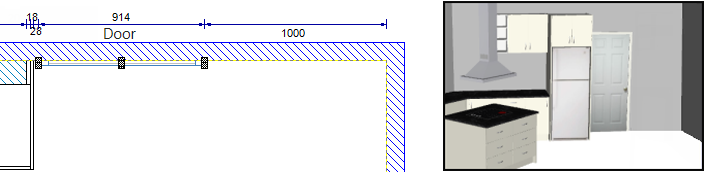
In this example, we are going to place the door 1000mm from the corner where a corner cabinet is placed.
- Make sure that Snap To Handle is on and select the Marker
 command tool to turn on.
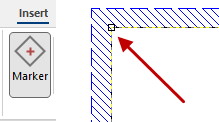
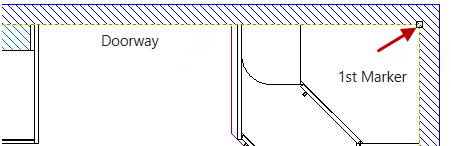
- Place the 1st Marker close to the back right hand corner of the corner cabinet as illustrated.
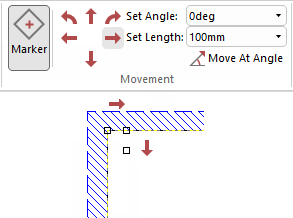
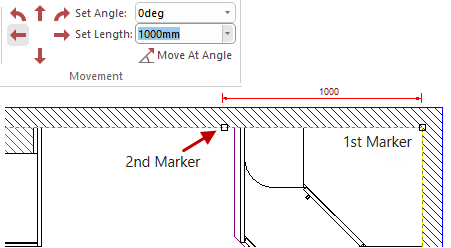
- To place 2nd Marker, enter 1000mm in the Set Length edit box and click on the left arrow command.
- Now we can select Door from the CM-Cabinets (or CM-Accessories) library and place the door
so that the right handle section of the door snaps to the second marker.
Tutorial 3
In this tutorial we will place the same door as discussed above but using the Move in 3D... command.
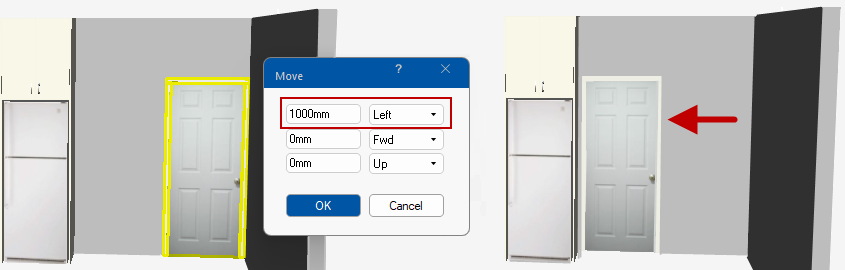
All Floor and Wall cabinets have been removed to allow placement of door.
- Select Door from the CM-Cabinets (or CM-Accessories) library and place in right hand corner of wall, as shown.
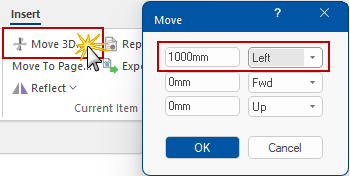
- With the door selected, select Move in 3D... from either the Insert tab (shown) or from the right click menu of selected door.
- In the presented Move dialog, type distance in the applicable edit box and select direction from the corresponding drop list.
- In this example 1000mm Left, as shown.
- Click OK when selections are completed.
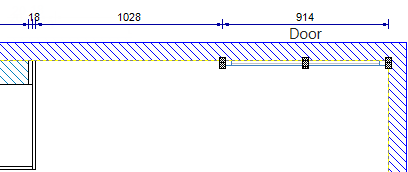
- The placed door will be moved to the correct position.
This can also be accomplished in 3D View - see Display tab for more on how.
See Also
Command Reference > Dialogs