CabMasterPro User Guide
In This Topic
    Adding 3D Model To Catalog
    In This Topic

    3D models can be added to your CabMaster drawing to be included in a Photoview render. Models can be inserted into your drawing using the Insert > 3D Model command.
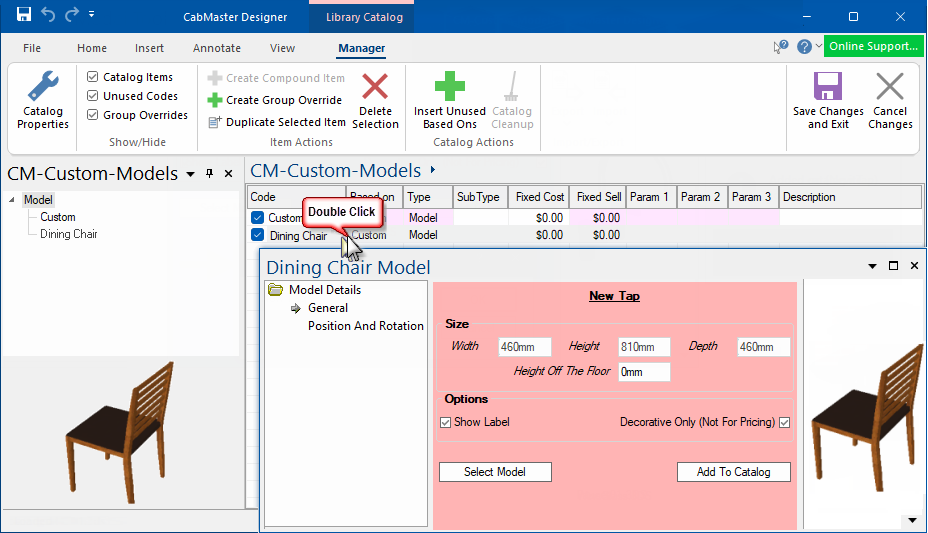
    Not only can this be done easily, but you can also permanently add your imported models to the CM-Custom-Models library, just like you can with the CM-Cabinets library.

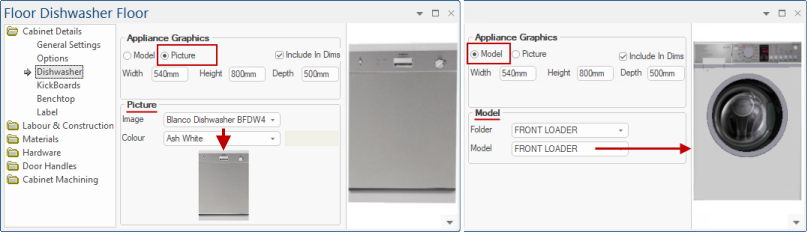
    Each appliance cabinet also has the option to display as a 'Picture' or a 'Model'.

    Appliance Graphics

    The Floor Dishwasher shows the difference in the display.


    Since some 3D Models can contain more detail than an entire drawing, they can significantly slow down movement in a 3D view if many are used.

    To help increase the speed in 3D, untick the Display > Models check box to temporarily hide all models in the drawing. When the viewpoint is in the desired position, enable/tick this option to make all the models re-appear. [If an appliance uses a 'Picture', it will not be affected and will remain displayed]

    Where can I get 3D Models

    Besides the models already included with CabMaster™ in the CM-Models library, or the CM-Design-2 library (available from CabMaster™ on request), there are plenty of websites that provide free 3D models for download. Simply google "Free 3D Models" and look for websites that provide models in 3DS format, for example, Caroma and TurboSquid.

    CabMaster™ also allows use of 3DM and STL files, but 3DS is the recommended format.

    Where should I save my 3D Models

    You will need to create a folder to save the downloaded models into somewhere on the drive that you have installed CabMasterPro.

    WARNING: Make sure to create this folder is in a permanent location because if you move this folder after you have started working in it, your models will lose their connection with the file path.

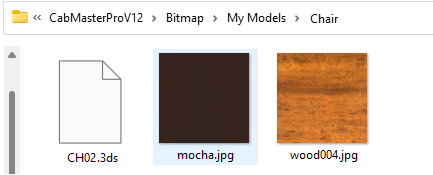
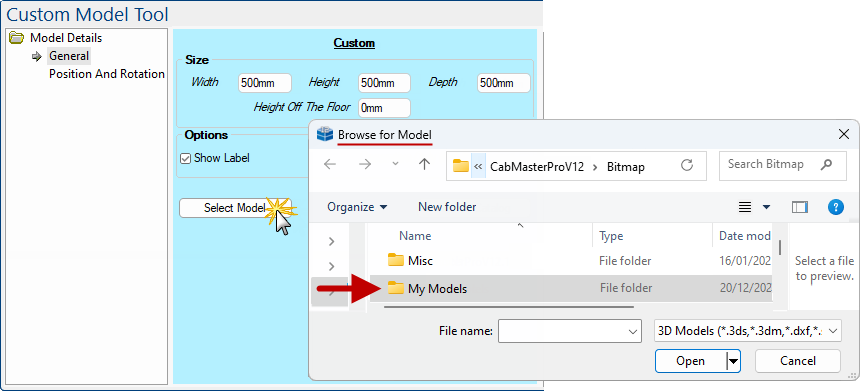
    In this tutorial we have created a "My Models" folder inside of the Bitmap tree in your CabMaster root folder (see example), so that it remains with the software but you can save it in a location of your choice. Move your downloaded models into this folder. Keep in mind that if the models have textures and other resources associated with them, they must be placed in the same folder as the model, otherwise they may not display correctly.

    For example, create subfolders inside of the "My Models" folder, one for each model and its textures. If your model does not have any textures you can just save it in the parent folder.

    Example of subfolder with textures

    This model has an associated texture and its therefore saved together in a separate folder.

    Adding Model to your Library

    1. First you will need to change to the CM-Custom-Models library to be able to permanently add models within CabMasterPro.
      • As you can see that initially there is only one item called 'Custom' which has an associated library catalog behind it and we will now show you how you can populate that.
      Click to Expand

      Click to Expand

    2. Select the Custom item and either place it on the drawing for formatting or customise before placement using the Format Tool.
    3. Now click on the Select Model option button in the presented Property Sheet. Browse to where your model is located.

      3Dmodel 5
    4. Your model should be displayed in the Preview Pane, however keep in mind, if it is a model that has textures associated with it but you do not have the textures, your model probably will not show up in the textured view i.e. the preview pane will be blank and you may think the model did not load.
      • To fix, change your view to one of the other views like 3D Solid and you should be able to see the model.
    5. After you have selected your model, adjust the Width, Height and Depth of the model and its default Height Off The Floor, as shown.

      3Dmodel 5a
    6. If required, you can then go to the Position And Rotation page and change its scale and orientation.
      • To go back to the original position, click the Reset button (which is made available after any changes are made).
      3Dmodel 6
    7. When you have finished adjusting the settings for your model, return to the General page and...
      • press the Add to Catalog button and give it a name as shown below, then click OK.
      • A message confirming that your new model has been added to the catalog will be presented.
      3Dmodel 7
    NOTE: The model will not show in your cabinet list until you either...
    • Switch libraries on the Home tab (e.g. CM-Cabinets) and come back to CM-Custom-Models;
      or
    • Exit and restart CabMasterPro.

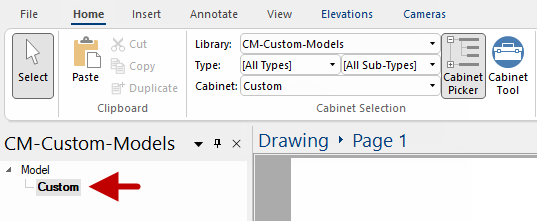
    You should also Regenerate Images (see command button on the F10 Options dialog). This will make the model image display in the Cabinet Picker (see image below left and 'New Tap' in the list for library CM-Custom-Models).

    Adjust or Add using LCM

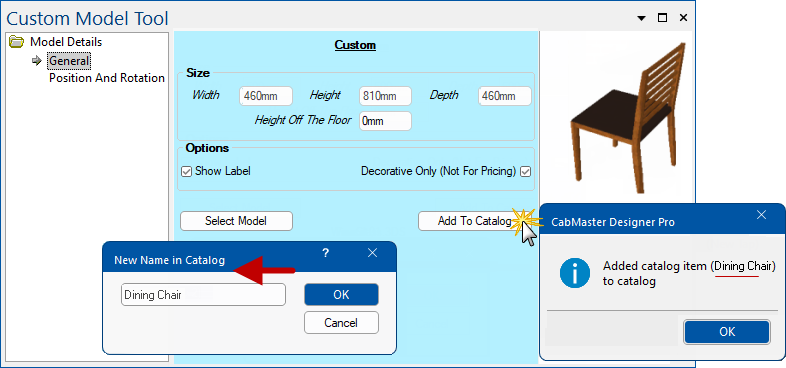
    You can adjust models that you have added by going to your Library Catalog Manager. This will allow you to add new models to your catalog by right-clicking on an existing model and selecting Duplicate. This can then be renamed and the model formatted.

    Library Catalog Manager is only available with CabMasterPro or higher software license.
    The method discussed above, to use the Add to Catalog button, can also be used. The only difference is that the background colour is pink, instead of blue, which means that you are editing the model at Catalog level and any changes will be permanent after you press 'Save Changes and Exit'.

    3Dmodel 8


    See Also